Guide on how to adjust time for auto delete secure print document on machine.
For the Older Machine series / Non I-Series Machine
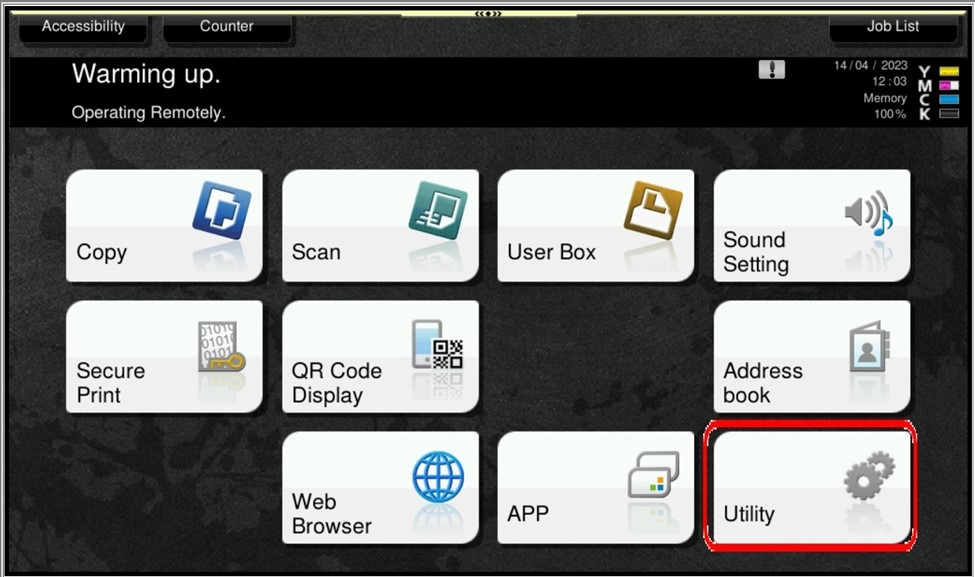
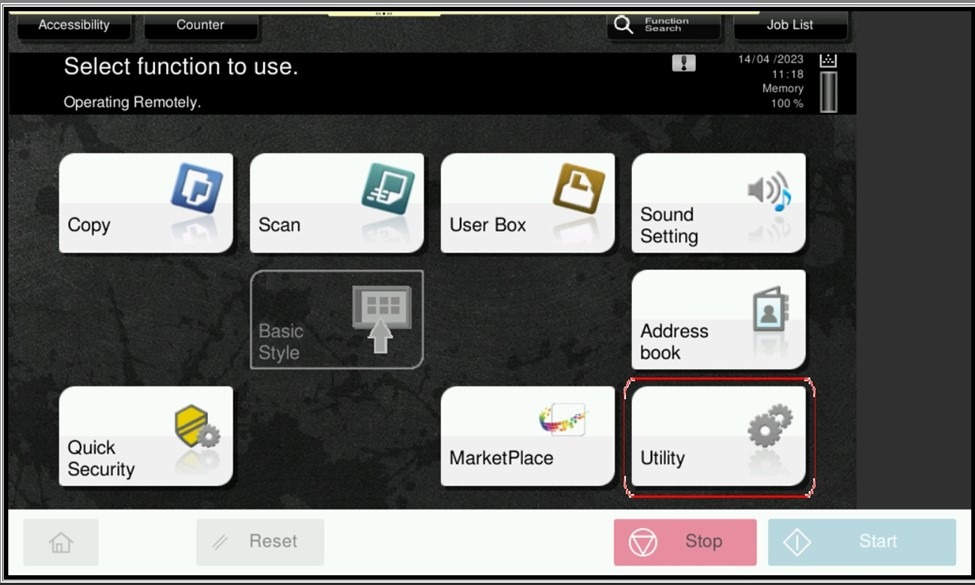
STEP 1 – On the Konica Minolta machine, we need to login to admin mode, Select [Utility].
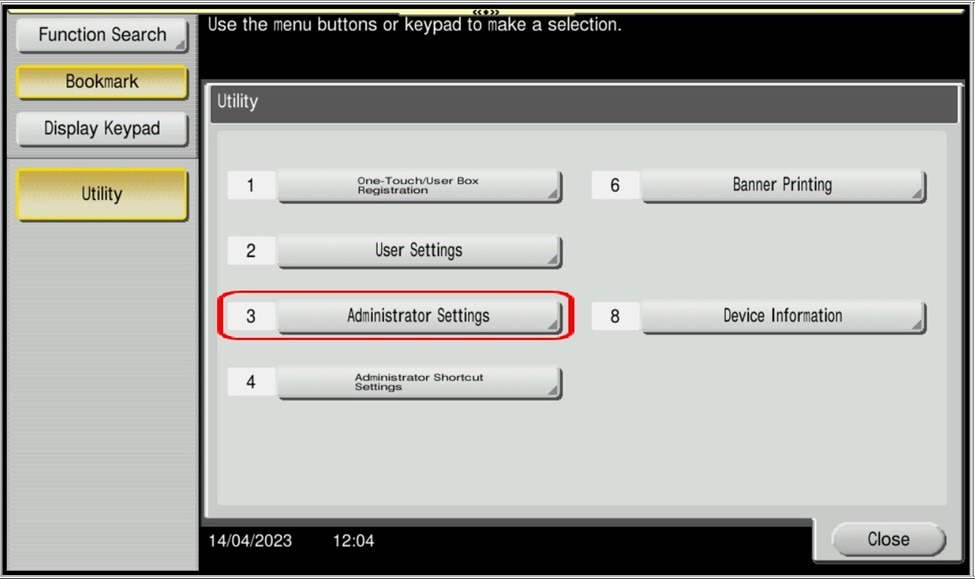
STEP 2 – Select [Administrator Settings].
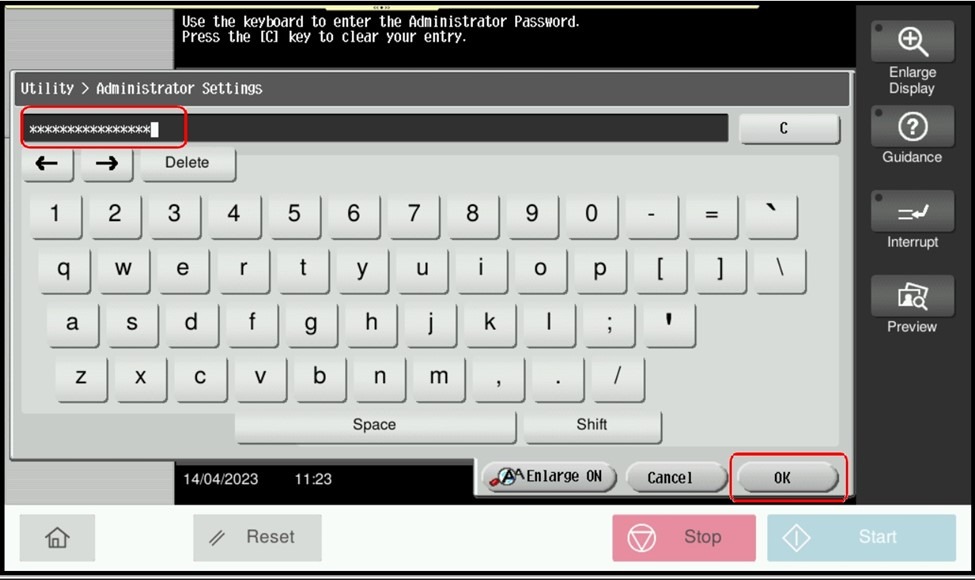
STEP 3 – Key in admin password for the machine, then select [OK] to continue.STEP 4 – Select [System Settings].
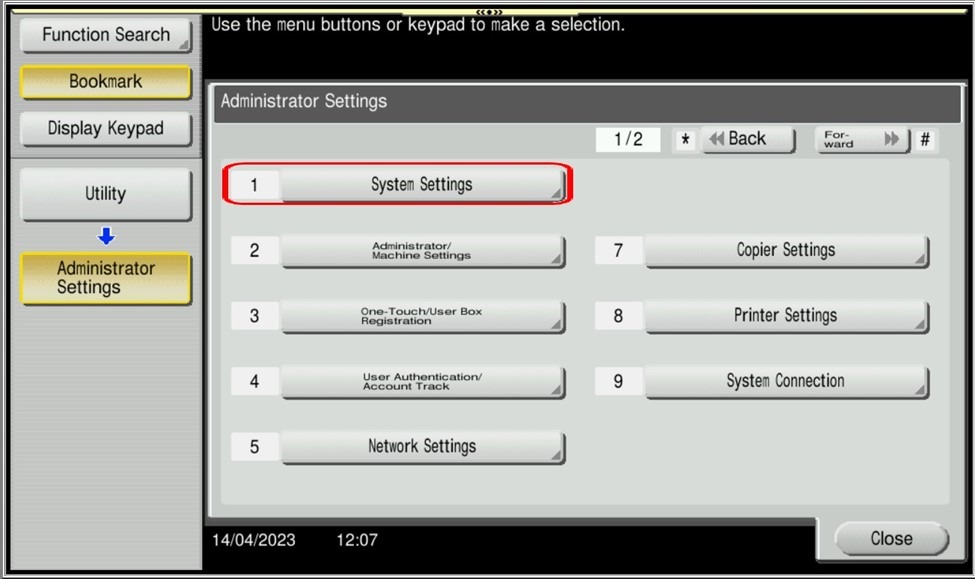
STEP 4 – Select [System Settings].
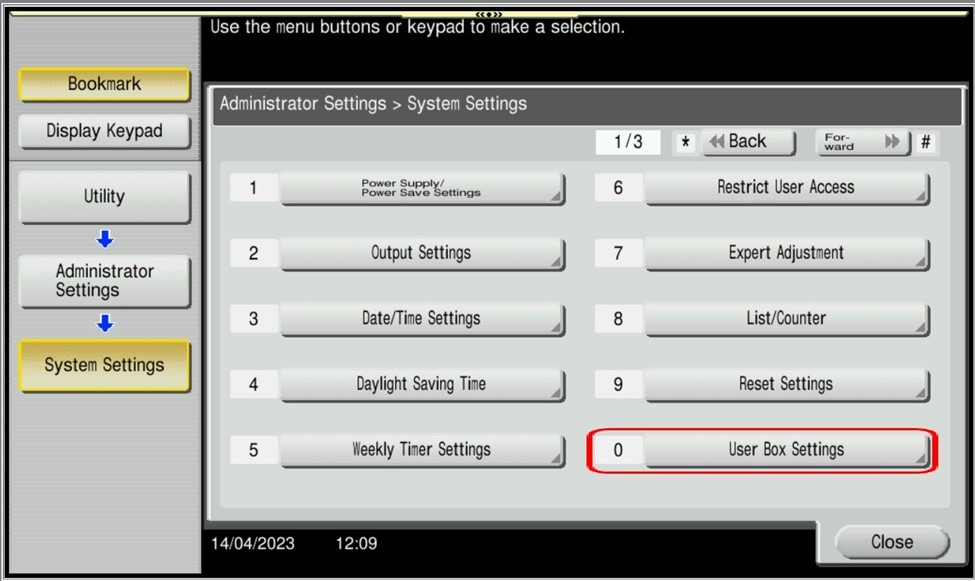
STEP 5 – Select [User Box Settings].
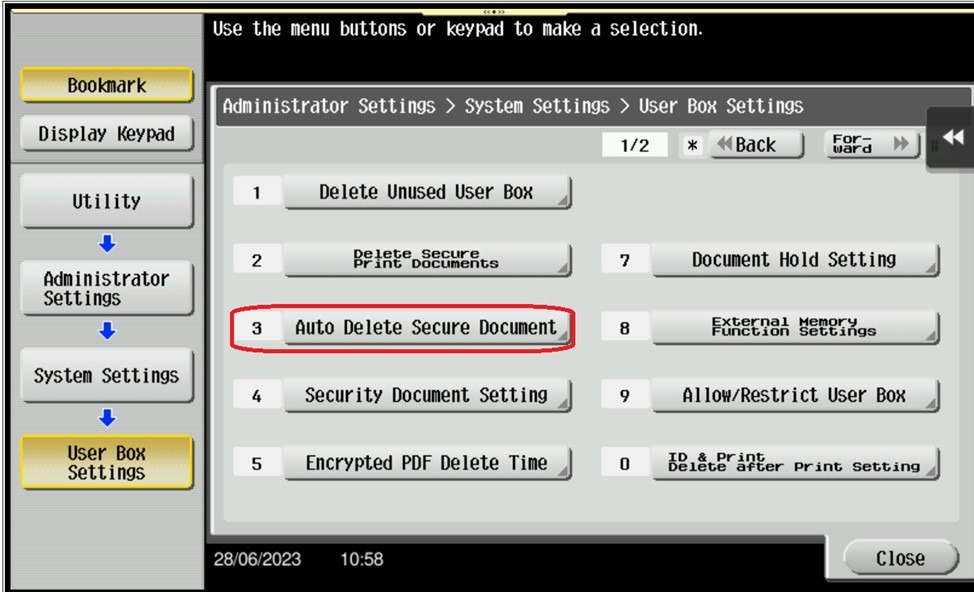
STEP 6 – Select [Auto Delete Secure Document], choose specific day or specify time from 5 min up to 720 min that will to auto delete secure print document, select [OK] to save the setting.

For the Newer Machine series / I-Series Machine
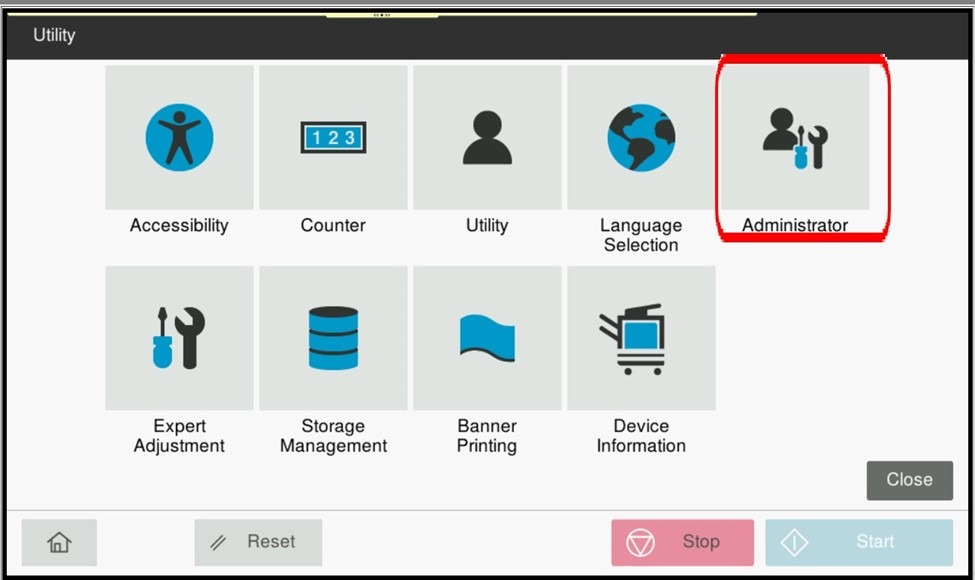
STEP 1 – On the Konica Minolta machine, we need to login to admin mode, Select [Utility].
STEP 2 – Select [Administrator].
STEP 3 – Key in admin password for the machine, then select [OK] to continue.
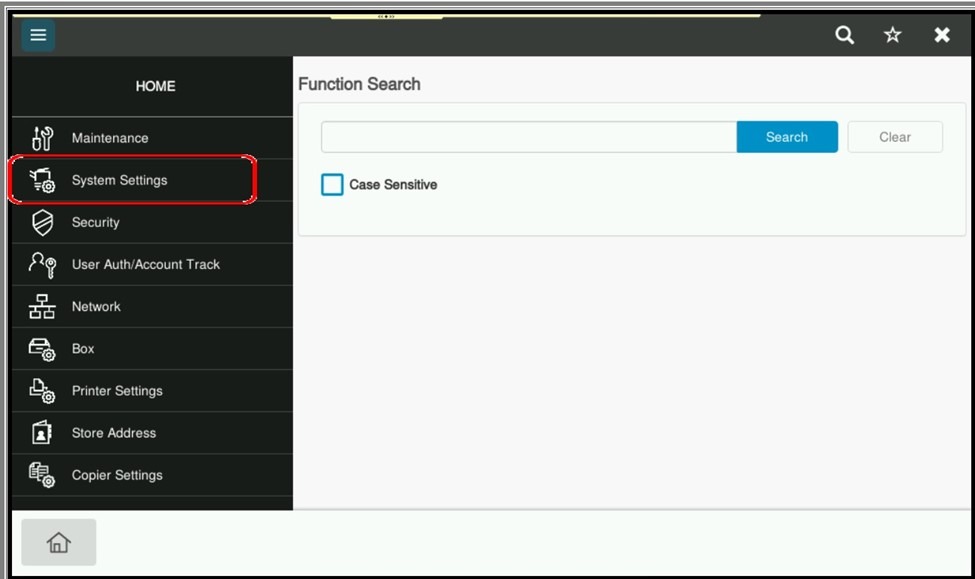
STEP 4 – Select [System Settings].
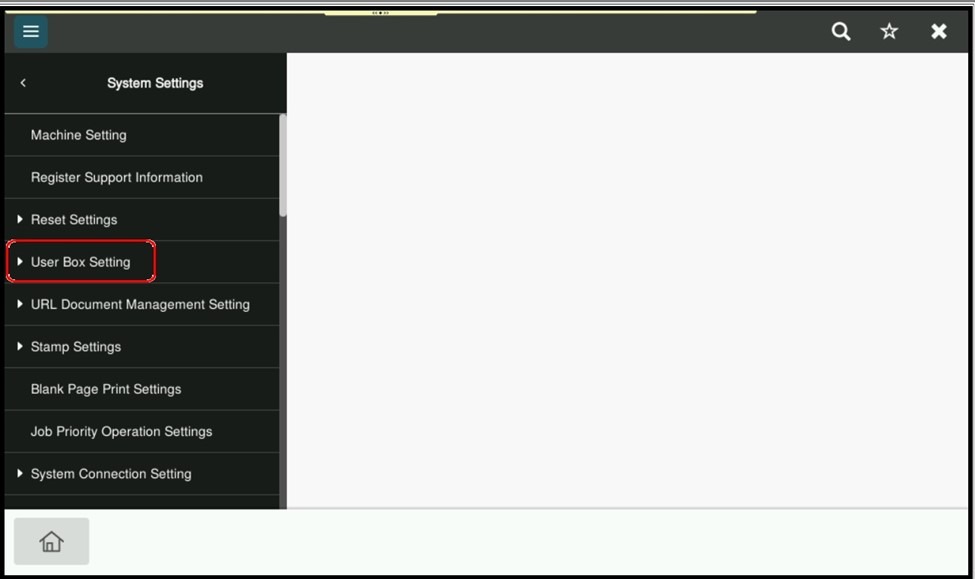
STEP 5 – Select [User Box Setting].
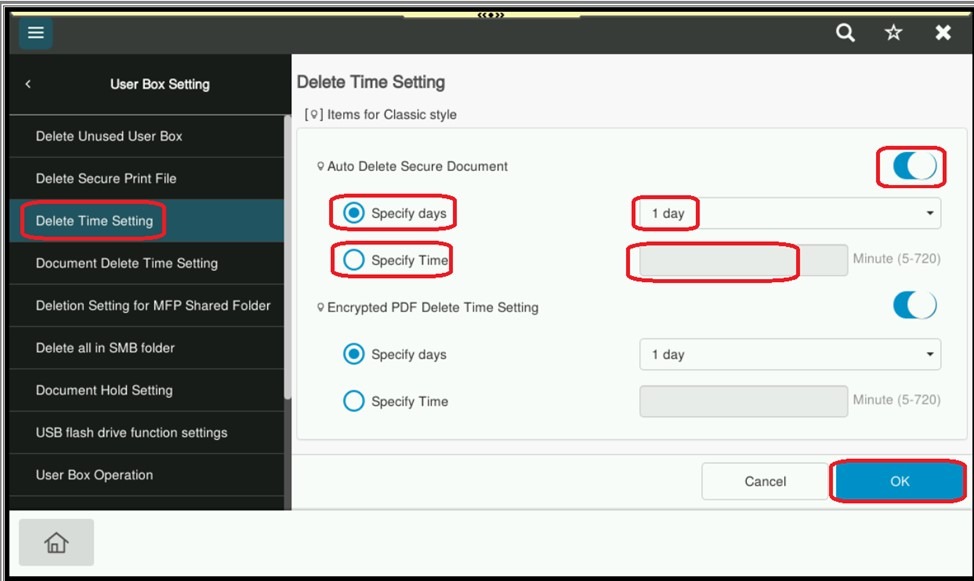
STEP 6 – Select [Delete Time Setting], choose specific day or specify time from 5 min up to 720 min that will to auto delete secure print document, select [OK] to save the setting.