Suggestion on how to setup offset on printing. This will help us to making a large number of copies as it eliminates offsetting after printing by using transversal and longitudinal orientations.
As per attachment below, once the offset function has been enabled when printing, the output of each set document will be showing in portrait and landscape orientation.

REQUIREMENTS:
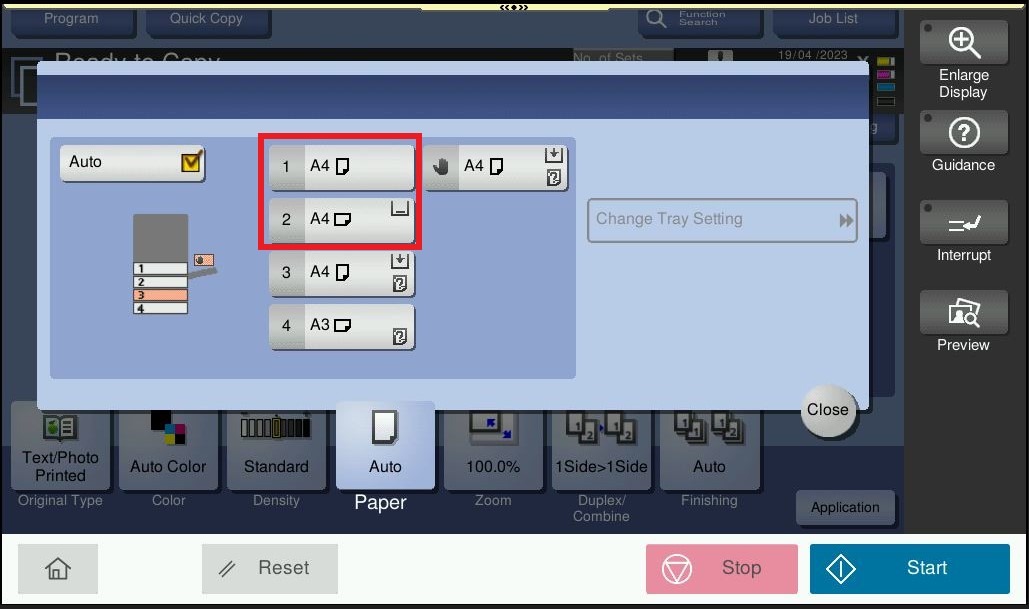
- Machine Tray orientation – Paper of same size and type is loaded in the transversal and longitudinal orientations. For example, if want to print A4 paper, the tray 1 need to put in A4 paper and portrait orientation while tray 2 put in exactly same paper size and paper type as tray 1 but in landscape orientation.
Kindly follow below step on how to setup offset for printing document from pc
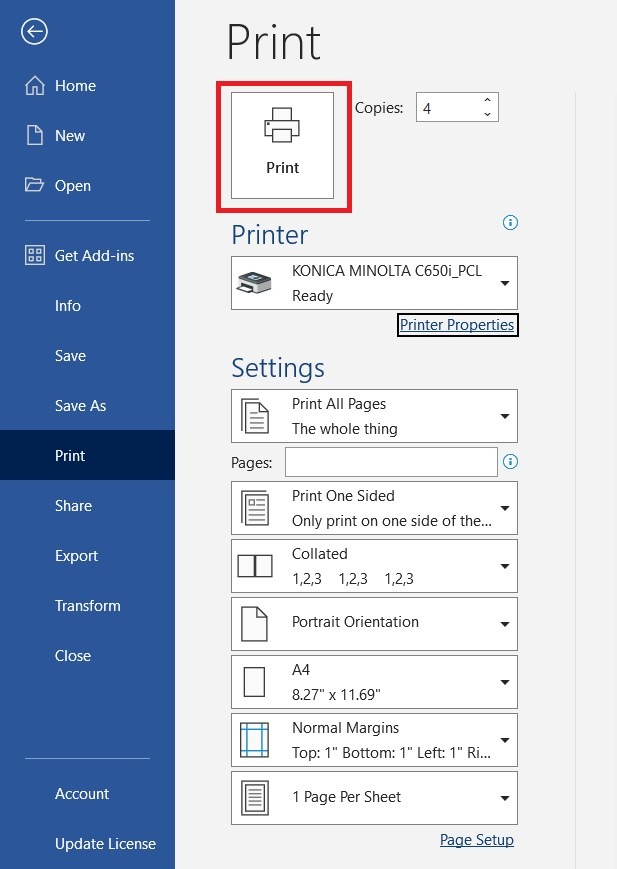
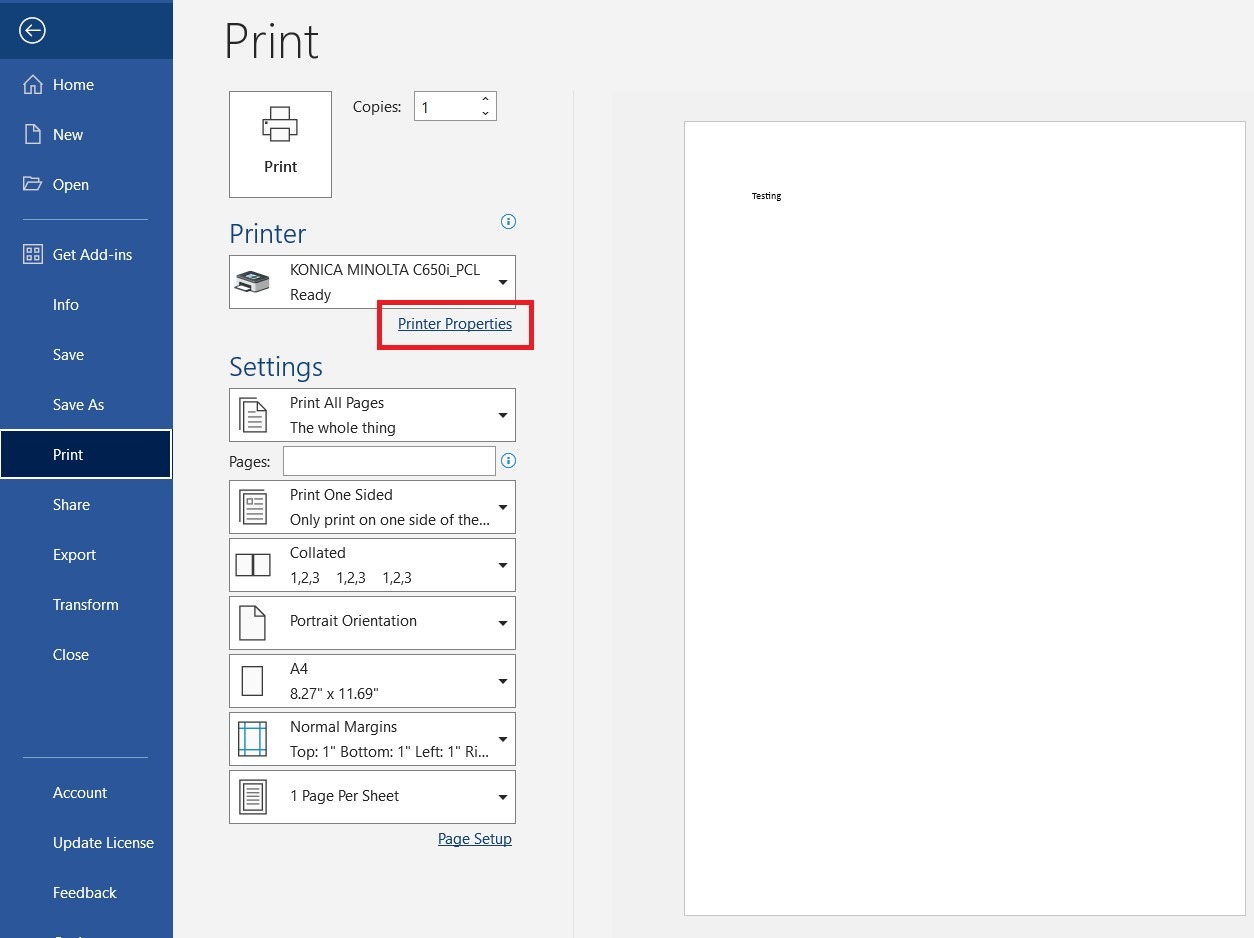
Step 1 – Open a document and select Printer Properties before printing.
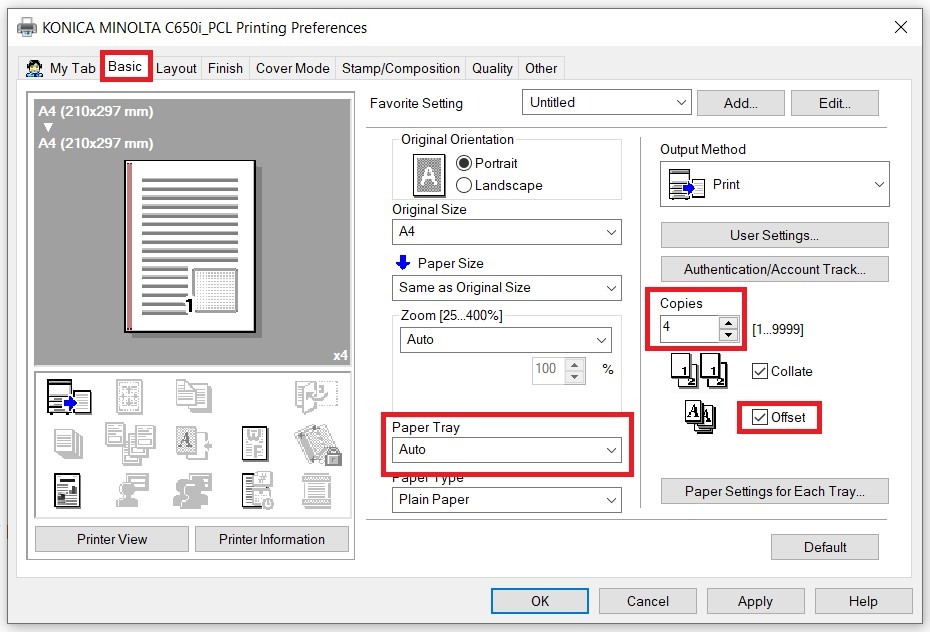
Step 2 – Select [Basic] tab – choose [Auto] that using same paper size in portrait orientation on machine / How many Copies that want to print – Tick [Offset] – [OK].
Step 3 – Select [Print] to print the document, each of the set will be arrange accordingly by portrait and landscape orientation, thus eliminate offsetting after printing.