Guide On How To Setup Scan To Email Via OAuth 2.0 From The Konica Minolta Machine.
Requirements:
- Machine firmware must upgraded to latest version
- Webdev client setting need to be enable in machine
- SMTP port number details must be fill in
To set up OAuth 2.0 on the machine using Microsoft settings, please follow the instructions in Part A, followed by Part B according to whether have a Non I-Series or I-Series Machine
For the Older Machine series / Non I-Series Machine (Part A: Web Connection)
STEP 1 – Access the machine Web Connection from the PC browser. Click this LINK on how to access Web Connection from the browser.
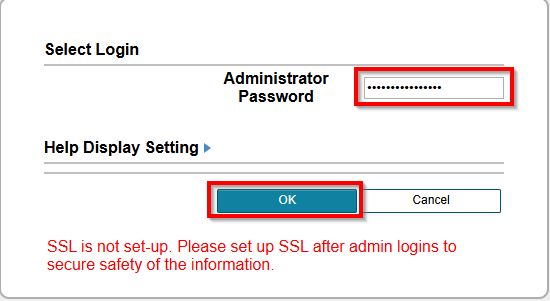
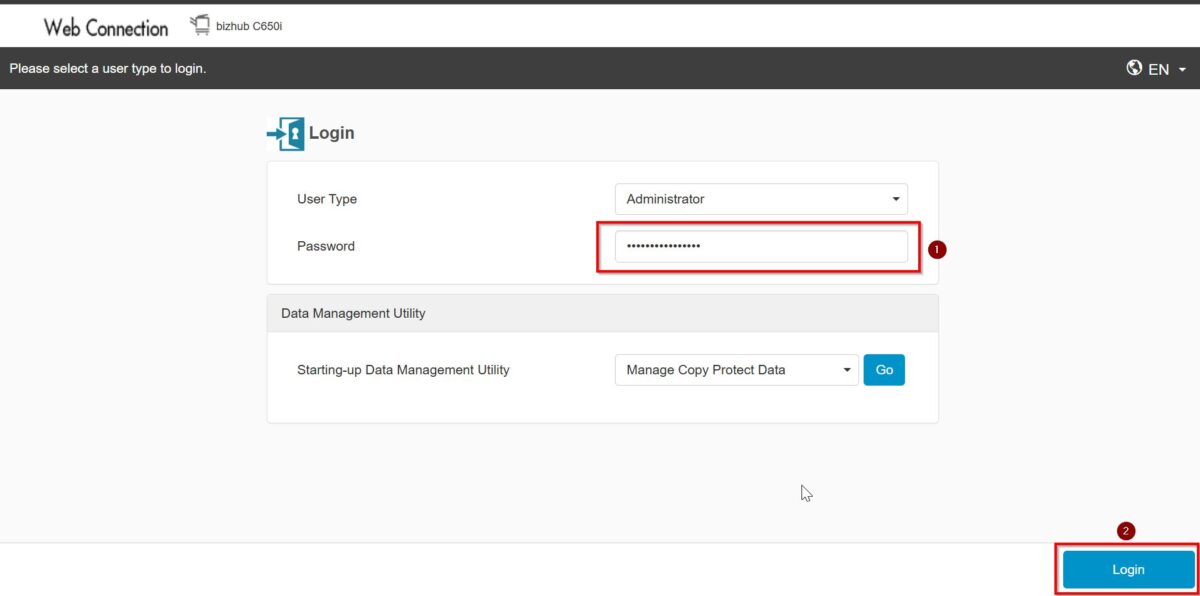
STEP 2 – Select [Administrator] and select [Login]. Default administrator password will be either [7801261178012611] or [1234567812345678] or [12345678] or [12341234].
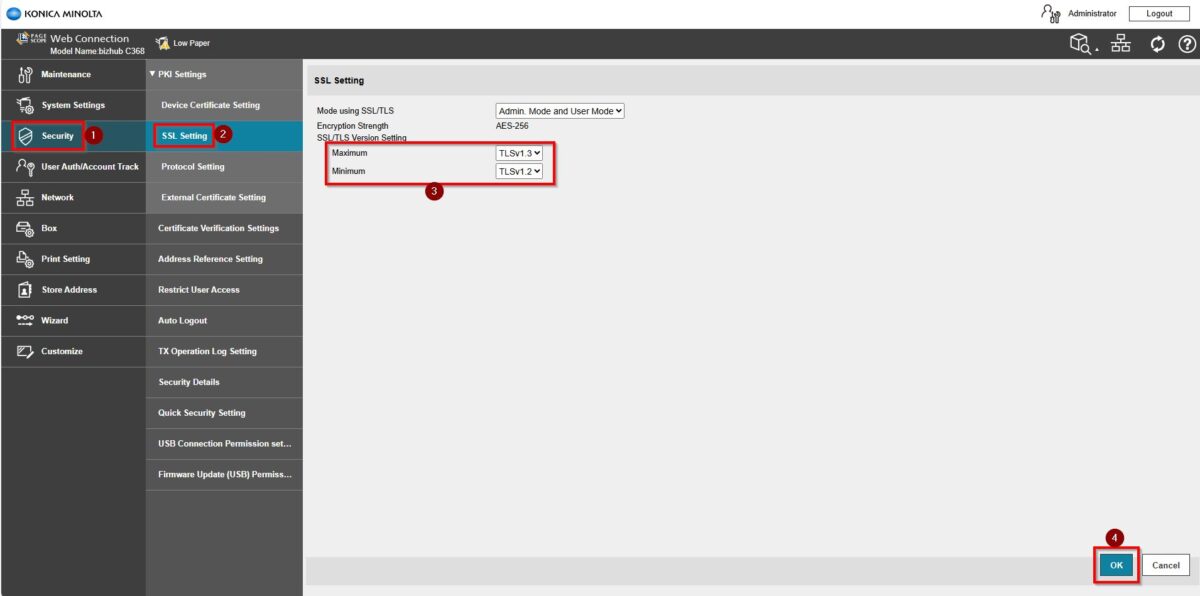
STEP 3 – Navigate to [Home] – [Security] – [PKI Setting] – [SSL Setting] – [SSL/TLS Version Setting]. Set either the values as below. Click [OK] to save the setting once the setting has been set.
| Min | Max |
| TLSv1.2 | TLSv1.2 or TLSv1.3 |
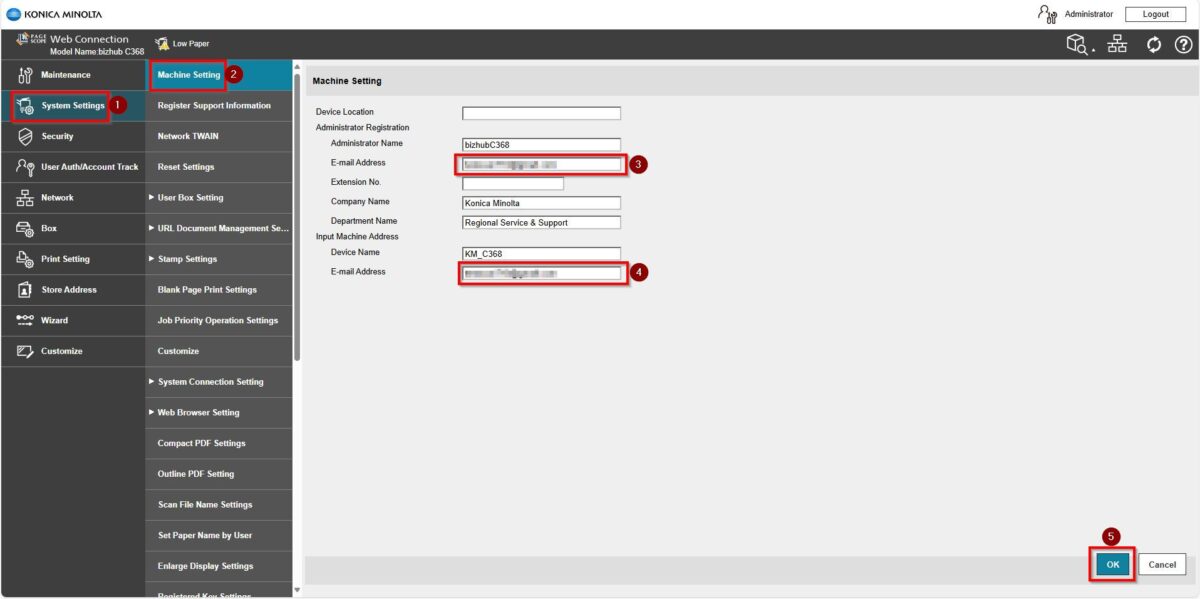
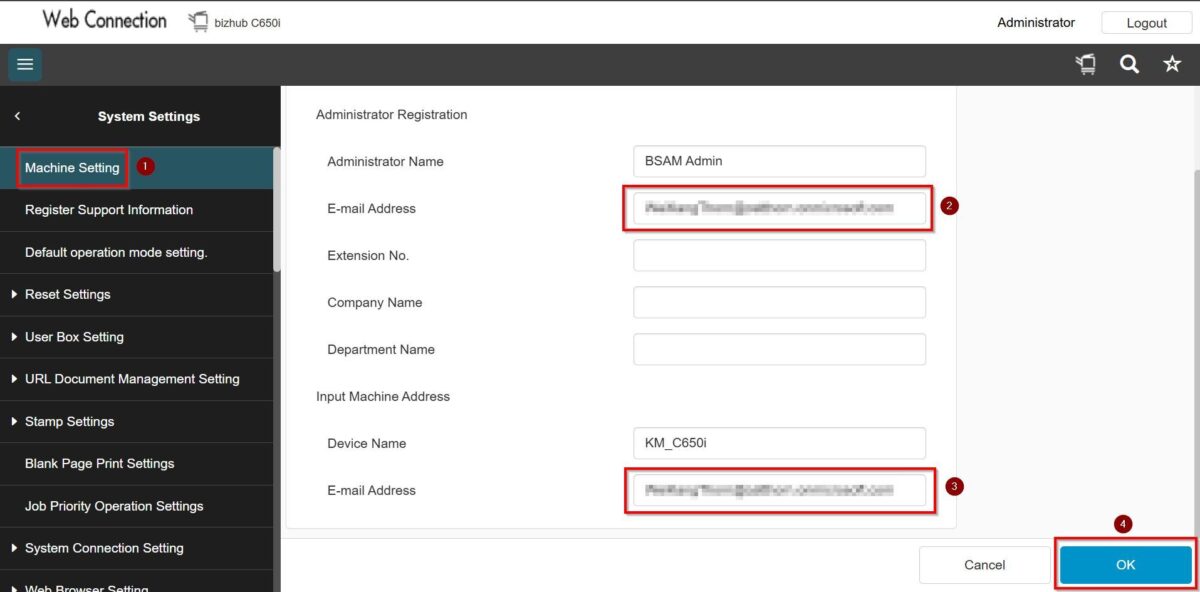
STEP 4 – Proceed to [System Settings] – [Machine Setting], key in [Email address] under Administrator Registration and Input Machine Address, click [OK] to save the setting.
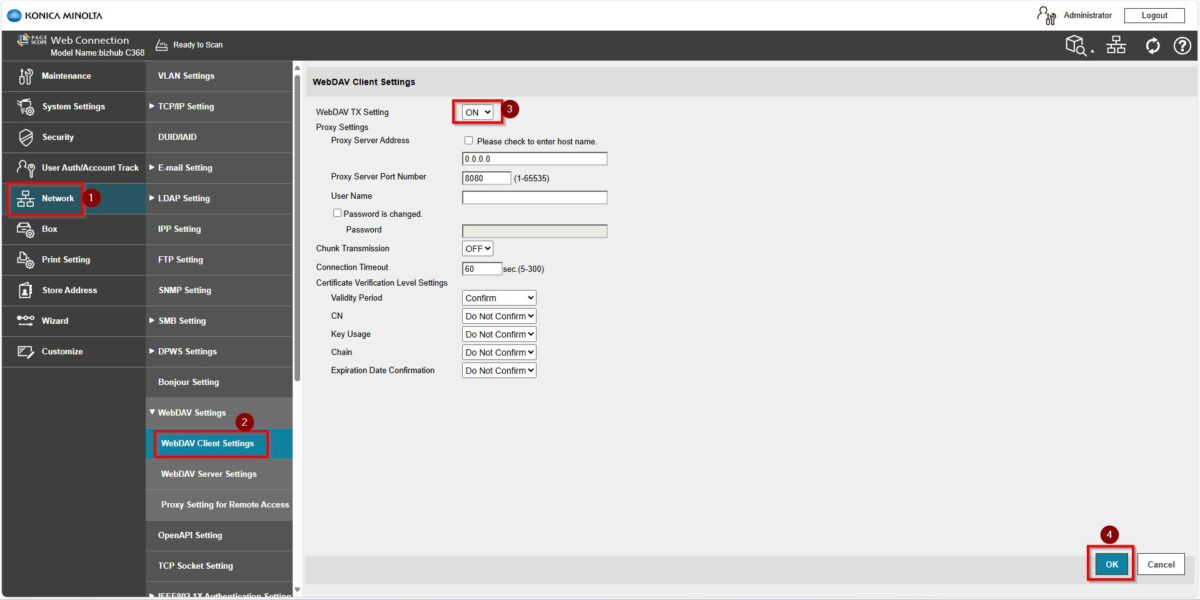
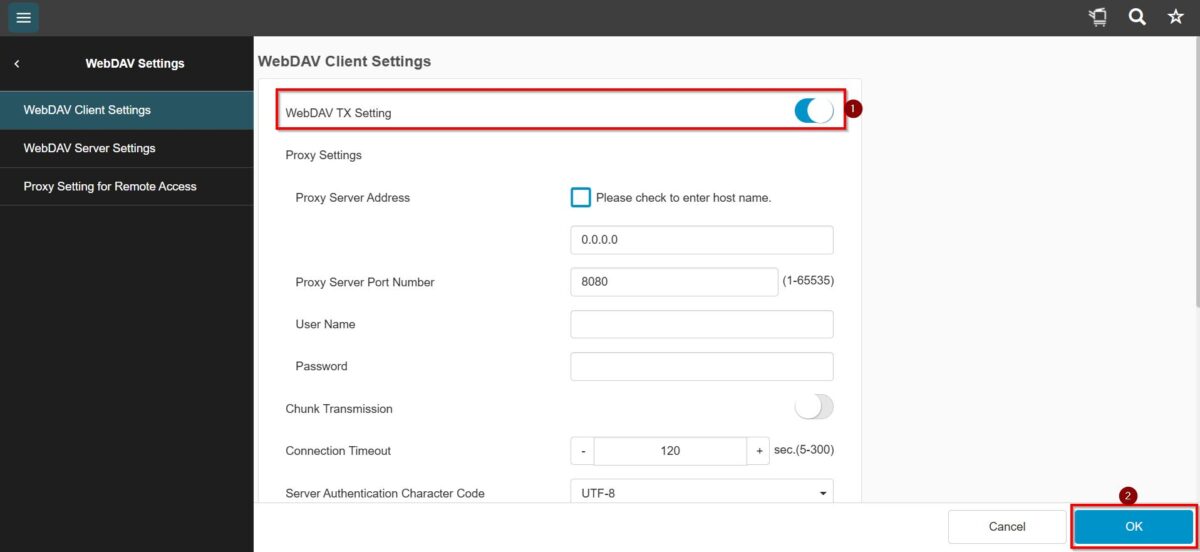
STEP 5 – Go back to [Home] – [Network] – [WebDAV Settings] – [WebDAV Client Settings] – [WebDAV TX Setting] – [ON]. This is required to obtain a refresh token. Once this step completed, kindly proceed to Part B on the printer screen panel.
For the Older Machine series / Non I-Series Machine (Part B: Remote Panel Machine)
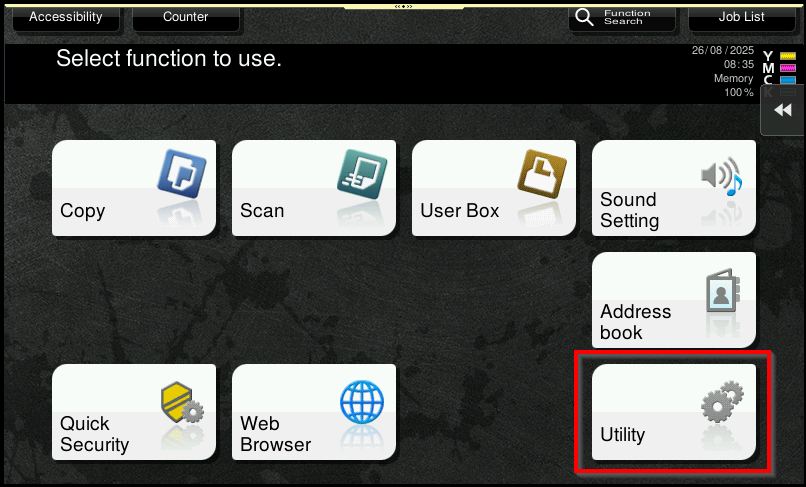
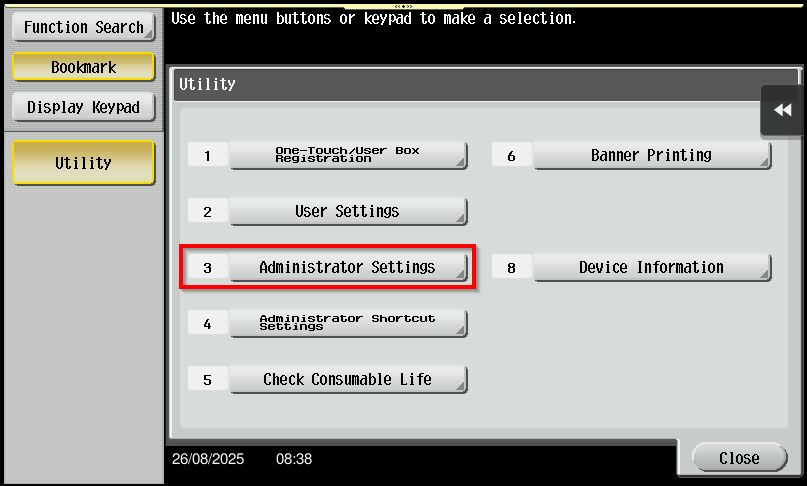
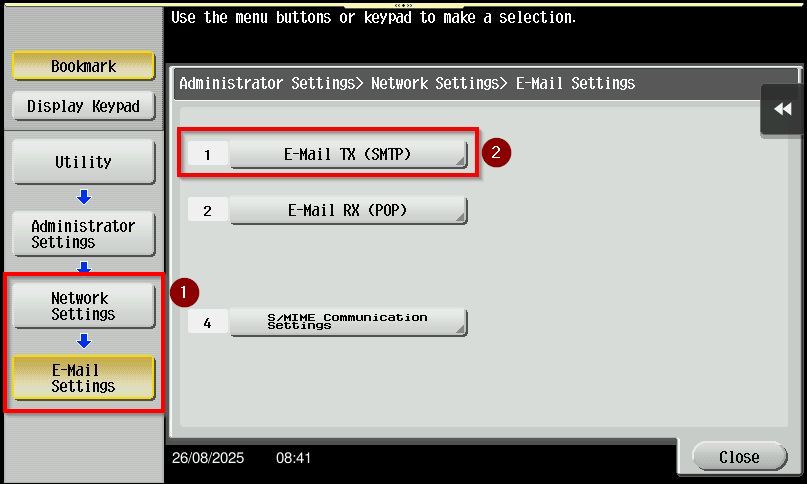
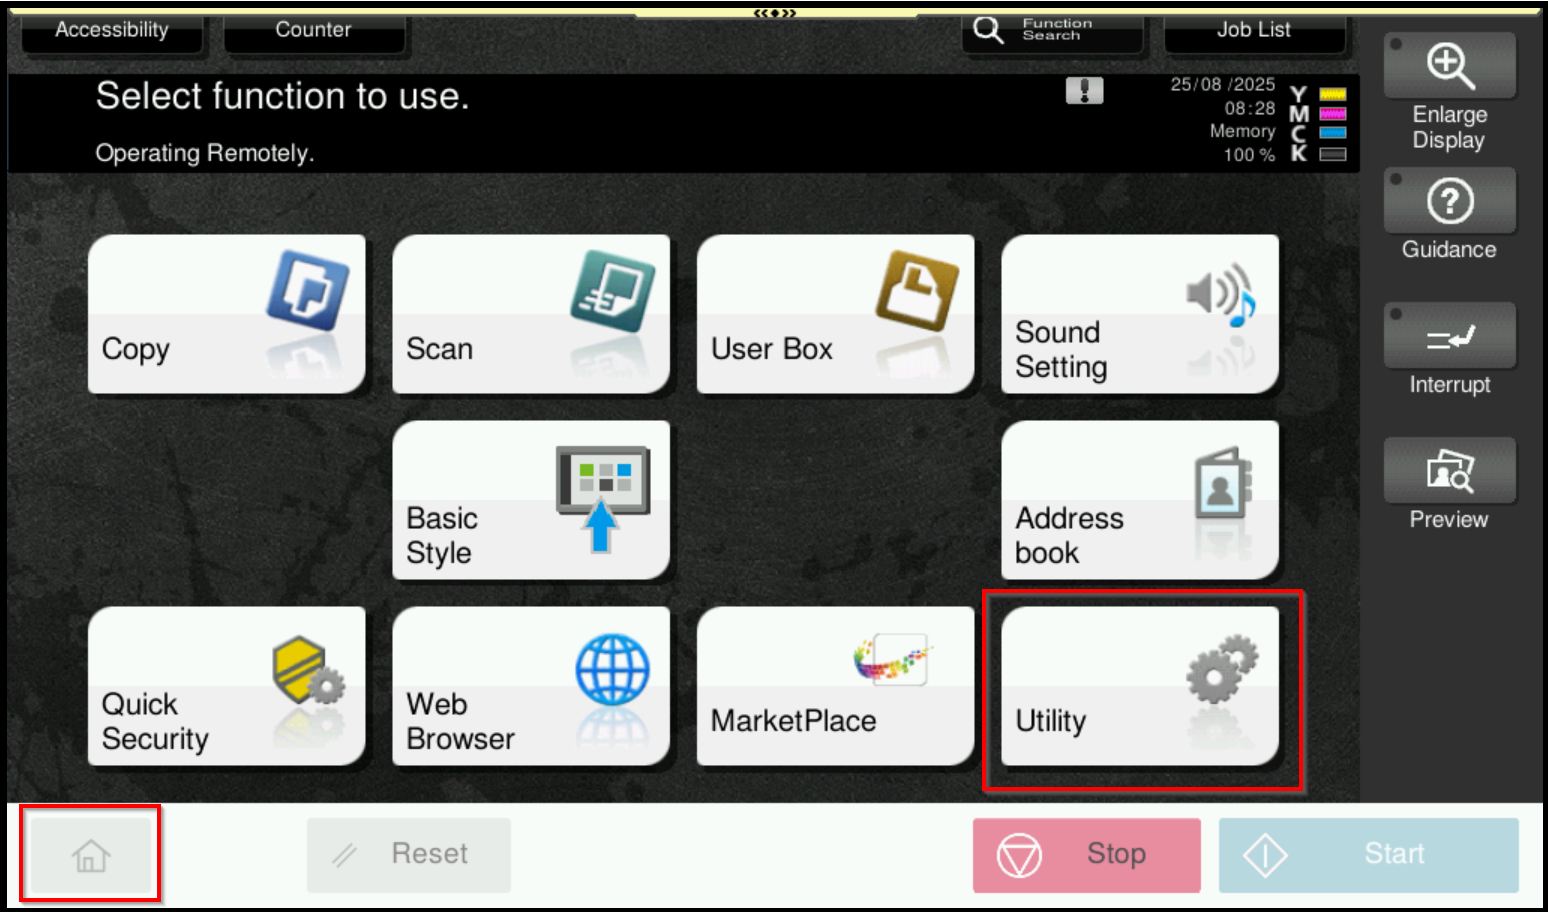
STEP 1 – Access the machine, select [Utility] – [Administrator Settings].
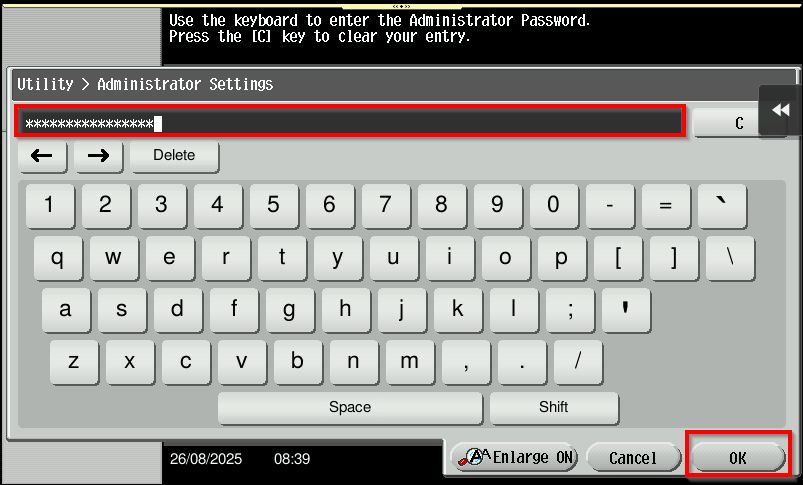
STEP 2 – Login as Administrator. Default administrator password will be either [7801261178012611] or [1234567812345678] or [12345678] or [12341234]. Once login proceed to [Network Settings] – [Email Settings] – [Email TX (SMTP)].
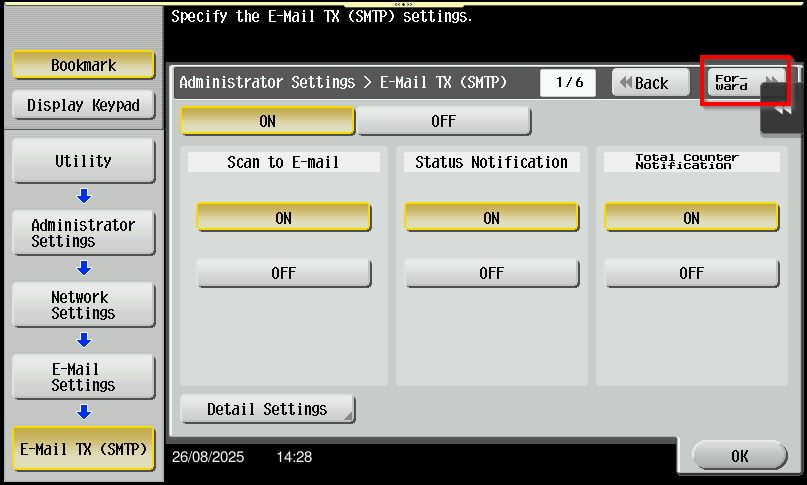
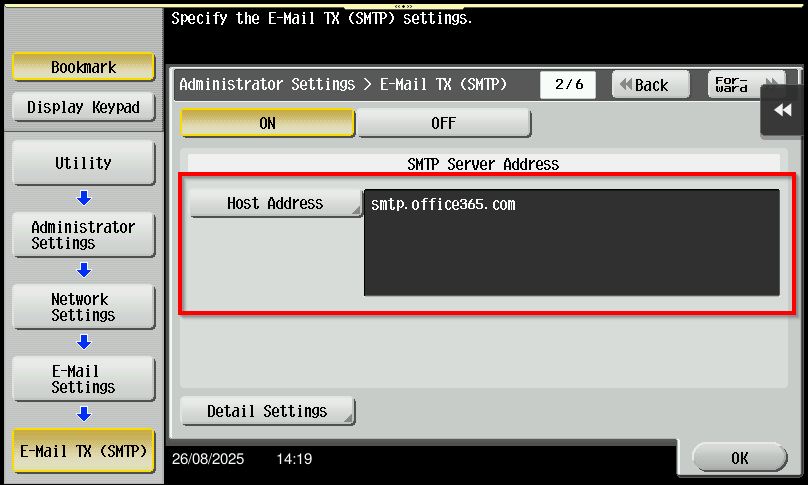
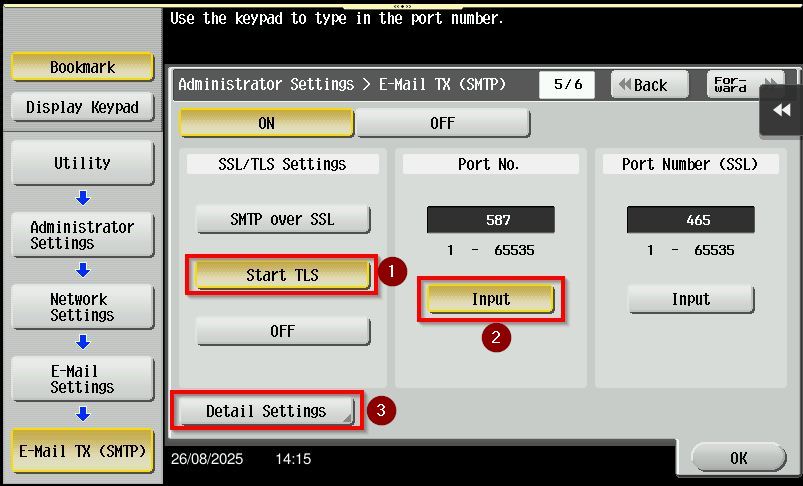
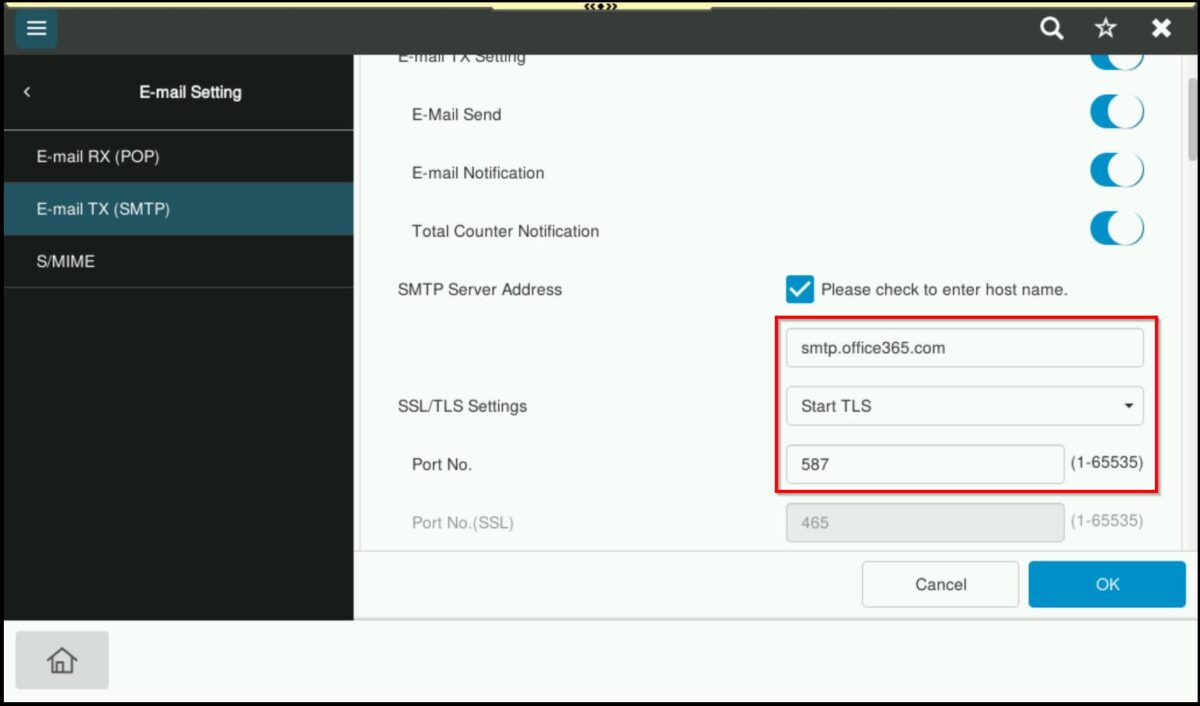
STEP 3 – Click on forward button to page 2/6, key in the SMTP server address to [smtp.office365.com], then proceed to select forward button to page 5/6, select [Start TLS] and key in [587] under Port Number. Once the setting has been adjusted, select [Detail Settings].
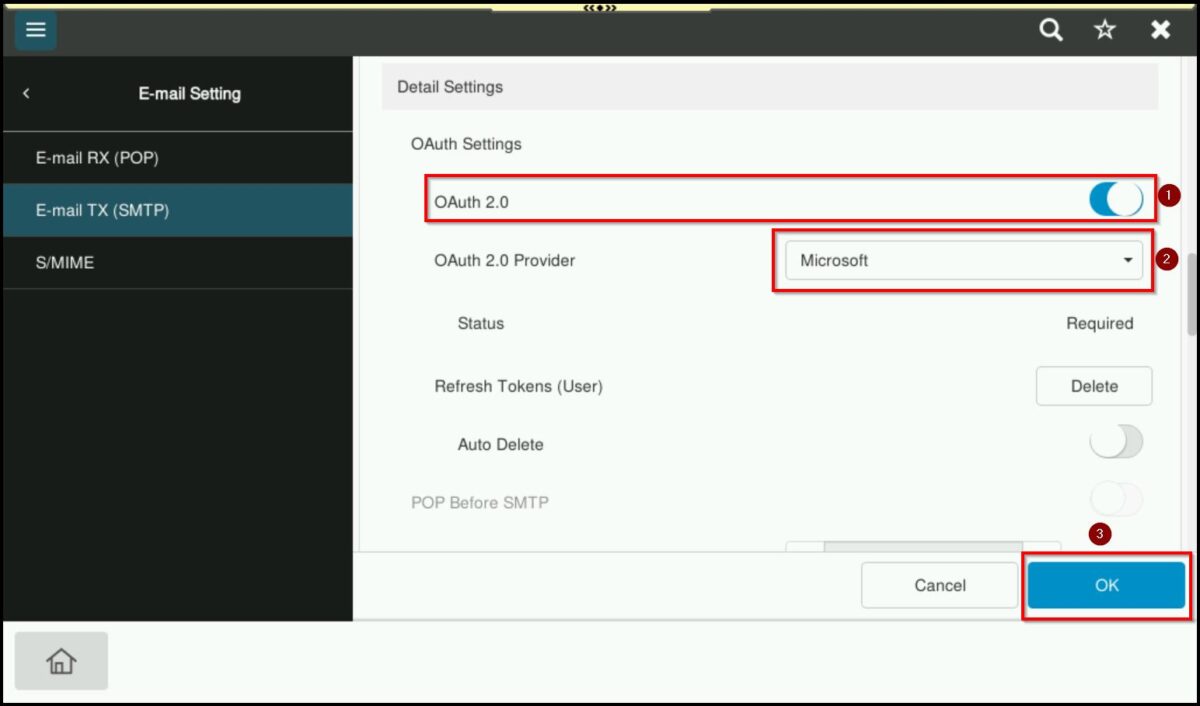
STEP 4 – Turn [ON] the OAuth 2.0 and select [Microsoft] as the OAuth 2.0 Provider. Then, click [OK] to proceed.
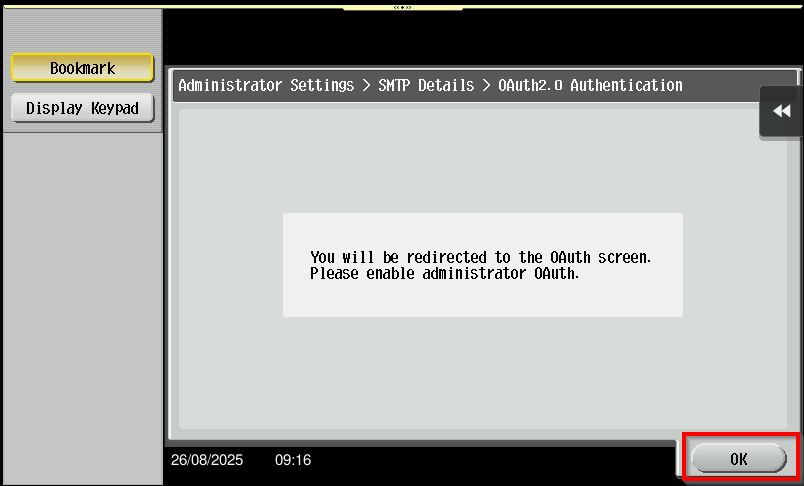
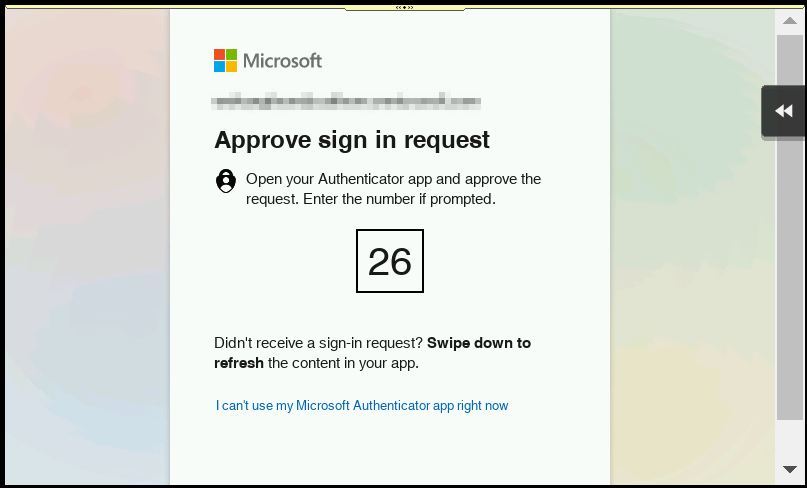
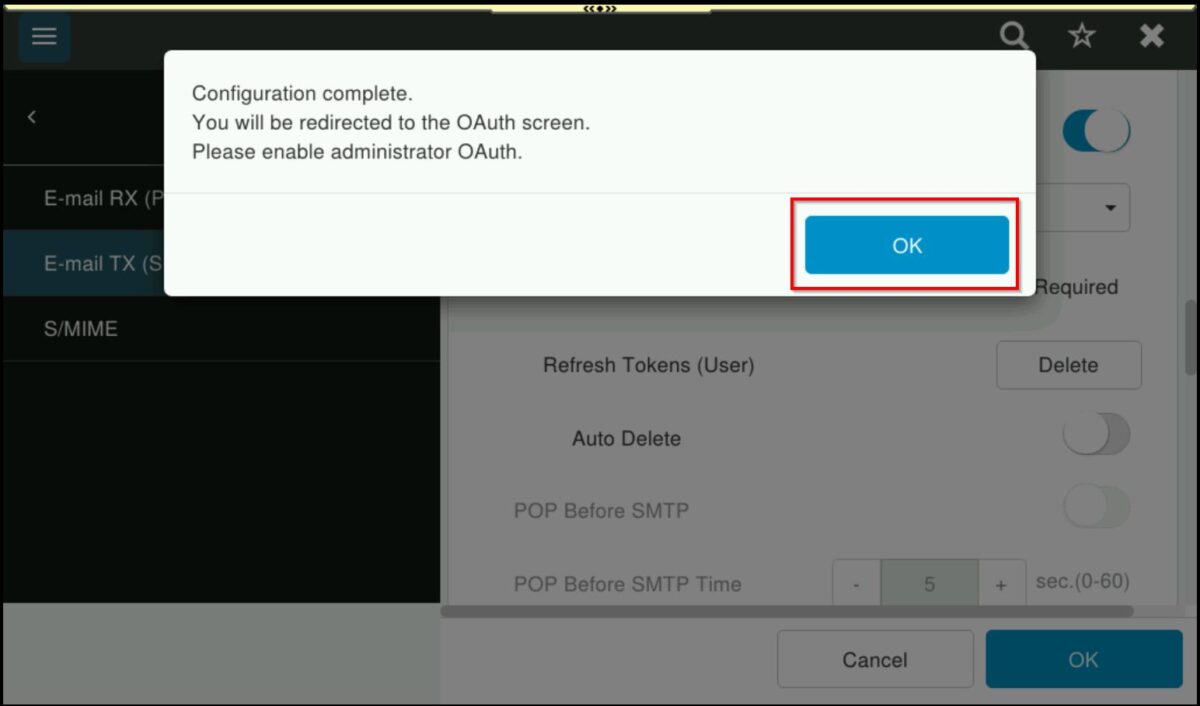
STEP 5 – After enabling OAuth 2.0, the [Microsoft authentication] screen will appear.
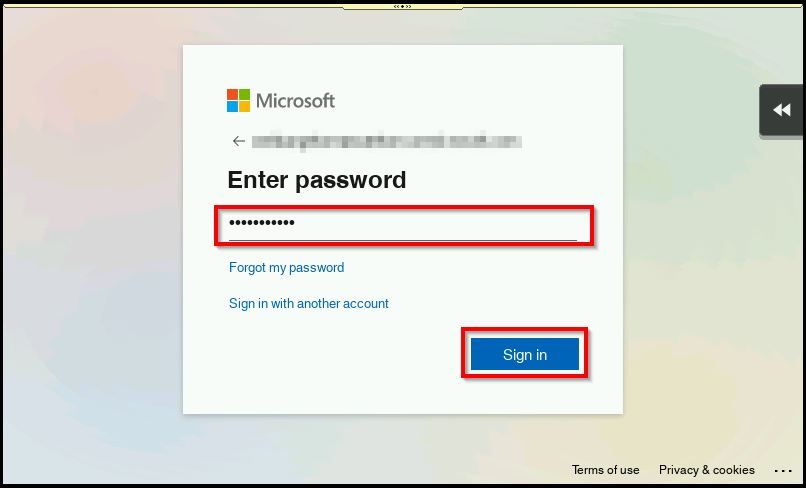
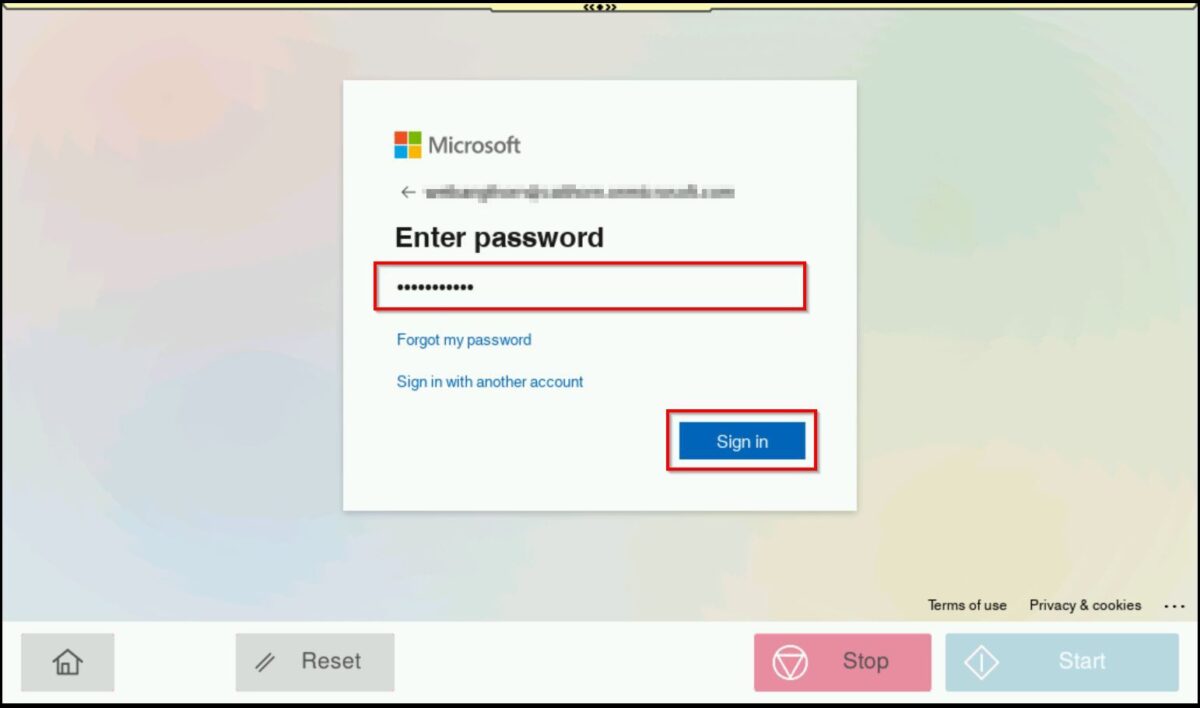
Enter the email address and password to complete the authentication then click [OK].
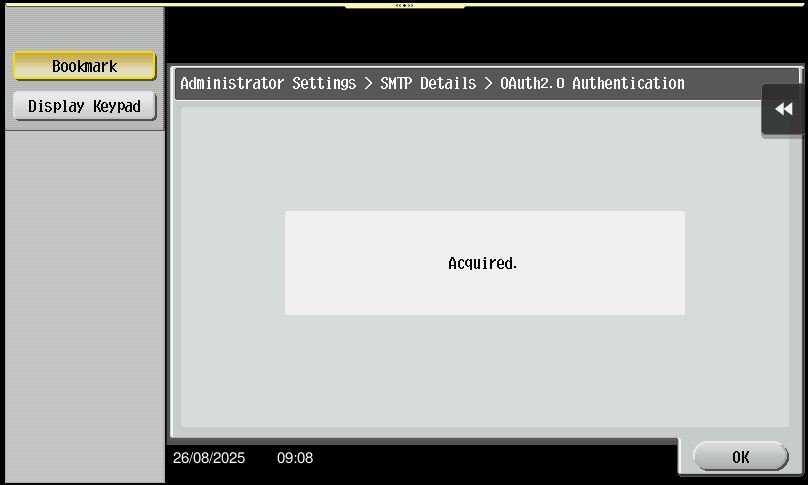
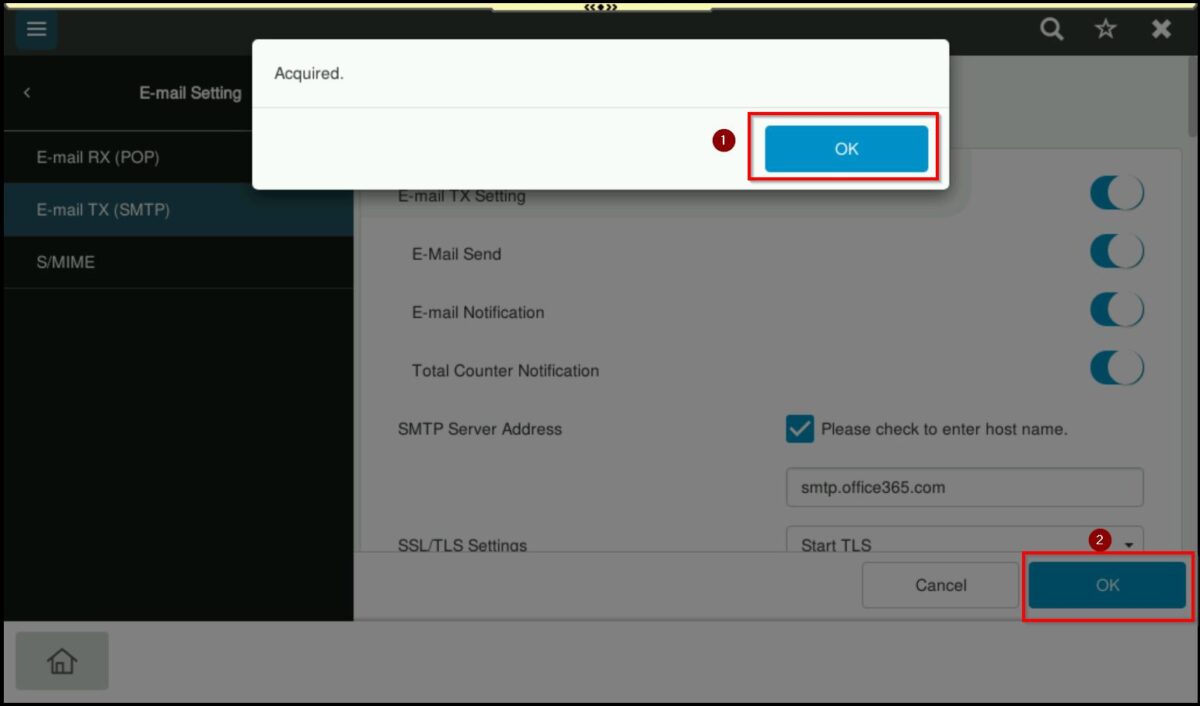
STEP 6 – Once the authentication is complete, the machine will display the message [Acquired].
Click [OK] twice to finalize the setup and then perform a test scan to email to confirm the configuration.
For the Newer Machine series / I-Series Machine (Part A: Web Connection)
STEP 1 – Access the machine Web Connection from the PC browser. Click this LINK on how to access Web Connection from the browser.
STEP 2 – Select [Administrator] and select [Login]. default administrator password will be either [7801261178012611] or [1234567812345678] or [12345678] or [12341234].
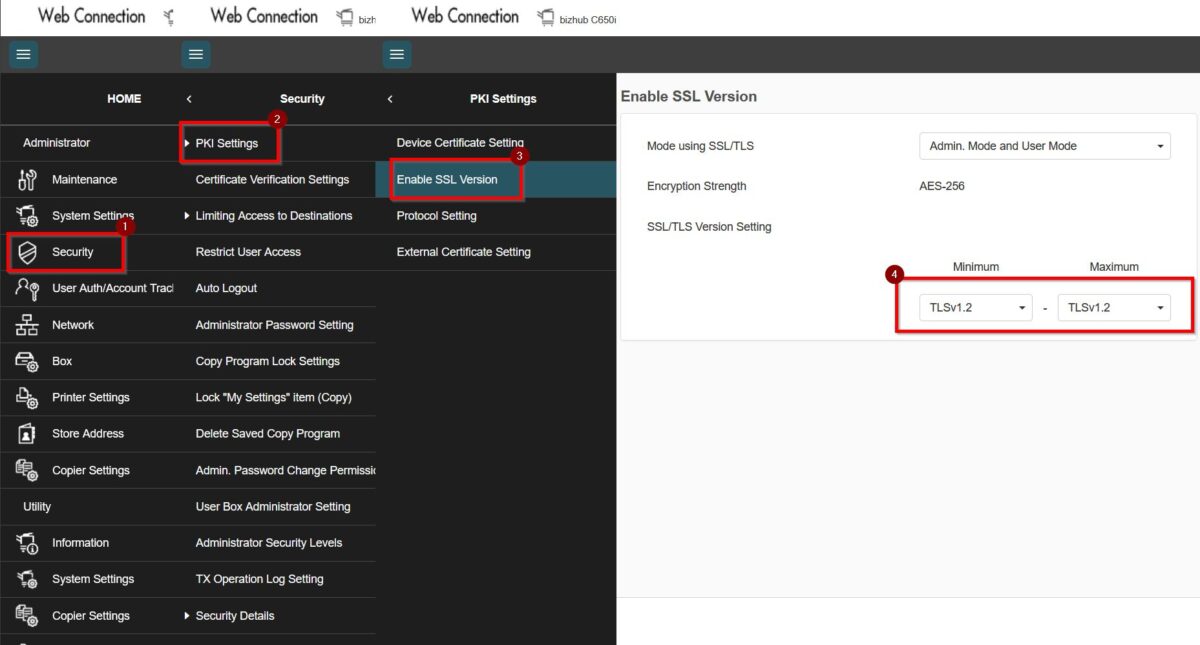
STEP 3 – Navigate to [Home] – [Security] – [PKI Setting] – [Enable SSL Version] – [SSL/TLS Version Setting]. Set either the values as below. Click [OK] to save the setting once the setting has been set.
| Min | Max |
| TLSv1.2 | TLSv1.2 or TLSv1.3 |
STEP 4 – Proceed to [System Settings] – [Machine Setting], key in [Email address] under Administrator Registration and Input Machine Address, click [OK] to save the setting.
STEP 5 – Go back to [Home] – [Network] – [WebDAV Settings] – [WebDAV Client Settings] – [WebDAV TX Setting] – [ON]. This is required as to obtain a refresh token. Once this step has been done, kindly proceed to Part B which need to do on the printer screen panel.
For the Newer Machine series / I-Series Machine (Part B: Remote Panel Machine)
STEP 1 – Access the machine, select [Home] – [Utility] – [Administrator].

STEP 2 – Login as Administrator, default administrator password will be either [7801261178012611] or [1234567812345678] or [12345678] or [12341234]. Once login proceed to [Network] – [Email Settings] – [Email TX (SMTP)]. Key in the SMTP Server Address as below for Microsoft.
- SMTP Server Address: smtp.office365.com
- SSL/TLS Settings: Start TLS
- Port No: 587

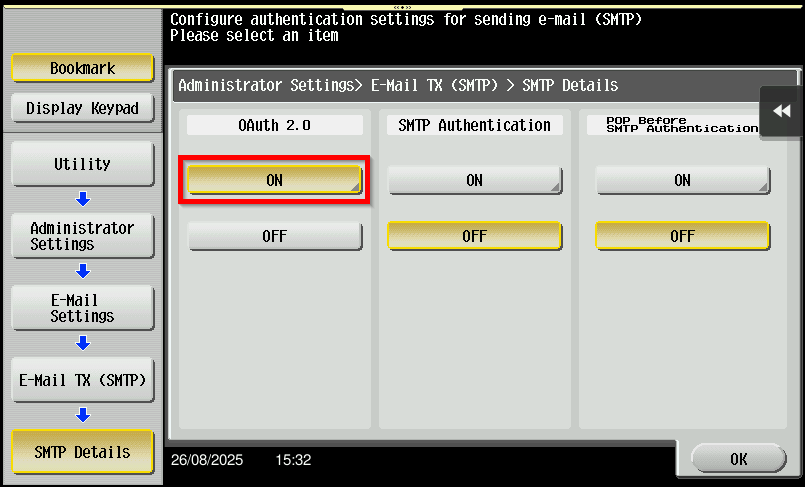
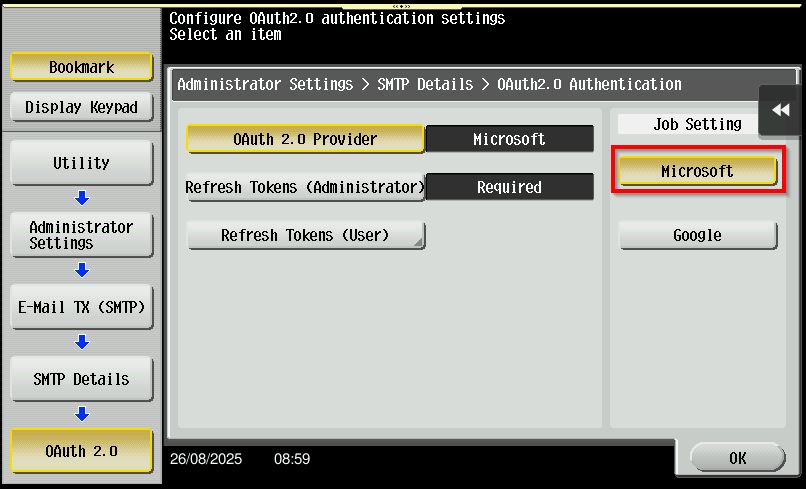
STEP 4 – Set the OAuth 2.0 as [ON] and setting select [Microsoft] as OAuth 2.0 provider. After that click [OK].
STEP 5 – After enabling OAuth 2.0, the [Microsoft authentication] screen will appear.
Enter the email address and password to complete the authentication then click [OK].
STEP 6 – Once the authentication is complete, the machine will display the message [Acquired].
Click [OK] twice to finalize the setup and then perform a test scan to email to confirm the configuration.
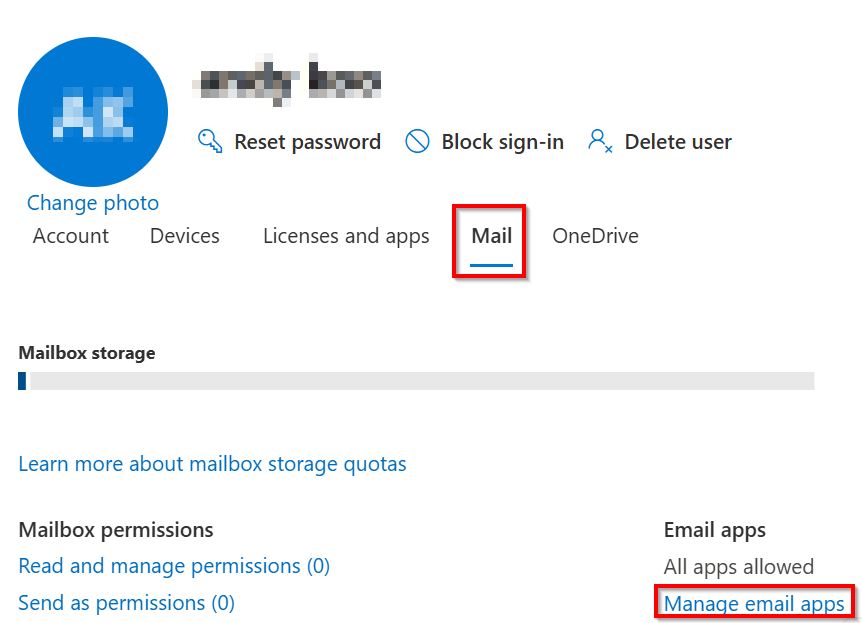
Incase the Scan to Email still failed after setup OAuth 2.0 providers is Microsoft with Error Code 535, kindly check that the authenticated SMTP setting is enabled in the Microsoft 365 admin center.
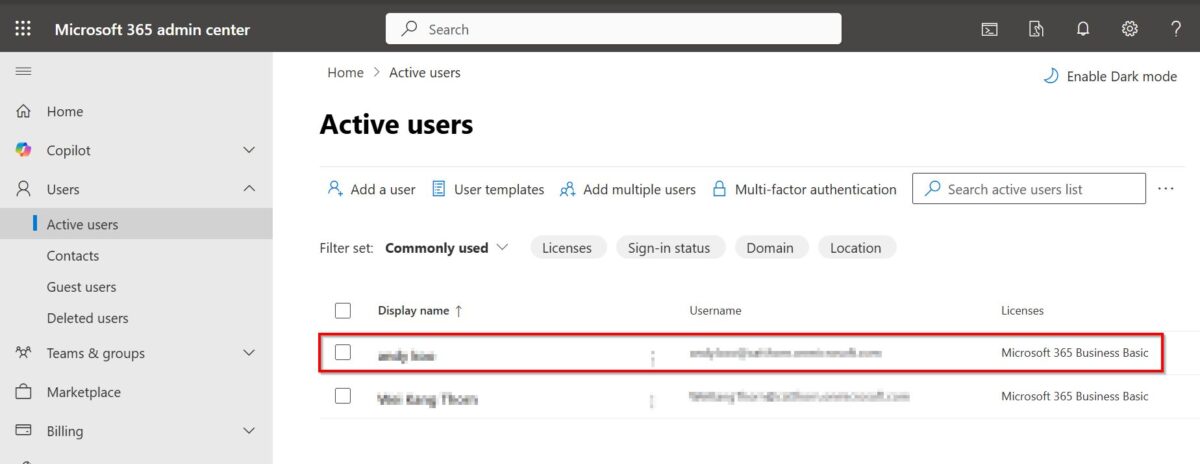
STEP 1: Proceed to Microsoft 365 Admin Center via this Link.
STEP 2: Select target users that is using for machine administrator email.
STEP 3: Select [Mail] – [Manage Email Apps] – tick [Authenticated SMTP] – [Save changes]. Wait for few minute then try to scan to email again.