Guide On How To Setup Scan To Email Via OAuth 2.0 From The Konica Minolta Machine.
Requirements:
- Machine firmware must upgraded to latest version
- Webdev client setting need to be enable in machine
- SMTP port number details must be fill in
To set up OAuth 2.0 on the machine using Gmail settings, please follow the instructions in Part A, followed by Part B according to whether have a Non I-Series or I-Series Machine
For the Older Machine series / Non I-Series Machine (Part A: Web Connection)
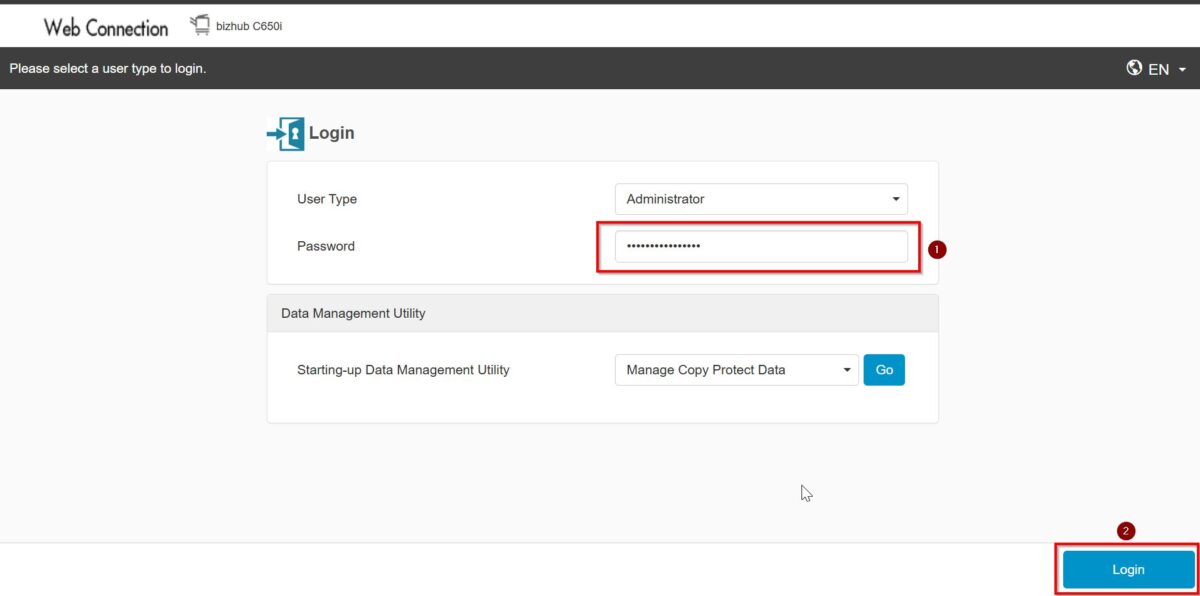
STEP 1 – Access the machine Web Connection from the PC browser. Click this LINK on how to access Web Connection from the browser.
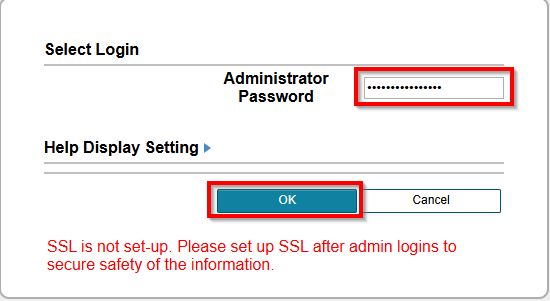
STEP 2 – Select [Administrator] and select [Login]. Default administrator password will be either [7801261178012611] or [1234567812345678] or [12345678] or [12341234].
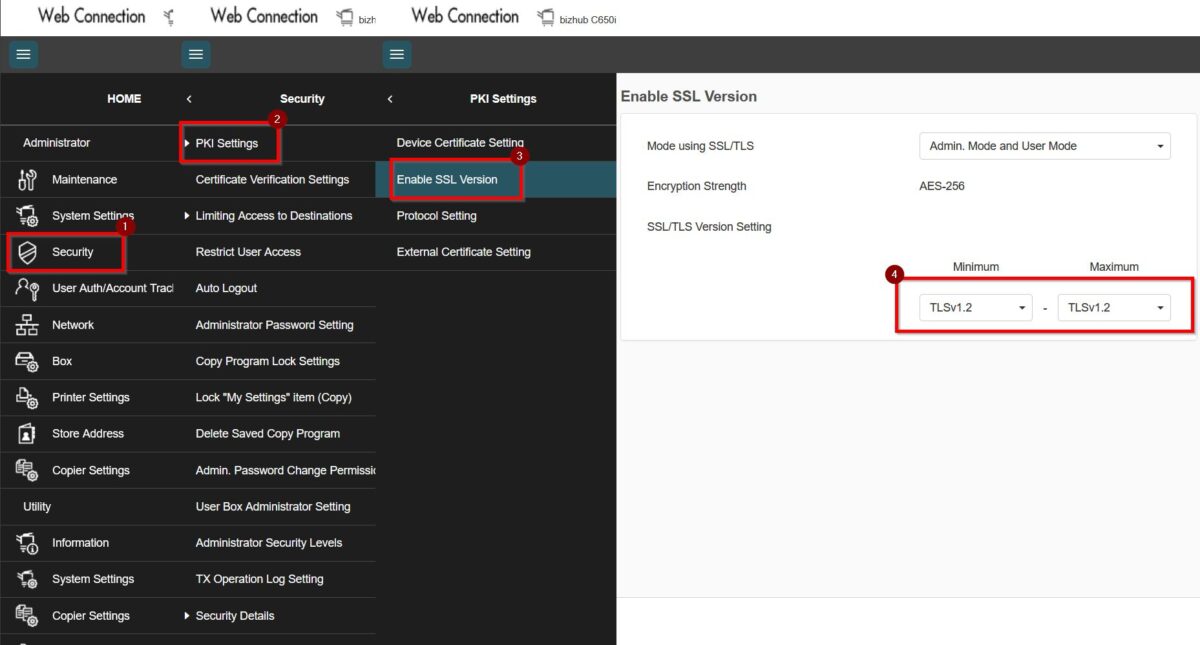
STEP 3 – Navigate to [Home] – [Security] – [PKI Setting] – [Enable SSL Version] – [SSL/TLS Version Setting]. Set either the values as below. Click [OK] to save the setting once the setting has been set.
| Min | Max |
| TLSv1.2 | TLSv1.2 or TLSv1.3 |
| TLSv1.3 | TLSv1.3 |
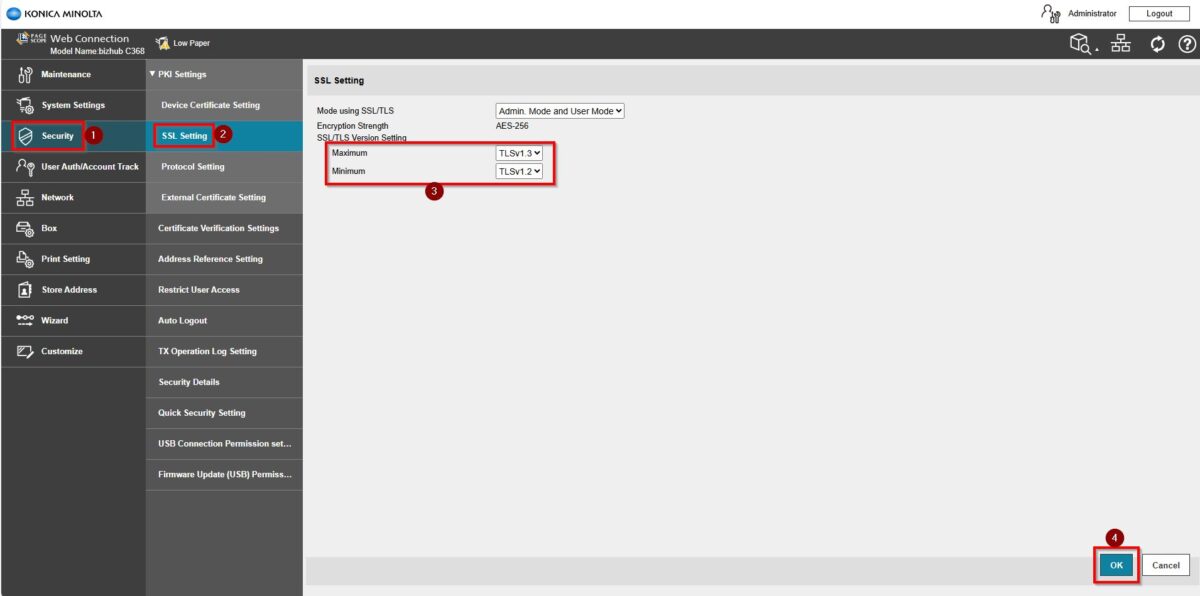
*If the TLSv1.3 is selected for TLSv1.2 & TLSv1.3, please set the HTTP version to “HTTP/2, HTTP/1.1“
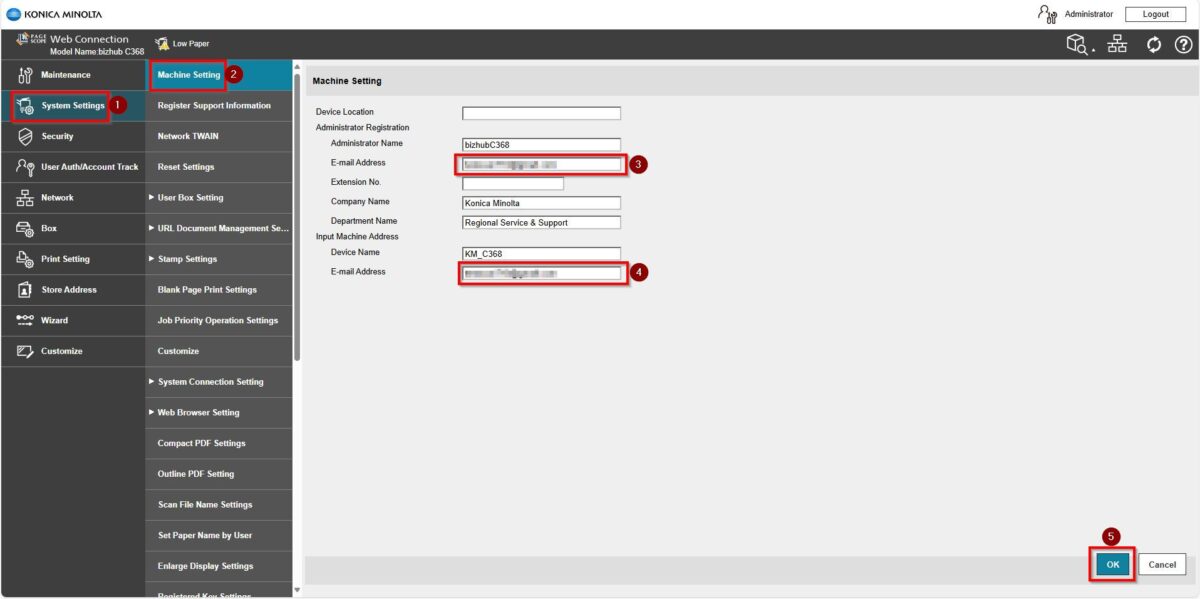
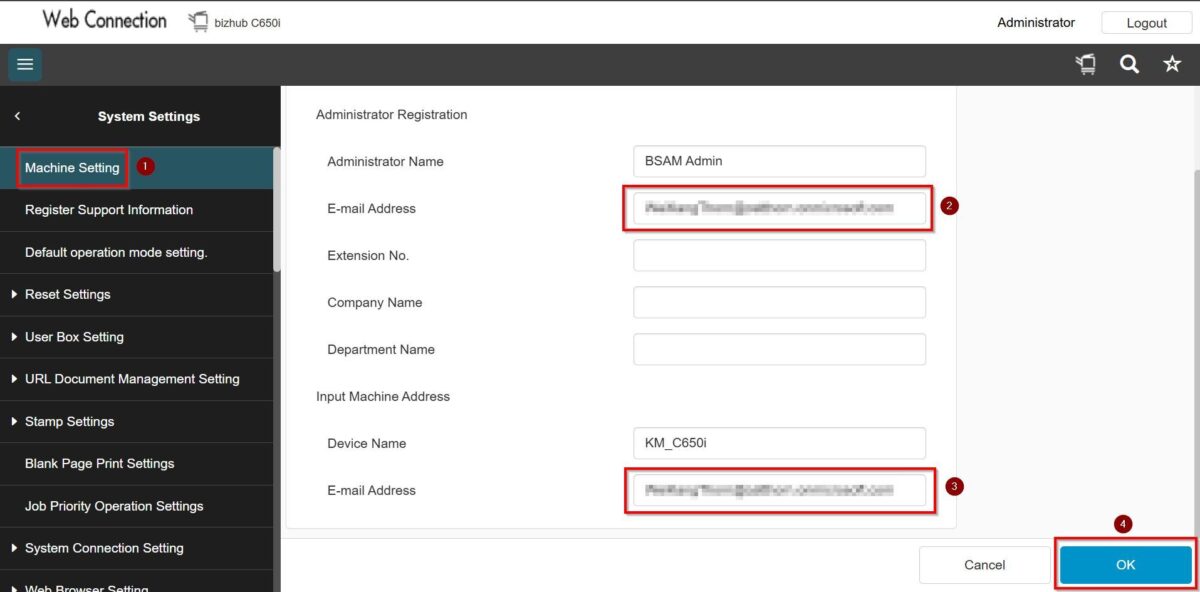
STEP 4 – Proceed to [System Settings] – [Machine Setting], key in [Email address] under Administrator Registration and Input Machine Address, click [OK] to save the setting.
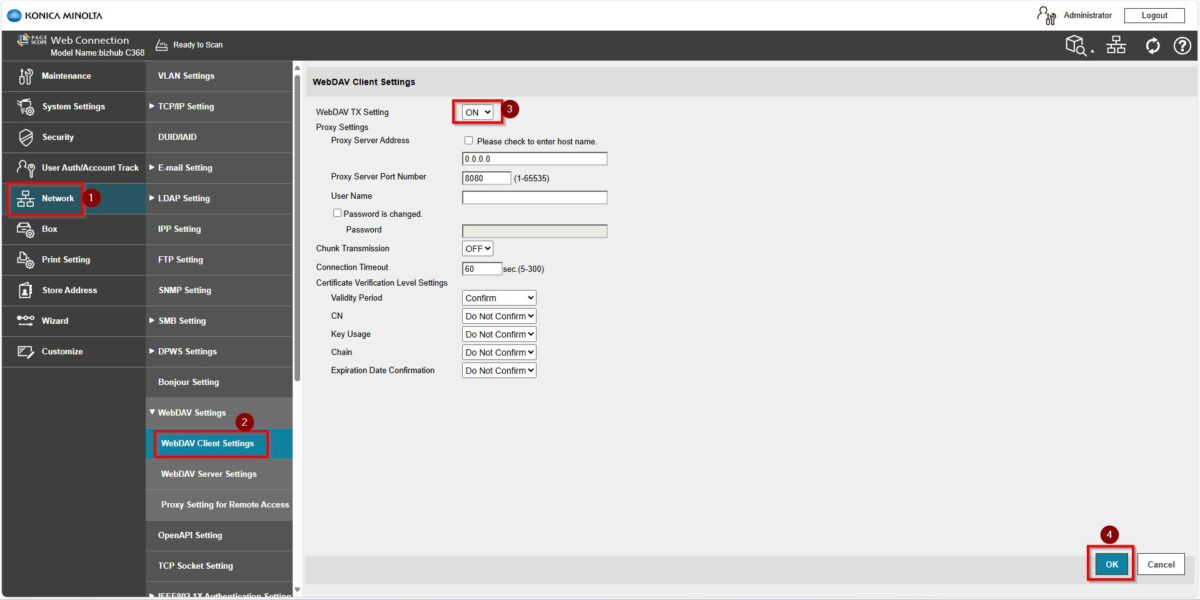
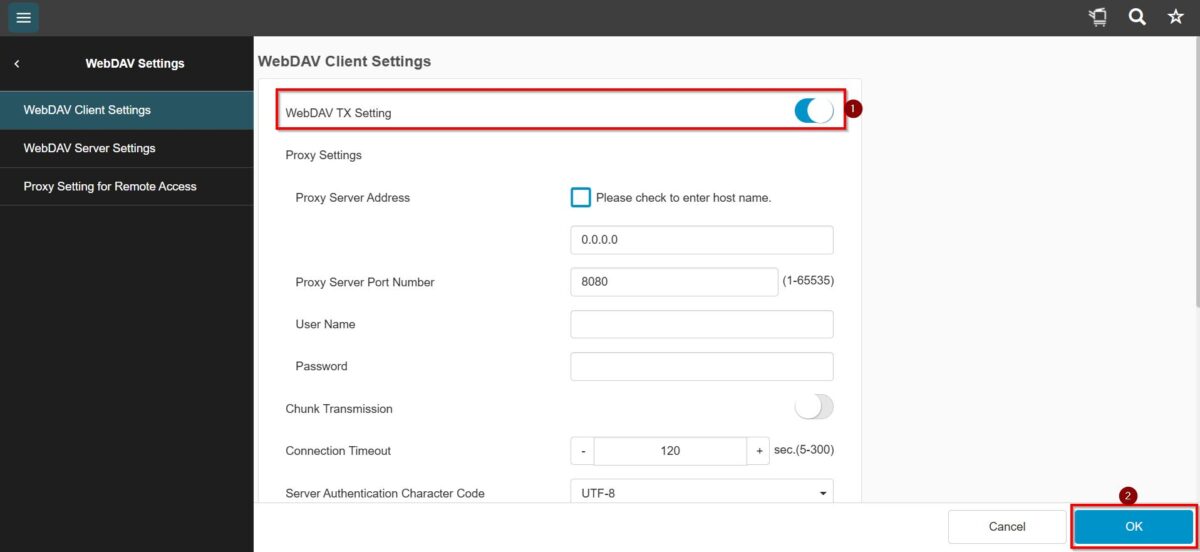
STEP 5 – Go back to [Home] – [Network] – [WebDAV Settings] – [WebDAV Client Settings] – [WebDAV TX Setting] – [ON]. This is required to obtain a refresh token. Once this step completed, kindly proceed to Part B on the printer screen panel.
For the Older Machine series / Non I-Series Machine (Part B: Remote Panel Machine)
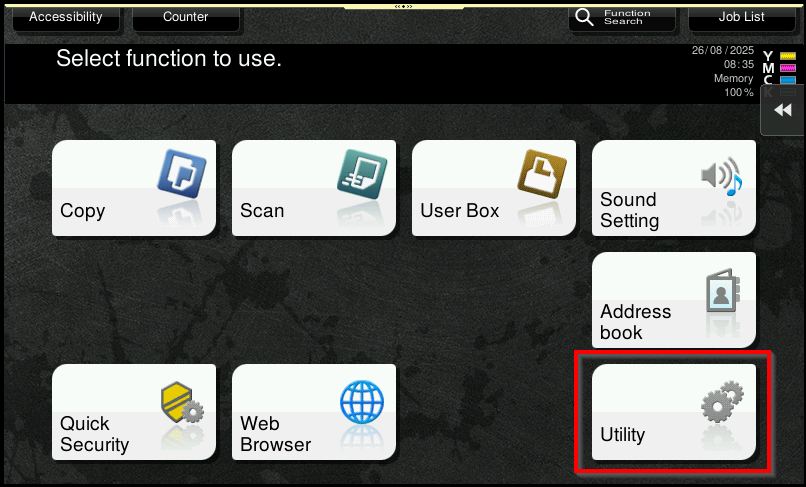
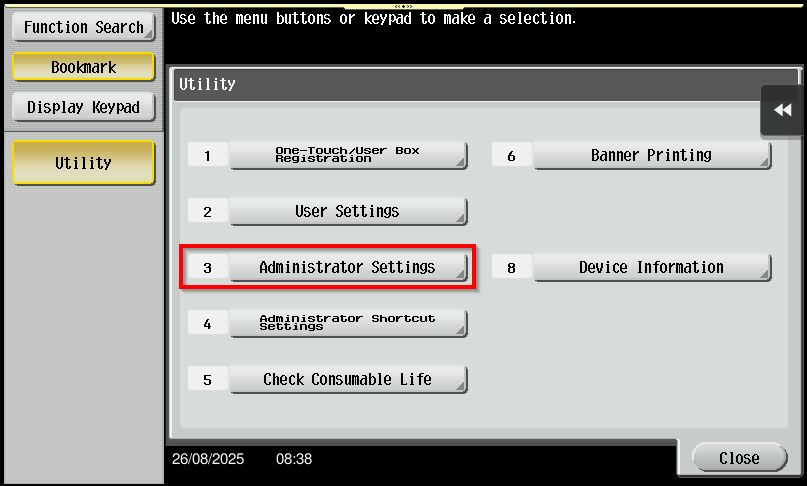
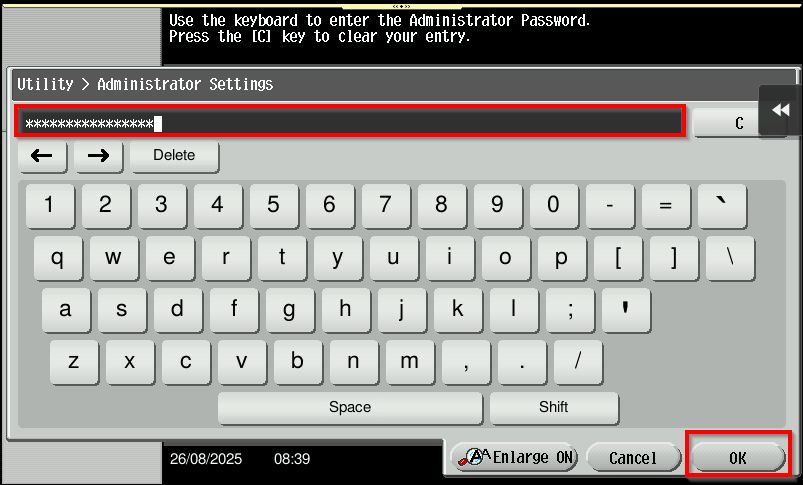
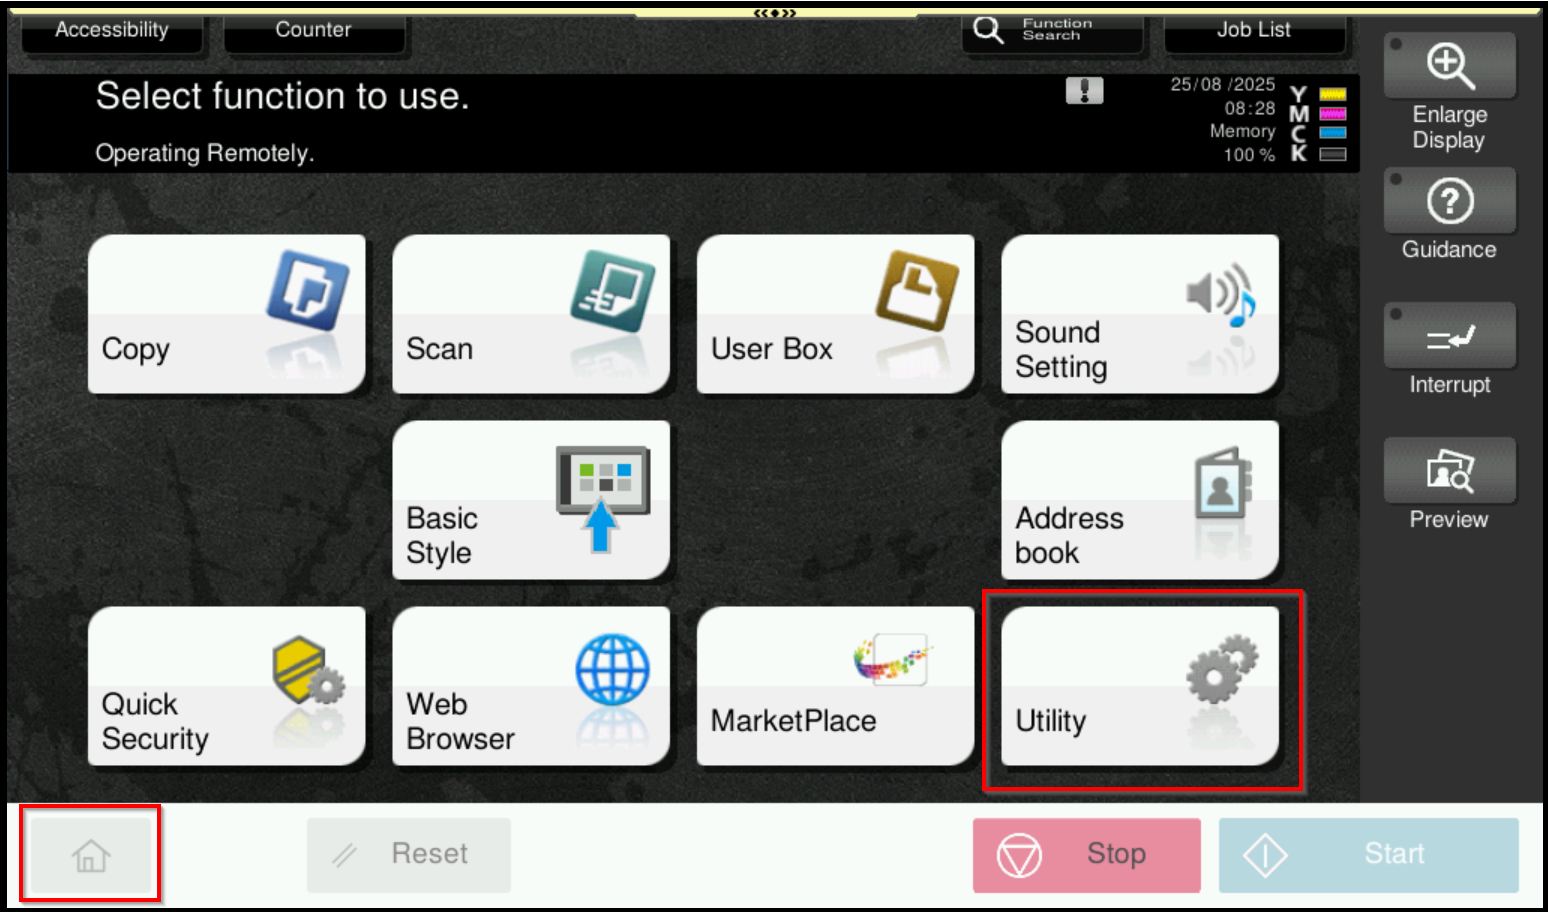
STEP 1 – Access the machine, select [Utility] – [Administrator Settings].
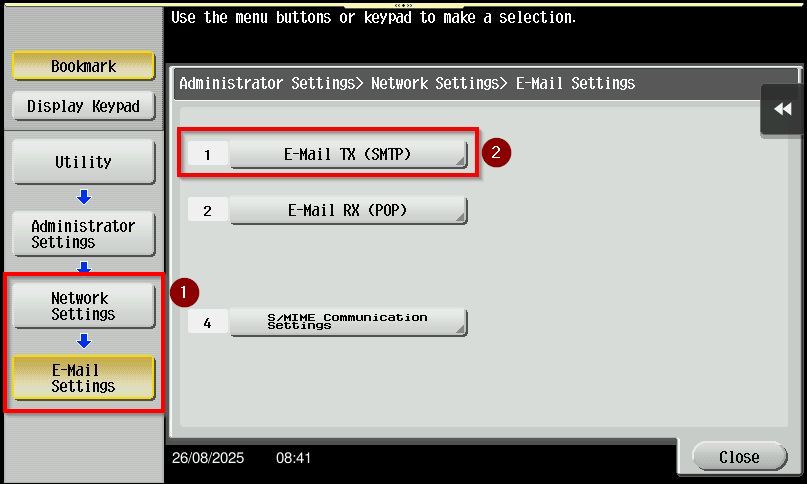
STEP 2 – Login as Administrator. Default administrator password will be either [7801261178012611] or [1234567812345678] or [12345678] or [12341234]. Once login proceed to [Network Settings] – [Email Settings] – [Email TX (SMTP)].
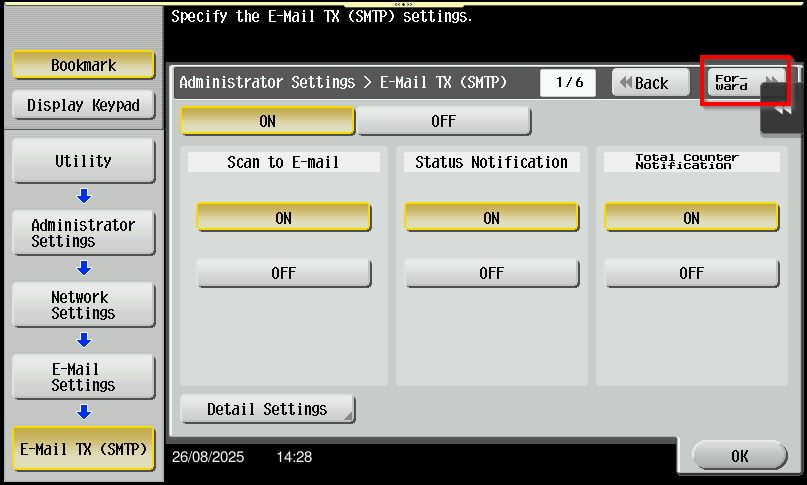
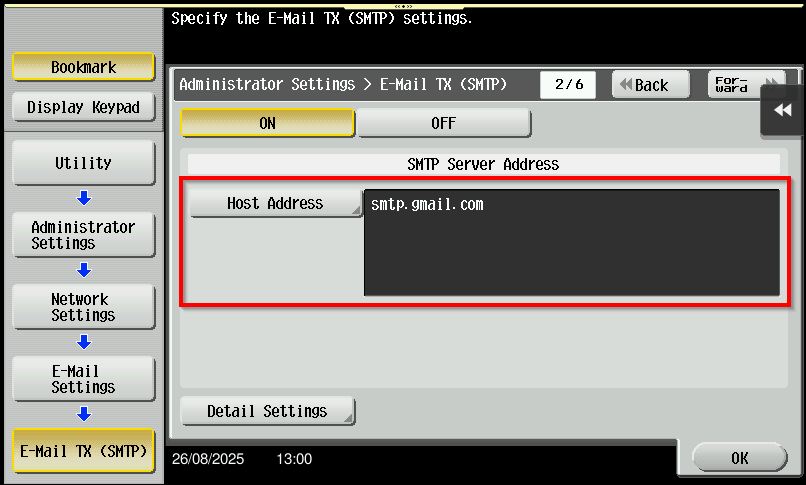
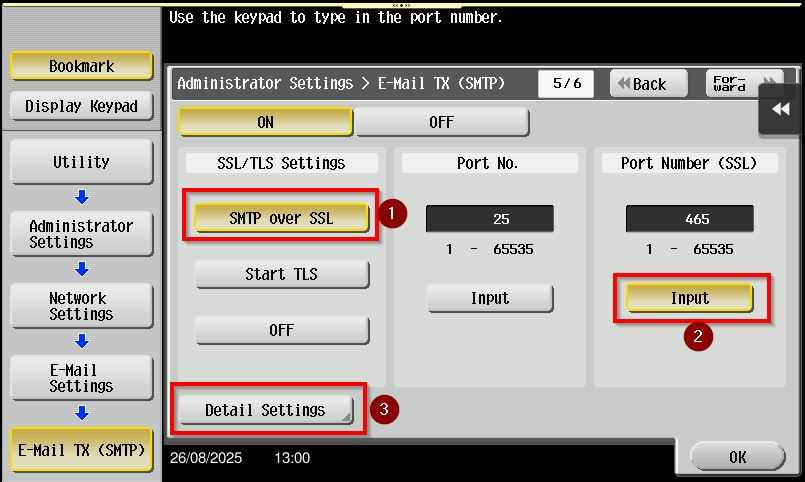
STEP 3 – Click on forward button to page 2/6, key in the SMTP server address to [smtp.gmail.com], then proceed to select forward button to page 5/6, select [SMTP Over SSL] and key in [465] under Port Number SSL. Once the setting has been adjusted, select [Detail Settings].
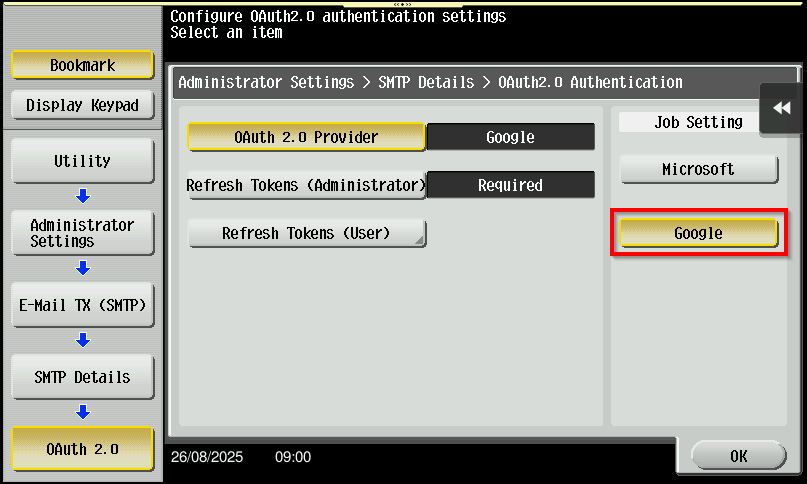
STEP 4 – Turn [ON] the OAuth 2.0 and select [Google] as the OAuth 2.0 Provider. Then, click [OK] to proceed.
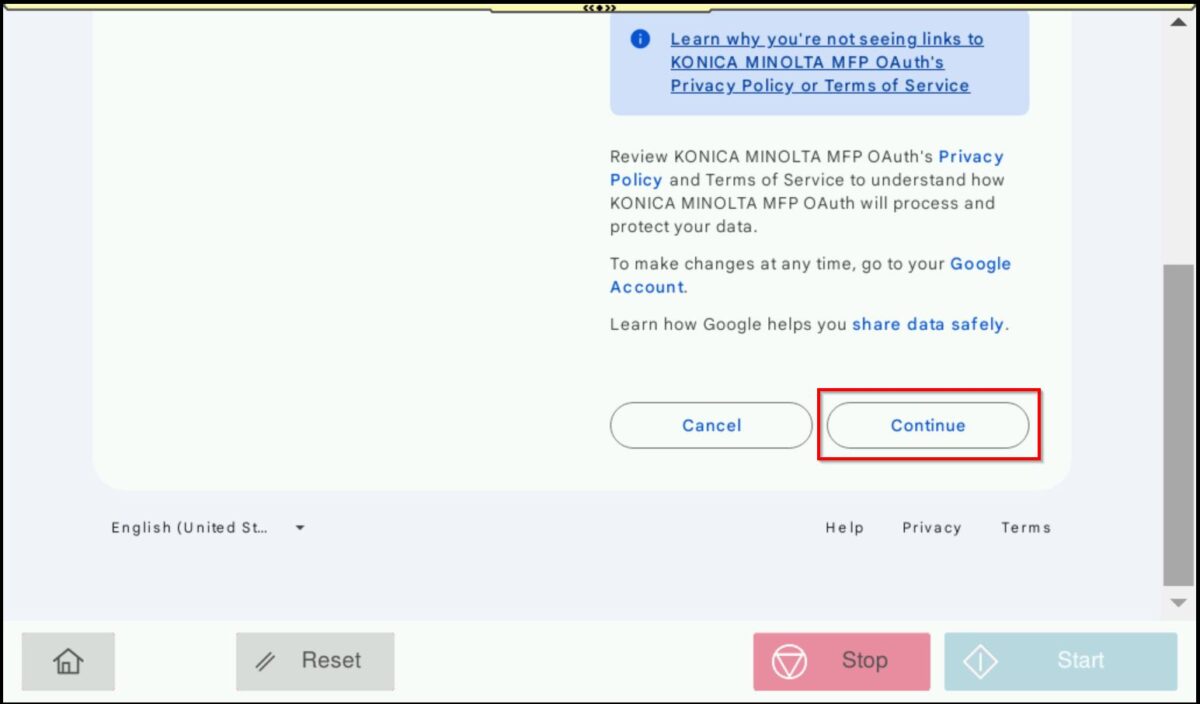
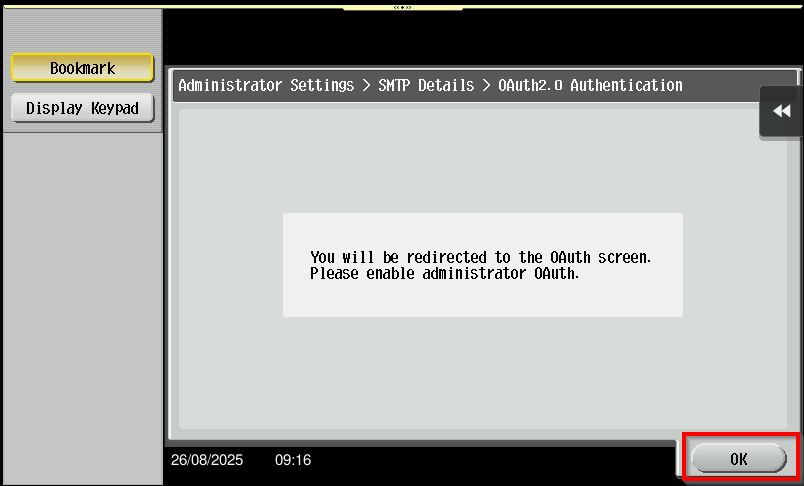
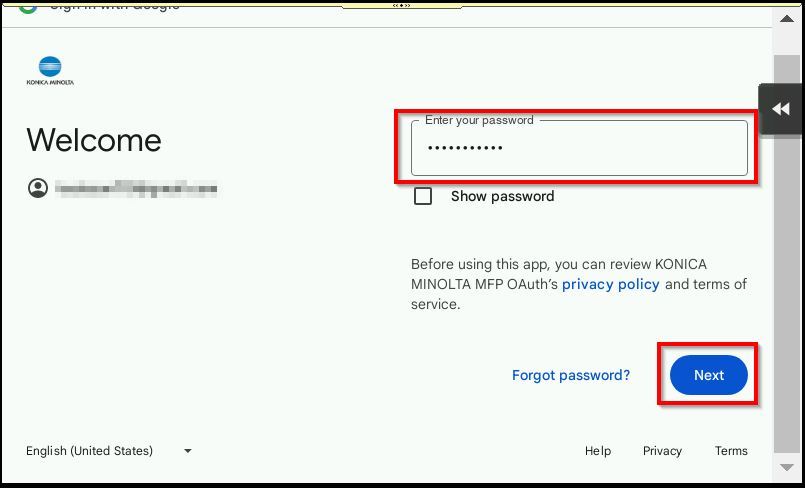
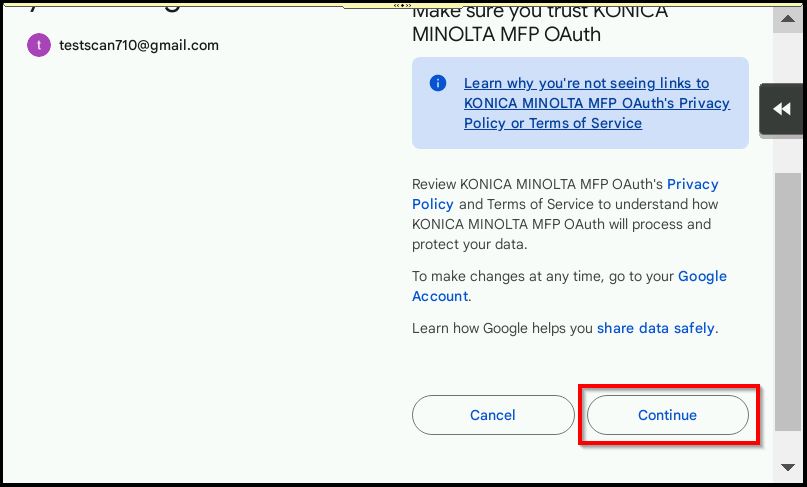
STEP 5 – After enabling OAuth 2.0, the [Google authentication] screen will appear.
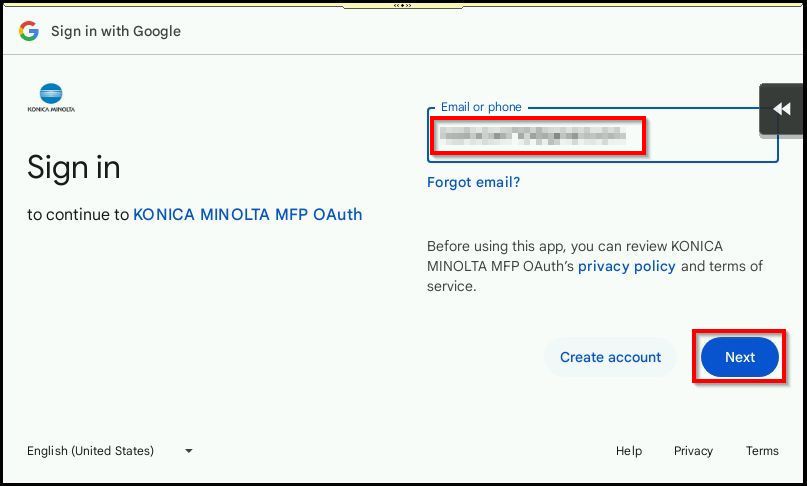
Enter the email address and password to complete the authentication then click [OK].
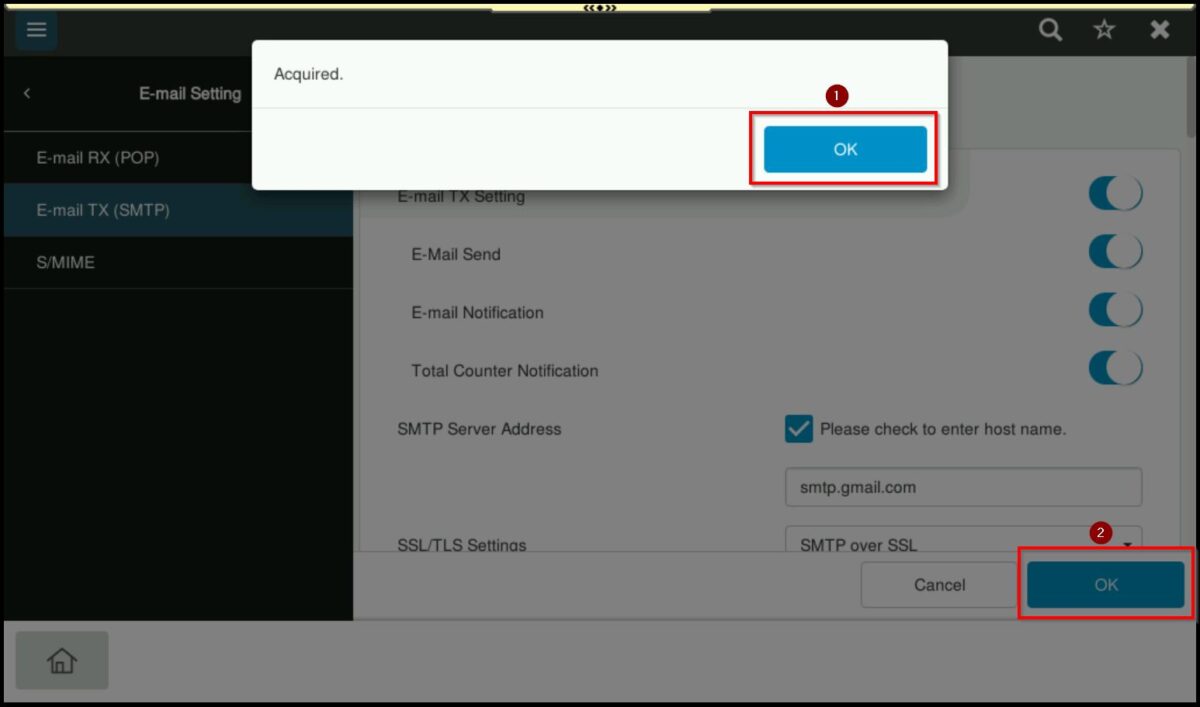
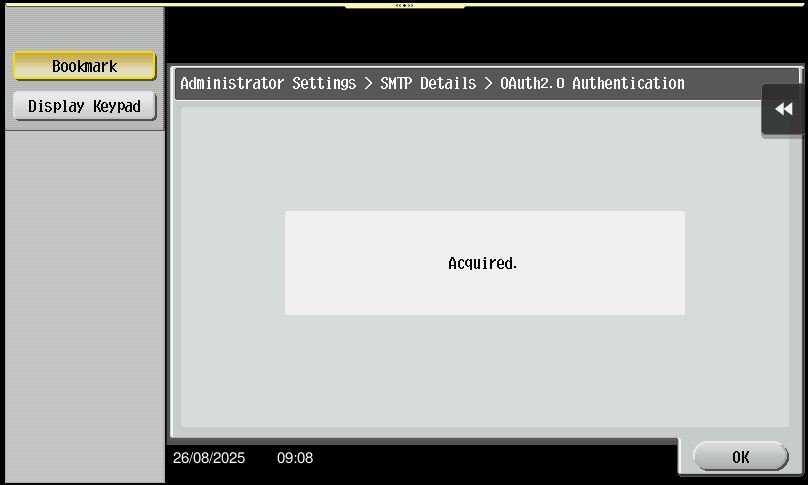
STEP 6 – Once the authentication is complete, the machine will display the message [Acquired].
Click [OK] twice to finalize the setup and then perform a test scan to email to confirm the configuration.
For the Newer Machine series / I-Series Machine (Part A: Web Connection)
STEP 1 – Access the machine Web Connection from the PC browser. Click this LINK on how to access Web Connection from the browser.
STEP 2 – Select [Administrator] and select [Login]. Default administrator password will be either [7801261178012611] or [1234567812345678] or [12345678] or [12341234].
STEP 3 – Navigate to [Home] – [Security] – [PKI Setting] – [Enable SSL Version] – [SSL/TLS Version Setting]. Set either the values as below. Click [OK] to save the setting once the setting has been set.
| Min | Max |
| TLSv1.2 | TLSv1.2 or TLSv1.3 |
| TLSv1.3 | TLSv1.3 |
*If the TLSv1.3 is selected for TLSv1.2 & TLSv1.3, please set the HTTP version to “HTTP/2, HTTP/1.1“
STEP 4 – Proceed to [System Settings] – [Machine Setting], key in [Email address] under Administrator Registration and Input Machine Address, click [OK] to save the setting.
STEP 5 – Go back to [Home] – [Network] – [WebDAV Settings] – [WebDAV Client Settings] – [WebDAV TX Setting] – [ON]. This is required as to obtain a refresh token. Once this step has been done, kindly proceed to Part B which need to do on the printer screen panel.
For the Newer Machine series / I-Series Machine (Part B: Remote Panel Machine)
STEP 1 – Access the machine, select [Home] – [Utility] – [Administrator].

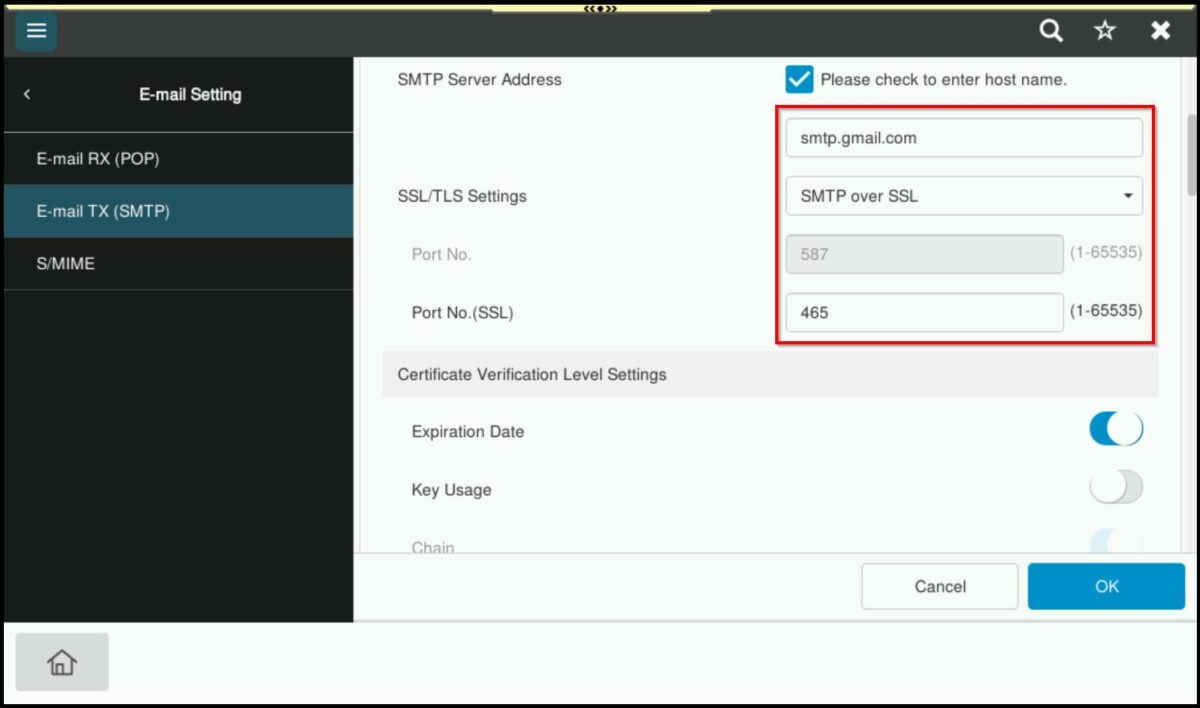
STEP 2 – Login as Administrator, default administrator password will be either [7801261178012611] or [1234567812345678] or [12345678] or [12341234]. Once login proceed to [Network] – [Email Settings] – [Email TX (SMTP)]. Key in the SMTP Server Address as below for Google.
- SMTP Server Address: smtp.gmail.com
- SSL/TLS Settings: SMTP over SSL
- Port No: 465

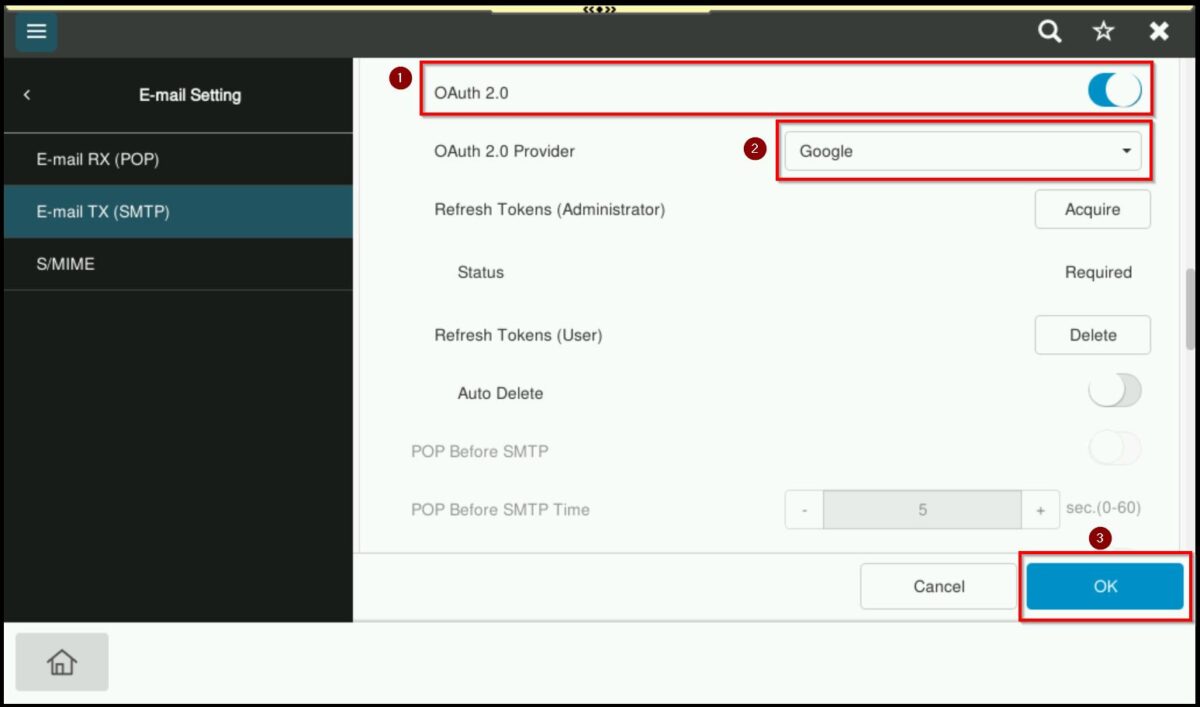
STEP 4 – Set the OAuth 2.0 as [ON] and setting select [Google] as OAuth 2.0 provider. After that click [OK].
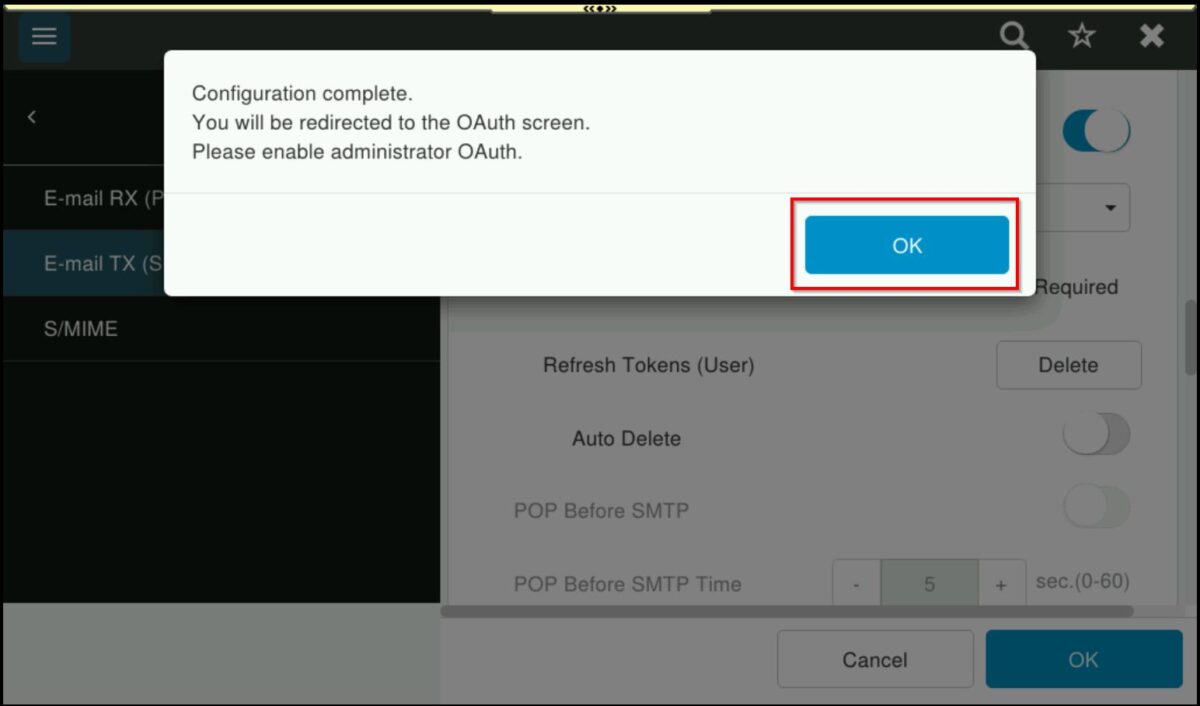
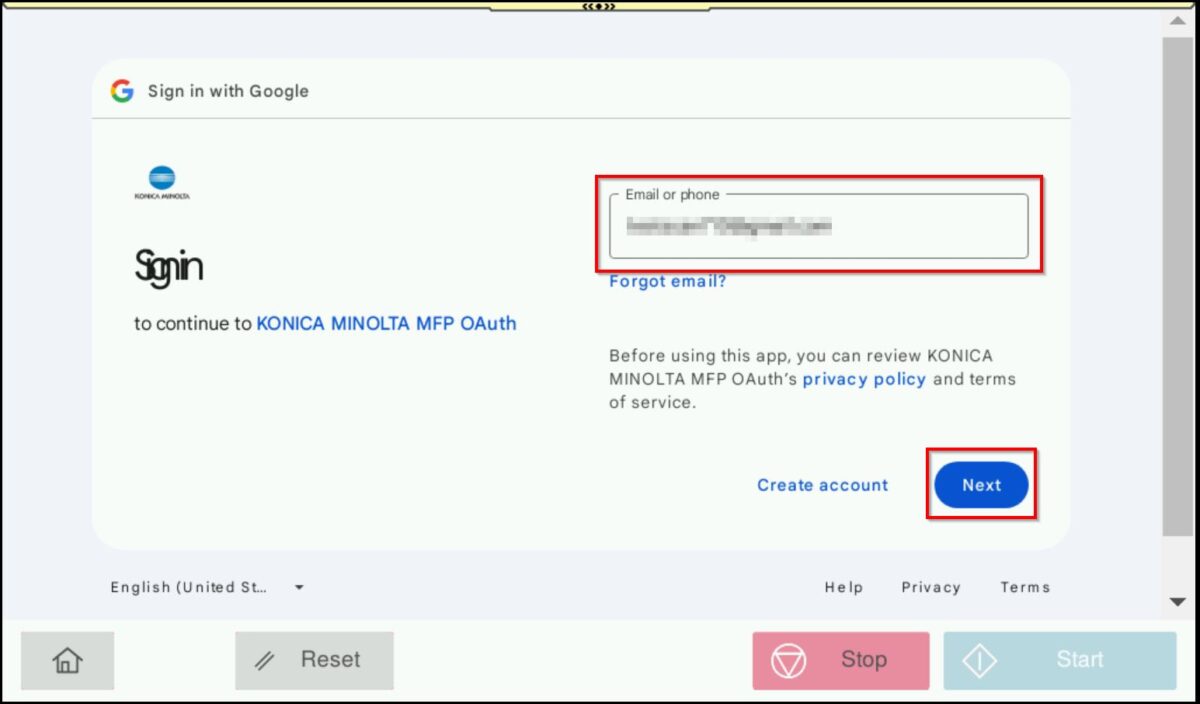
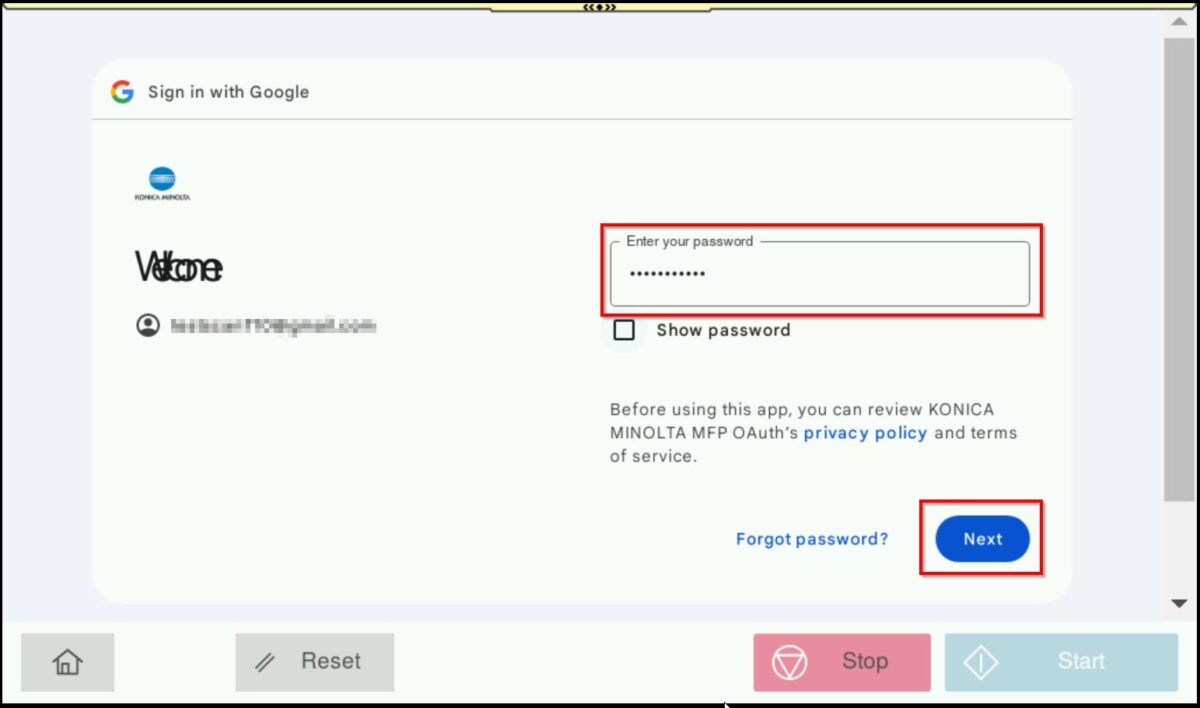
STEP 5 – After enabling OAuth 2.0, the [Google authentication] screen will appear.
Enter the email address and password to complete the authentication then click [OK].
STEP 6 – Once the authentication is complete, the machine will display the message [Acquired].
Click [OK] twice to finalize the setup and then perform a test scan to email to confirm the configuration.