Guide On How To Setup Scan To URL
Requirements:
- Configuring the environment to use the Scan to E-mail function
- Installing the MFP authentication or external server authentication
- Registering an E-mail address as user’s registration information
- Enabling the Scan to URL function of this machine
For the Older Machine series / Non I-Series Machine
STEP 1 – Access the machine Web Connection from the PC browser. Click this LINK on how to access Web Connection from the browser.
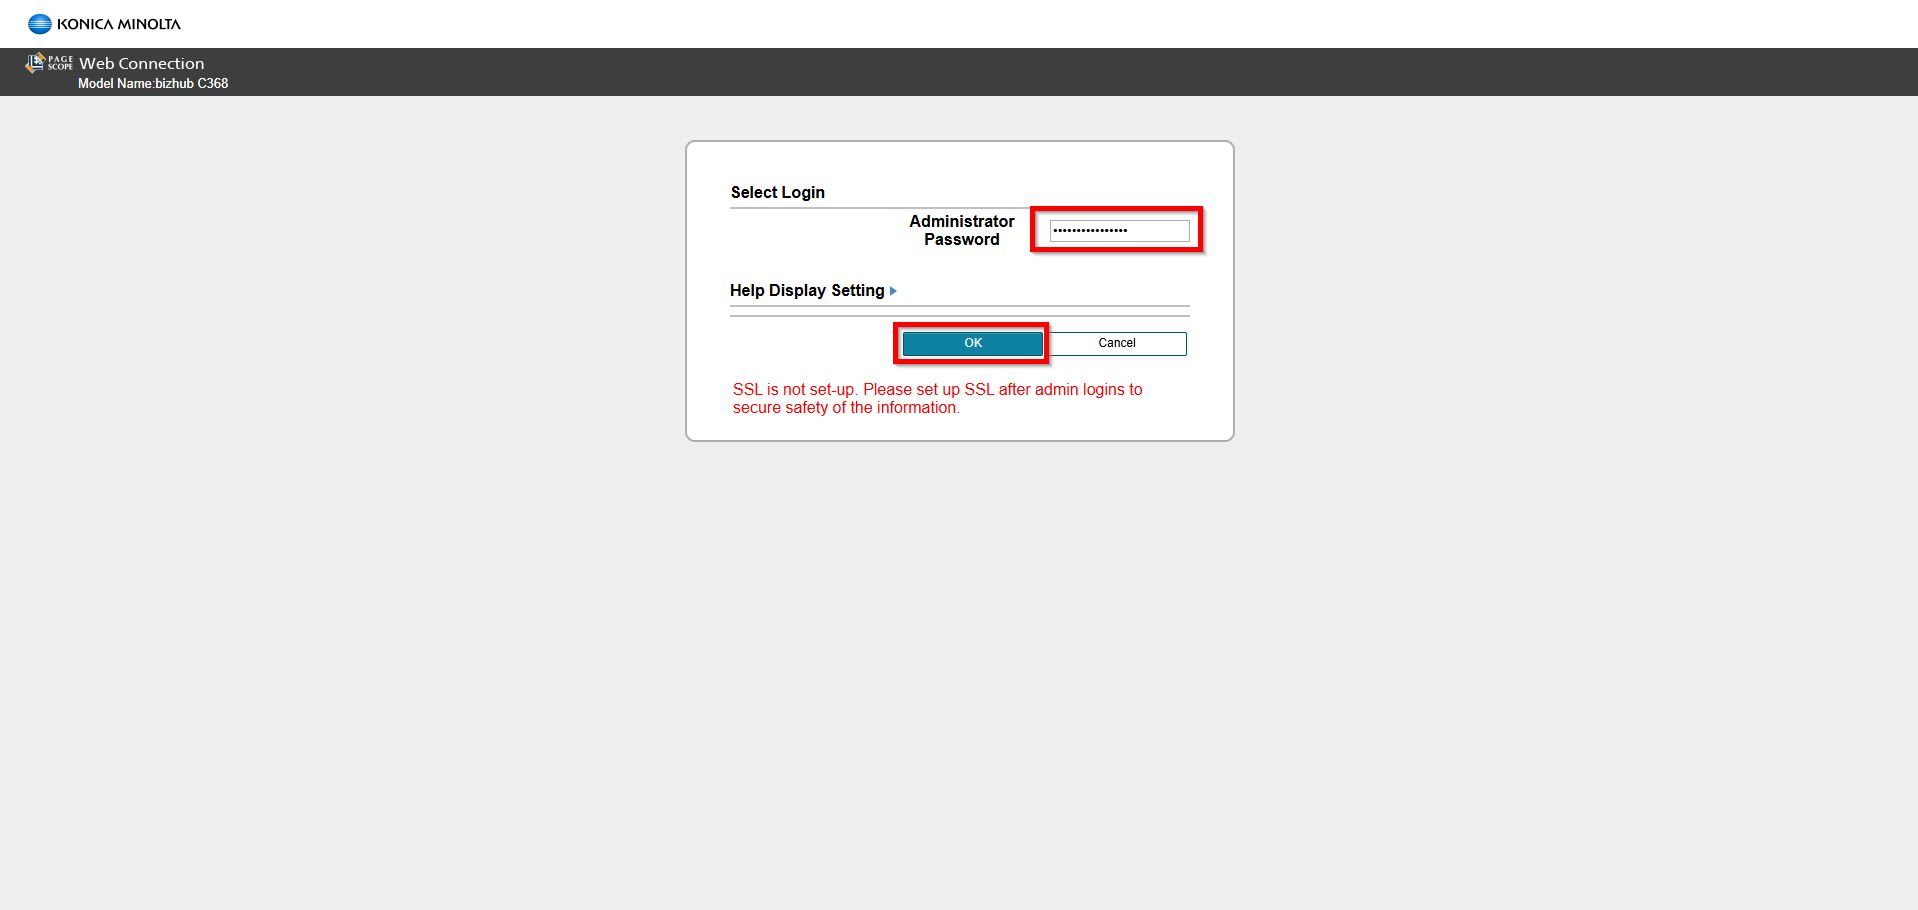
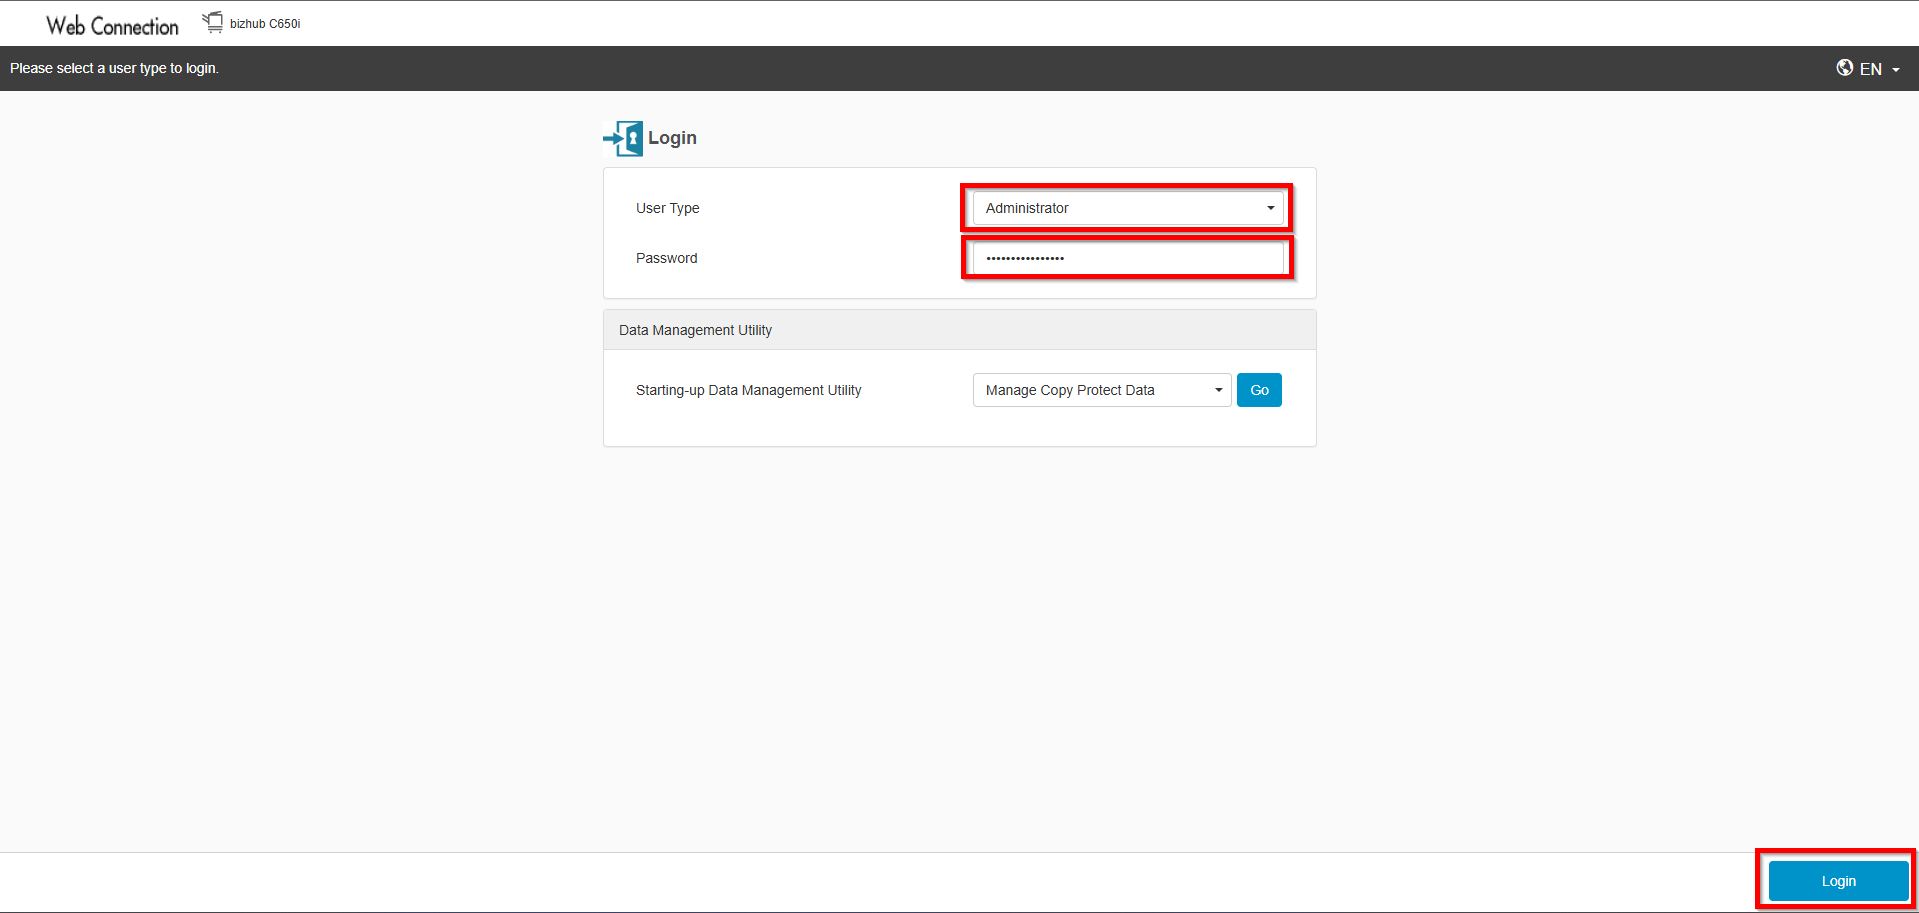
STEP 2 – Select [Administrator] and select [Login]. Key in the [Administrator Password] and click [OK] to login. Default administrator password will be either [7801261178012611] or [1234567812345678] or [12345678] or [12341234].

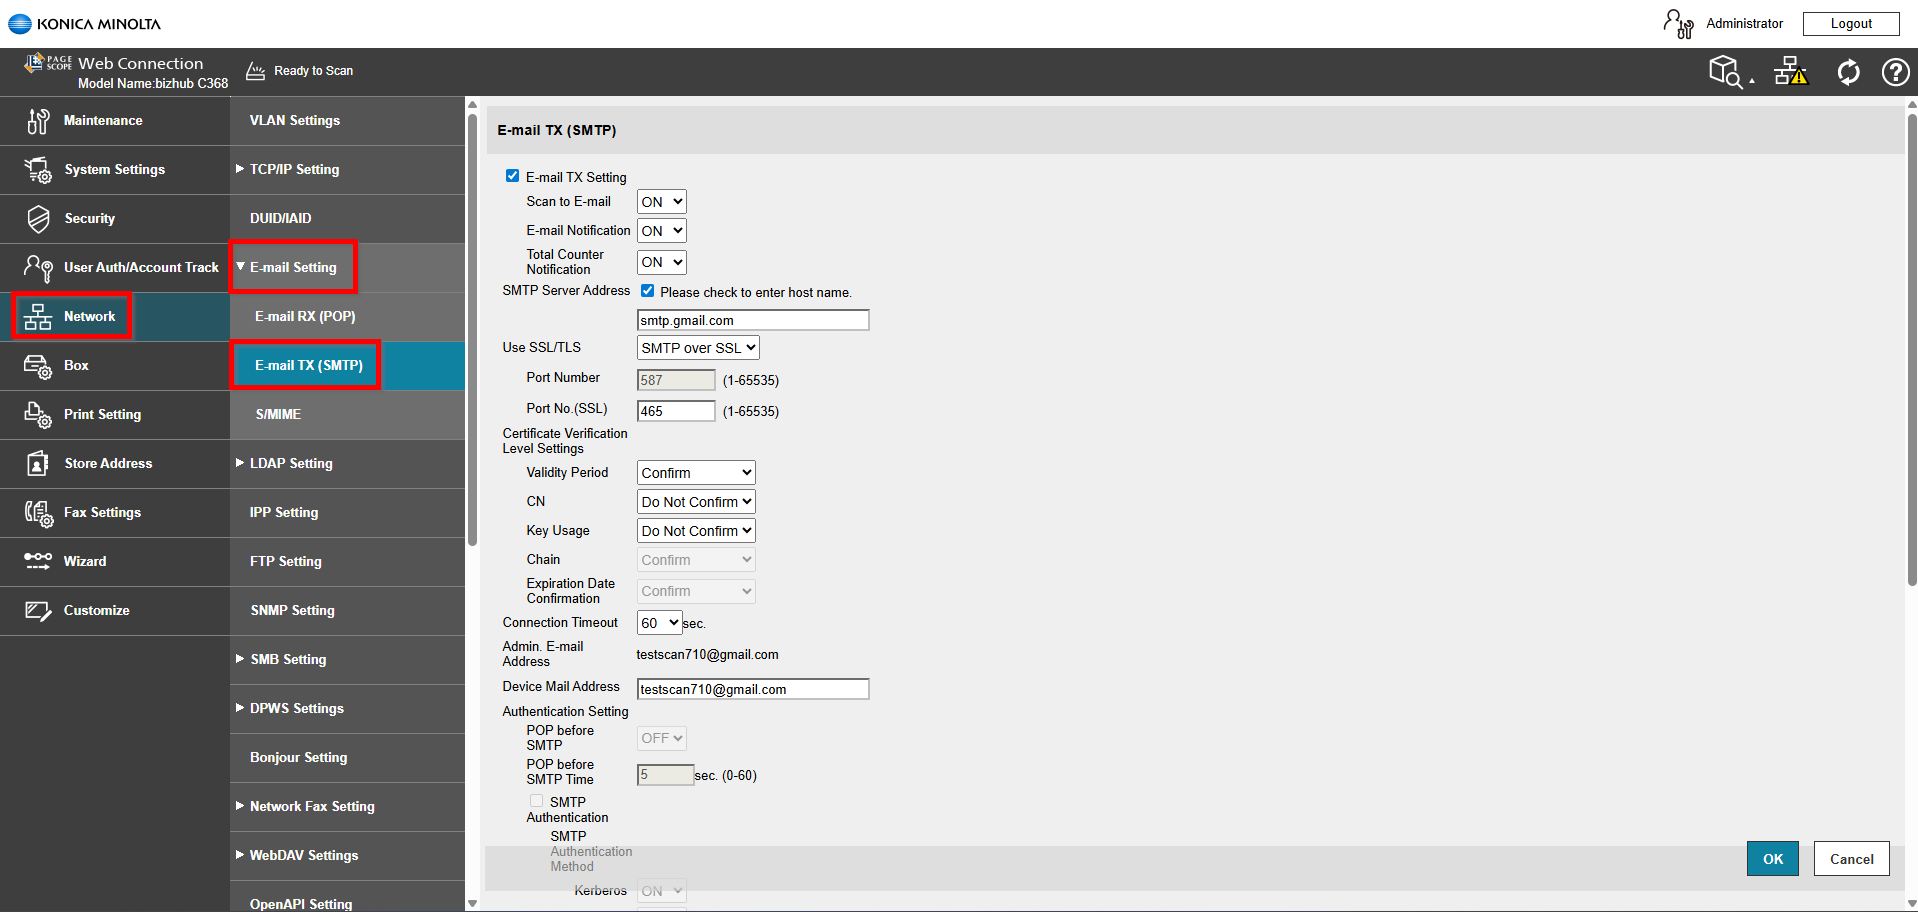
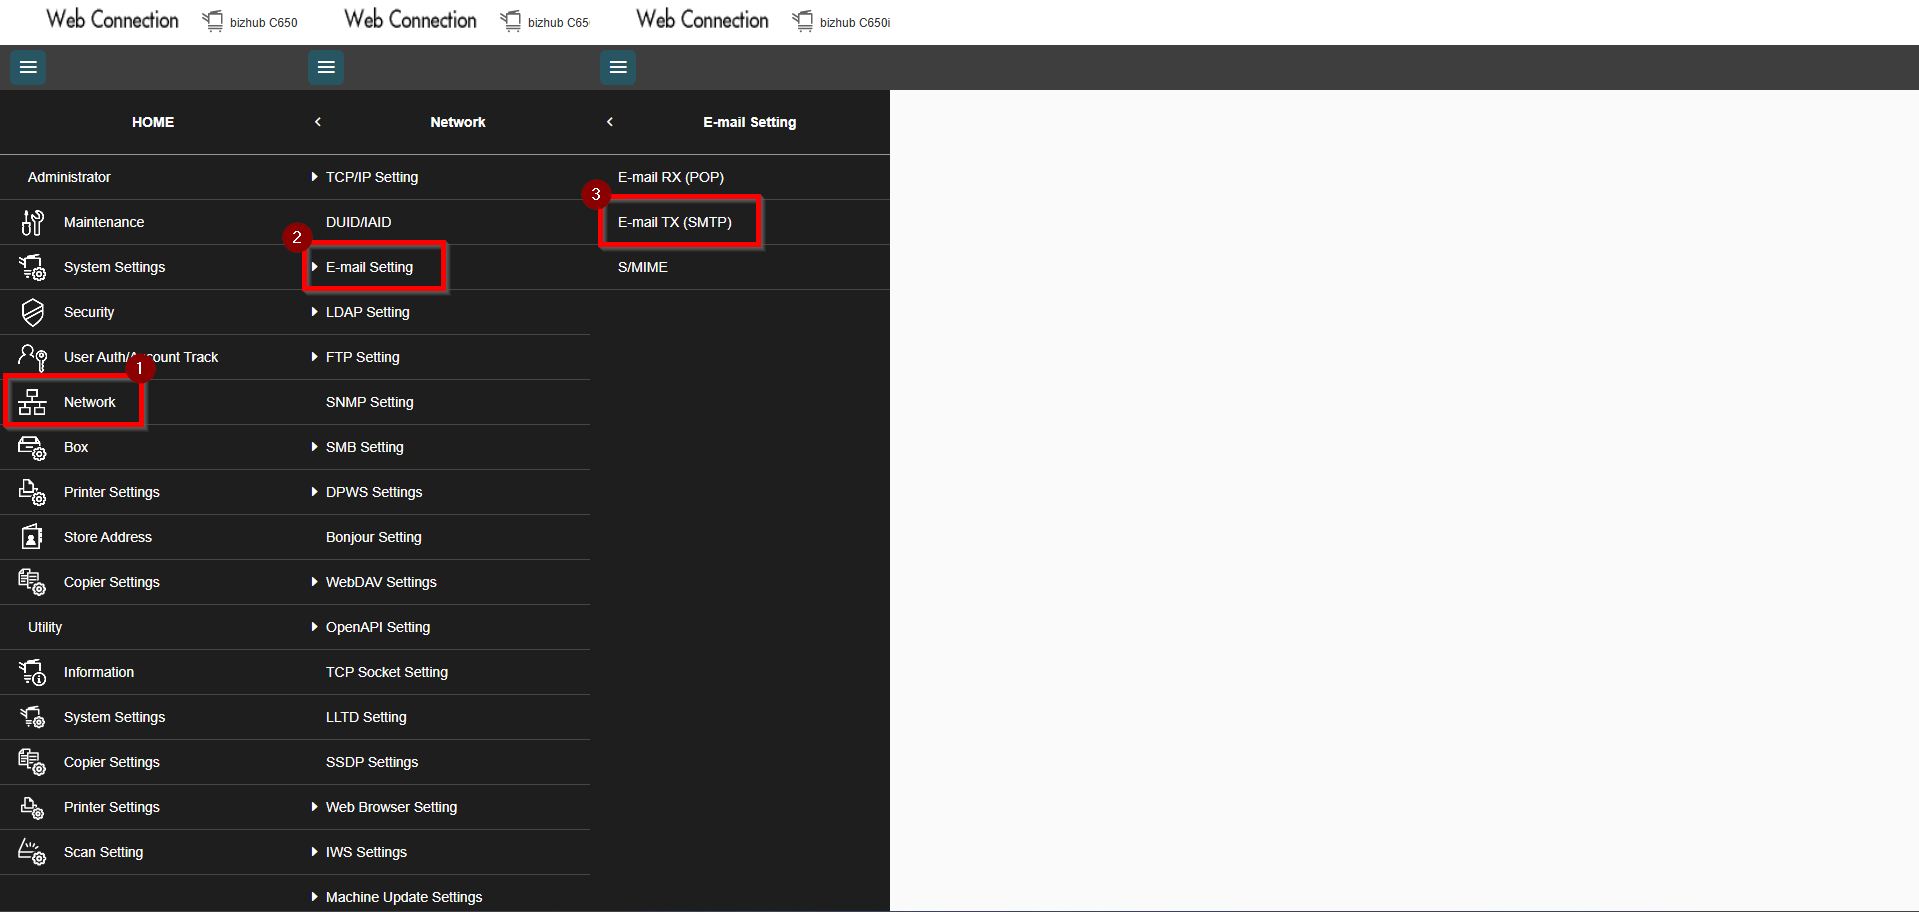
STEP 3 – Select [Network] – [Email Setting] – [Email TX (SMTP)] to setup Scan to Email function.
Kindly click on the LINK to complete the step on how to setup scan to email.
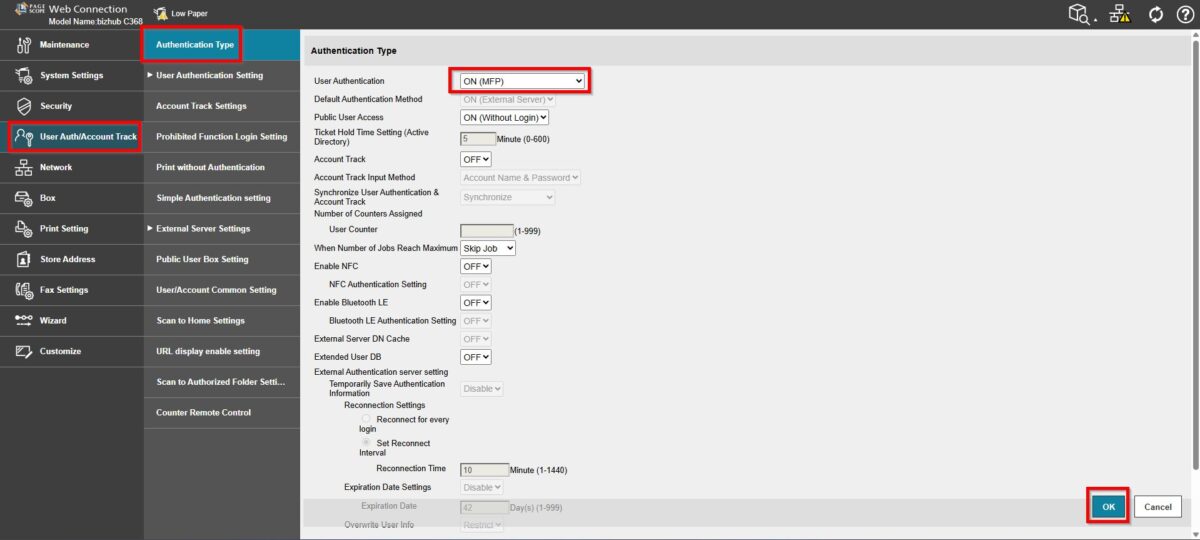
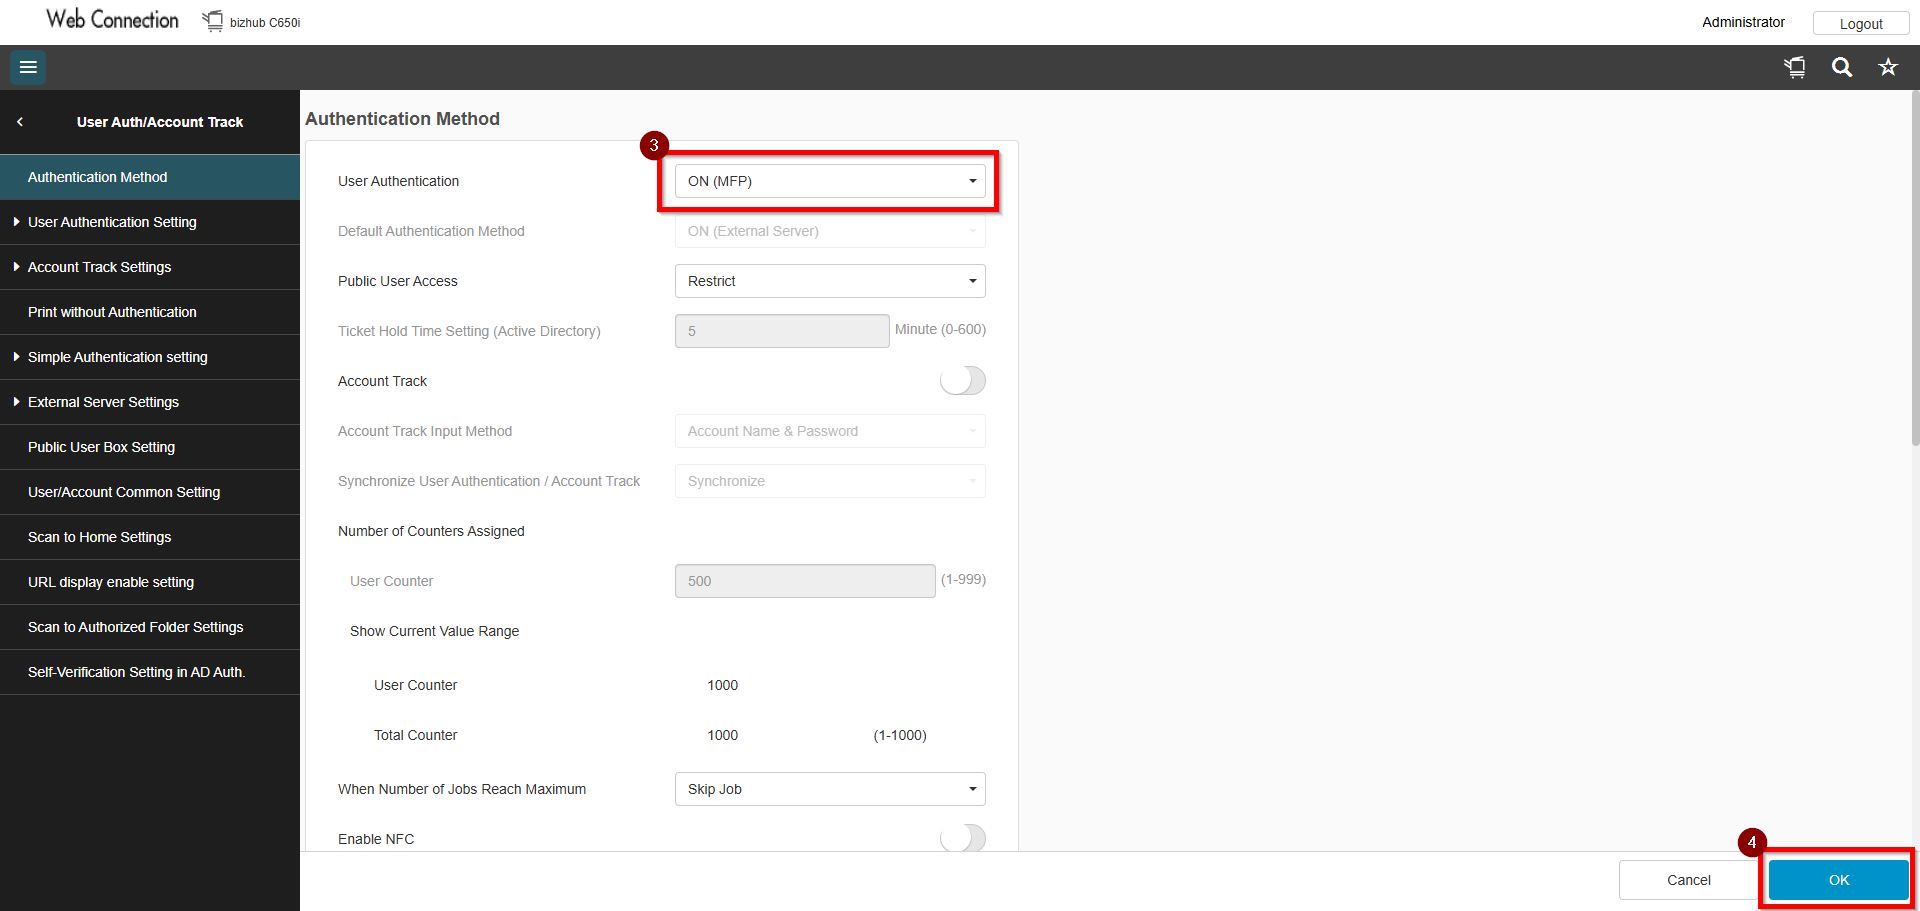
STEP 4 – After completing step above, select [User Auth/Account Track] – [Authentication Type] and set the User Authentication to [ON (MFP)].
Kindly click on the LINK to complete the step on how to enable user authentication.
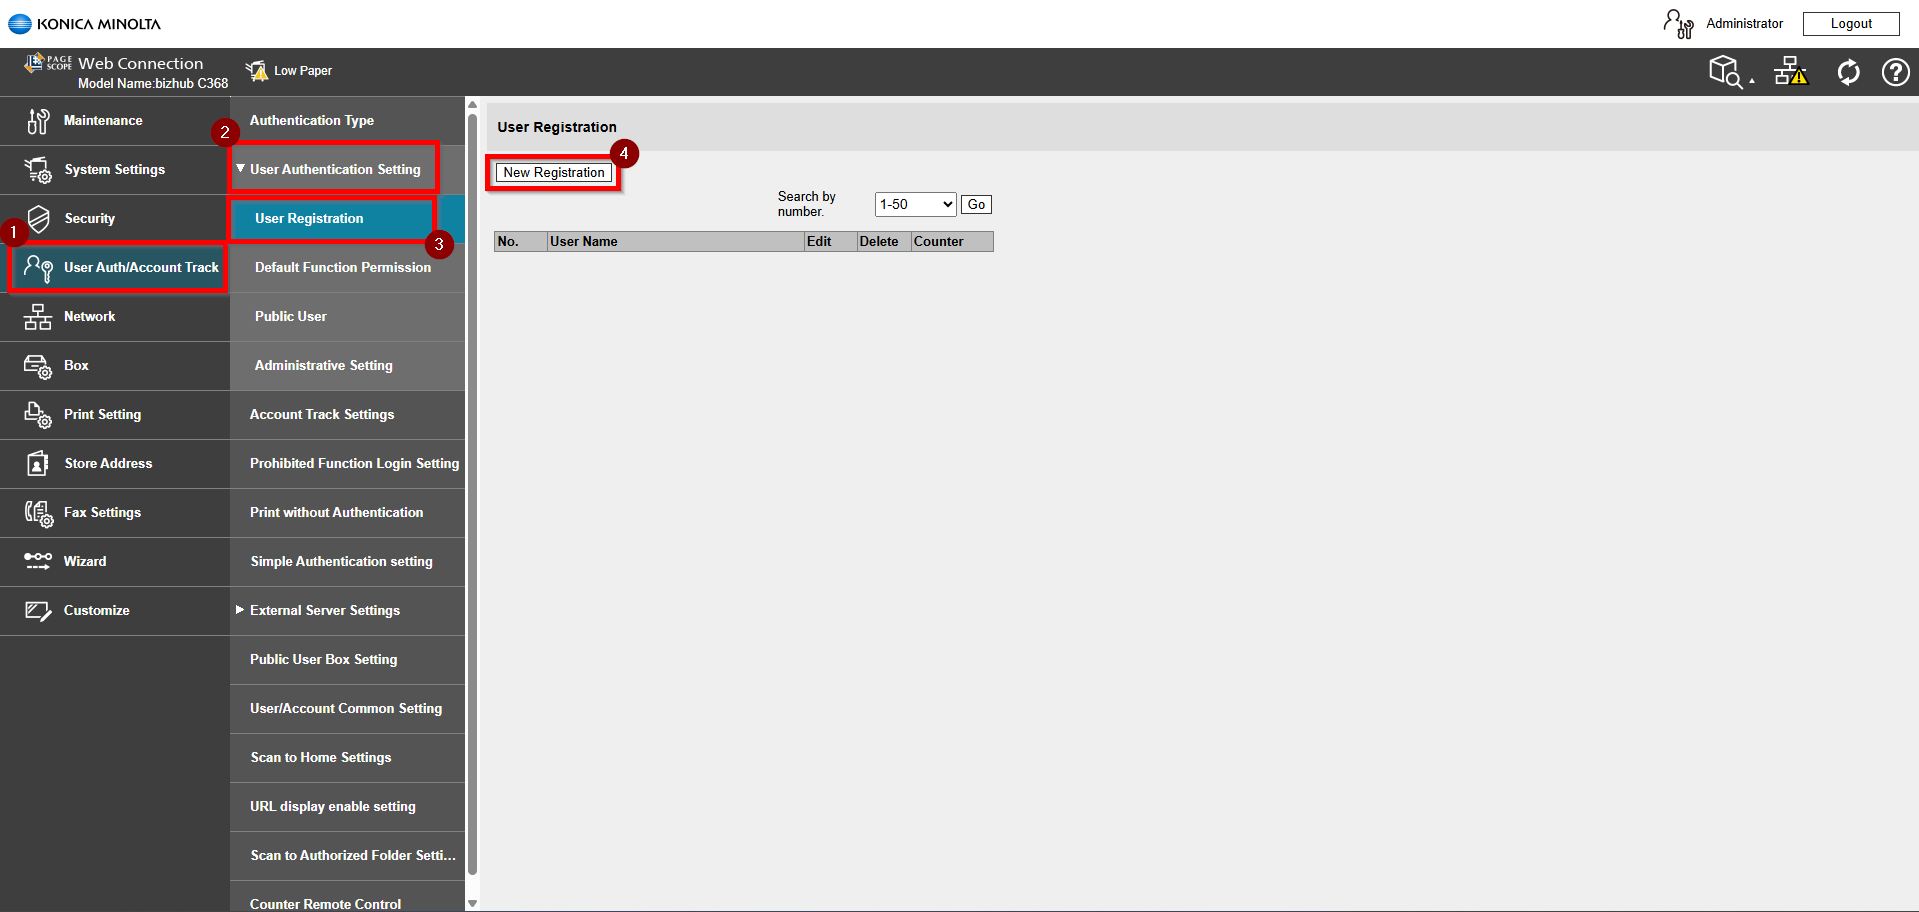
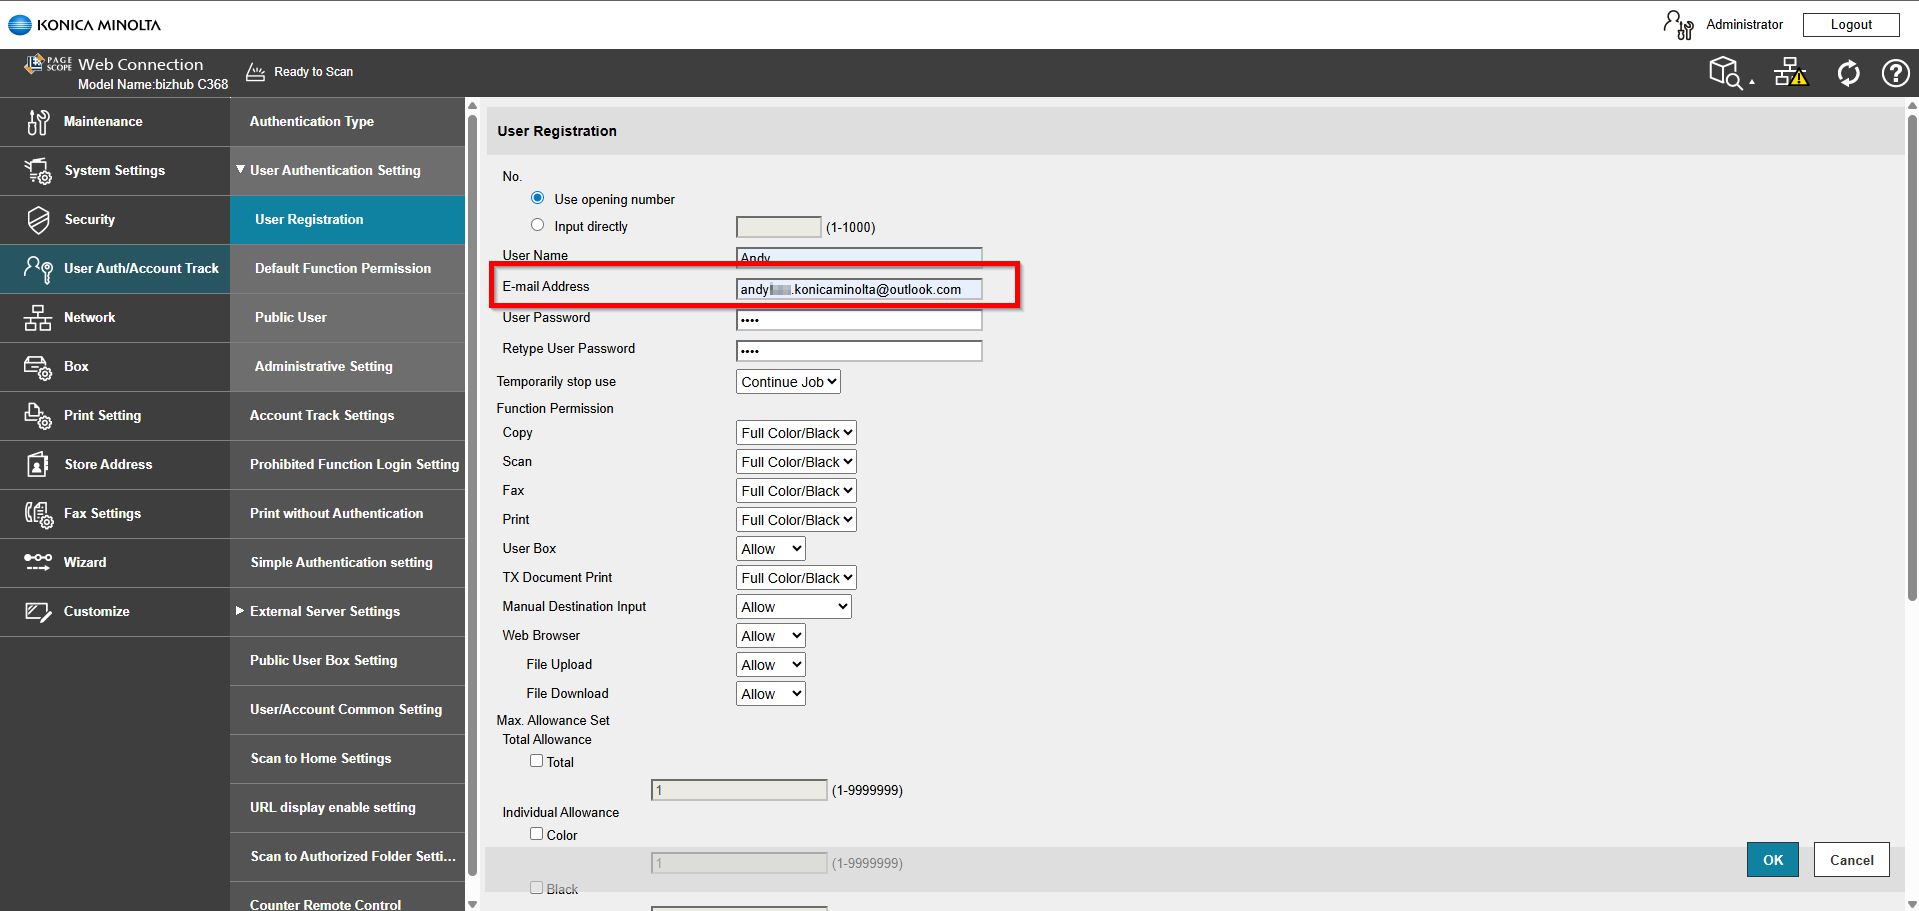
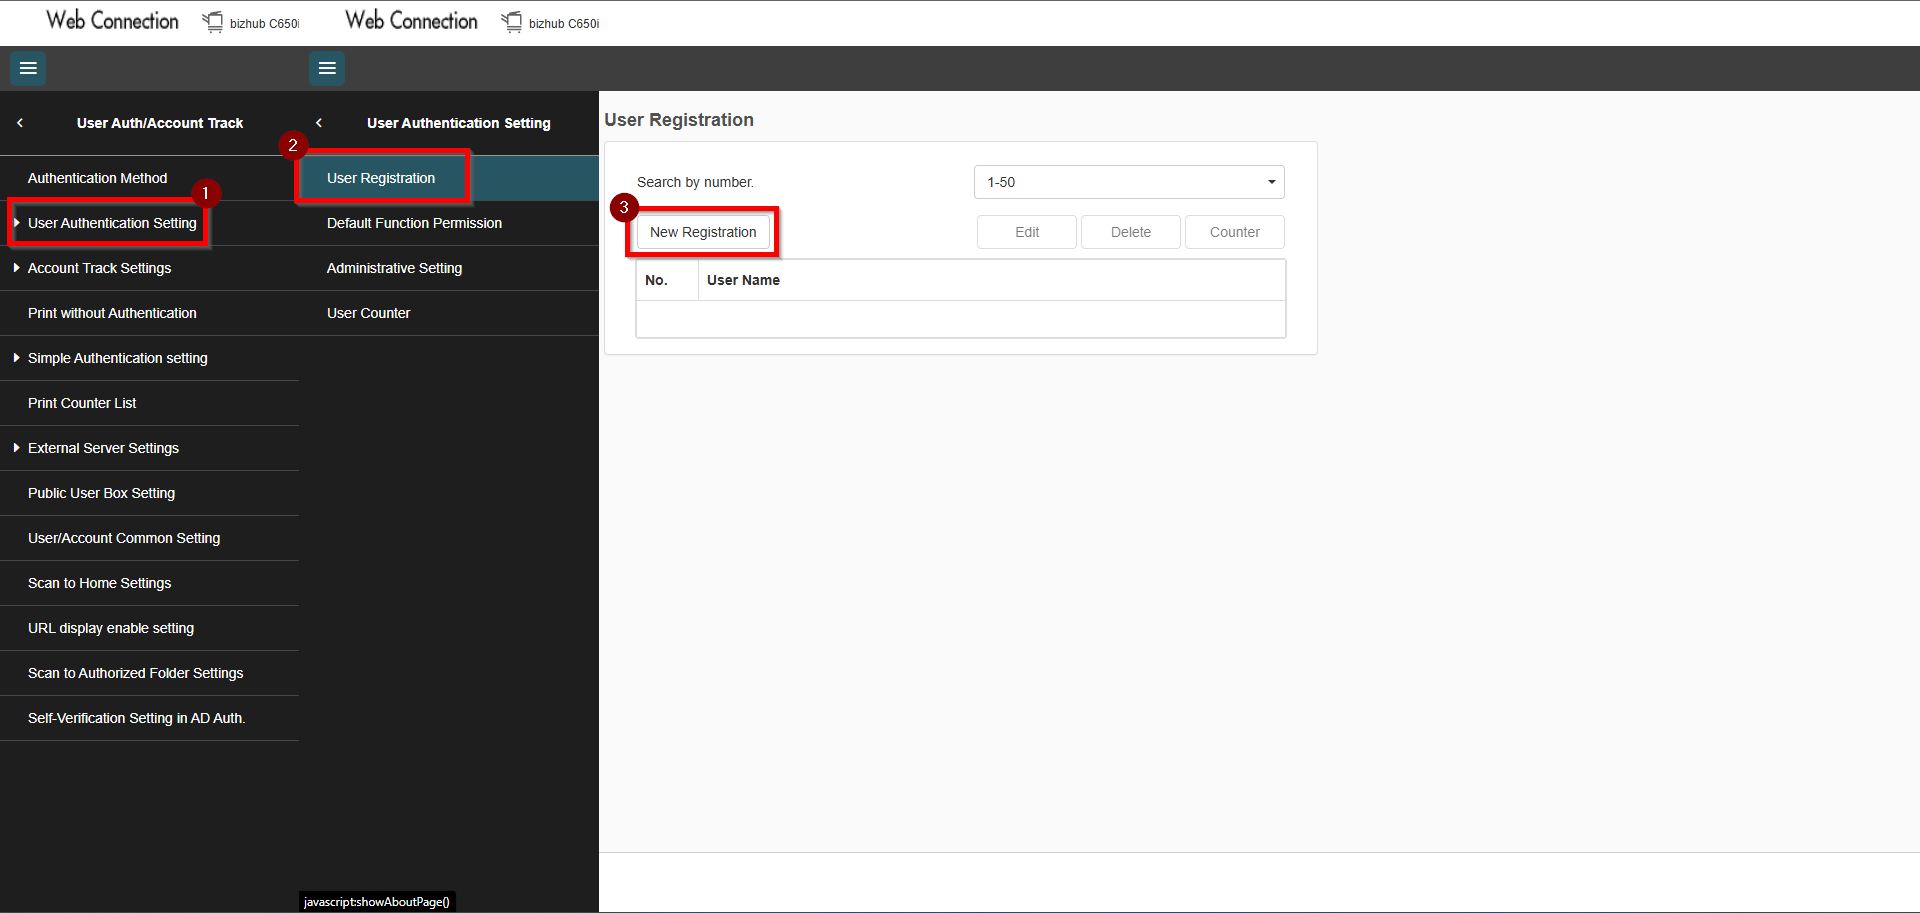
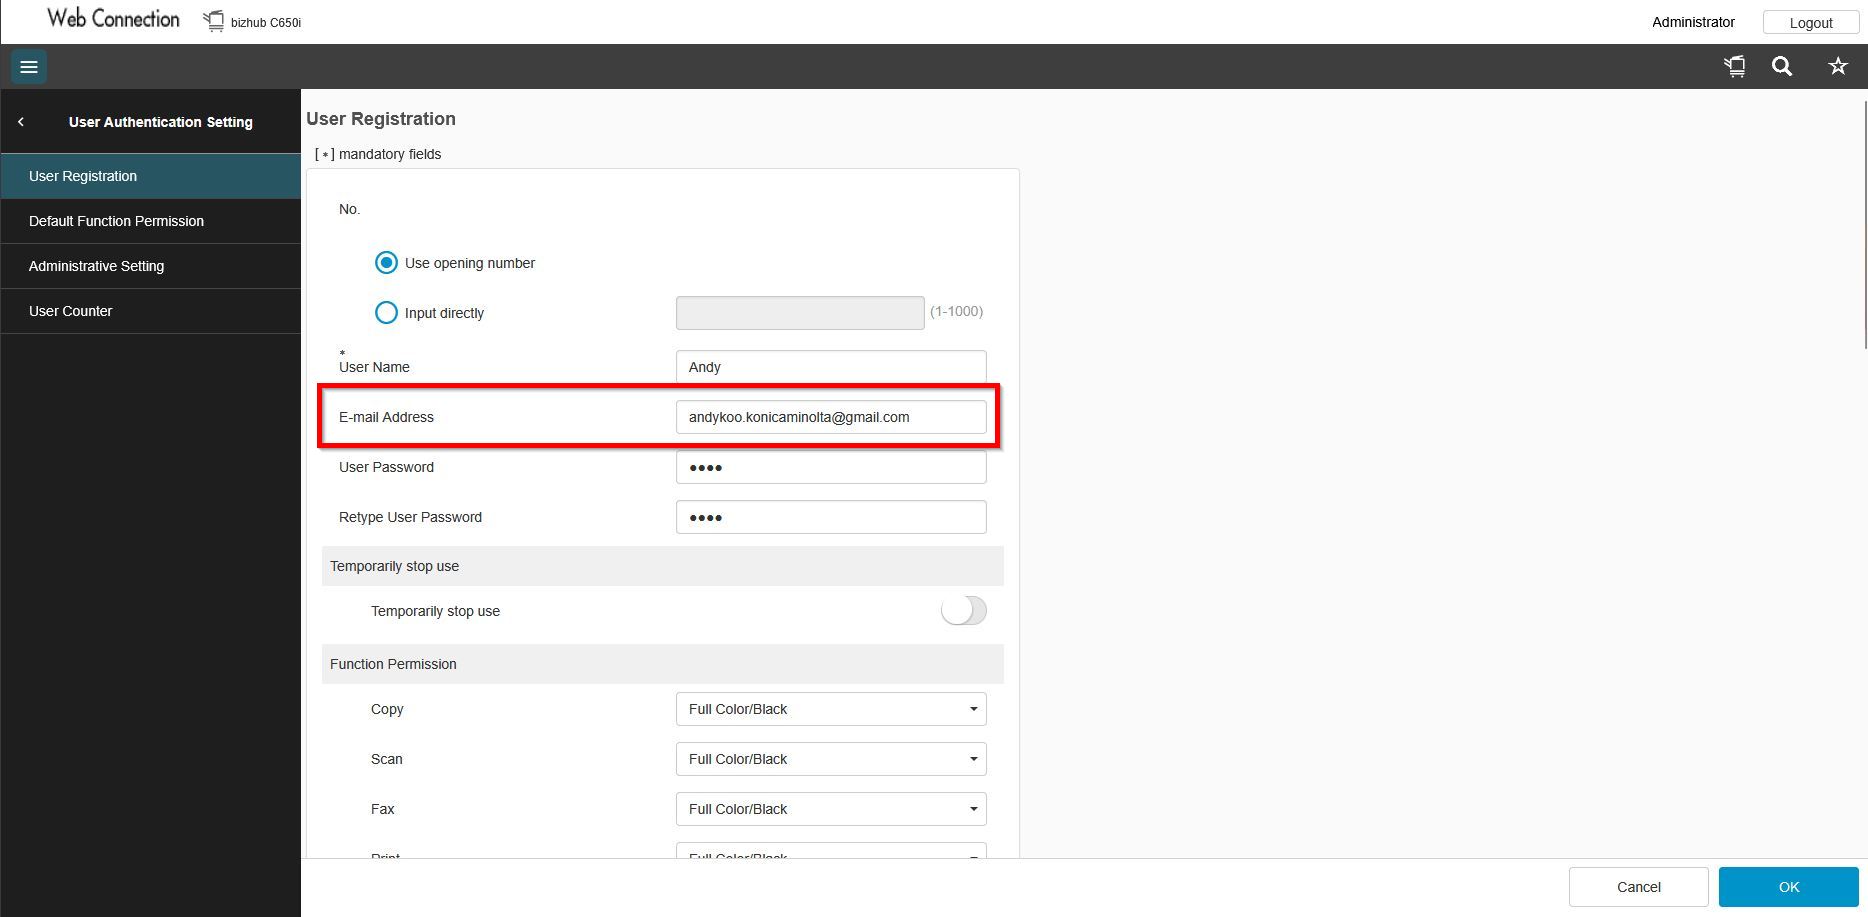
STEP 5 – After completing step above, select [User Auth/Account Track] – [User Authentication Settings] – [User Registration] then click [New Registration] to register a user. Ensure that the [Email Address] is entered in the column.
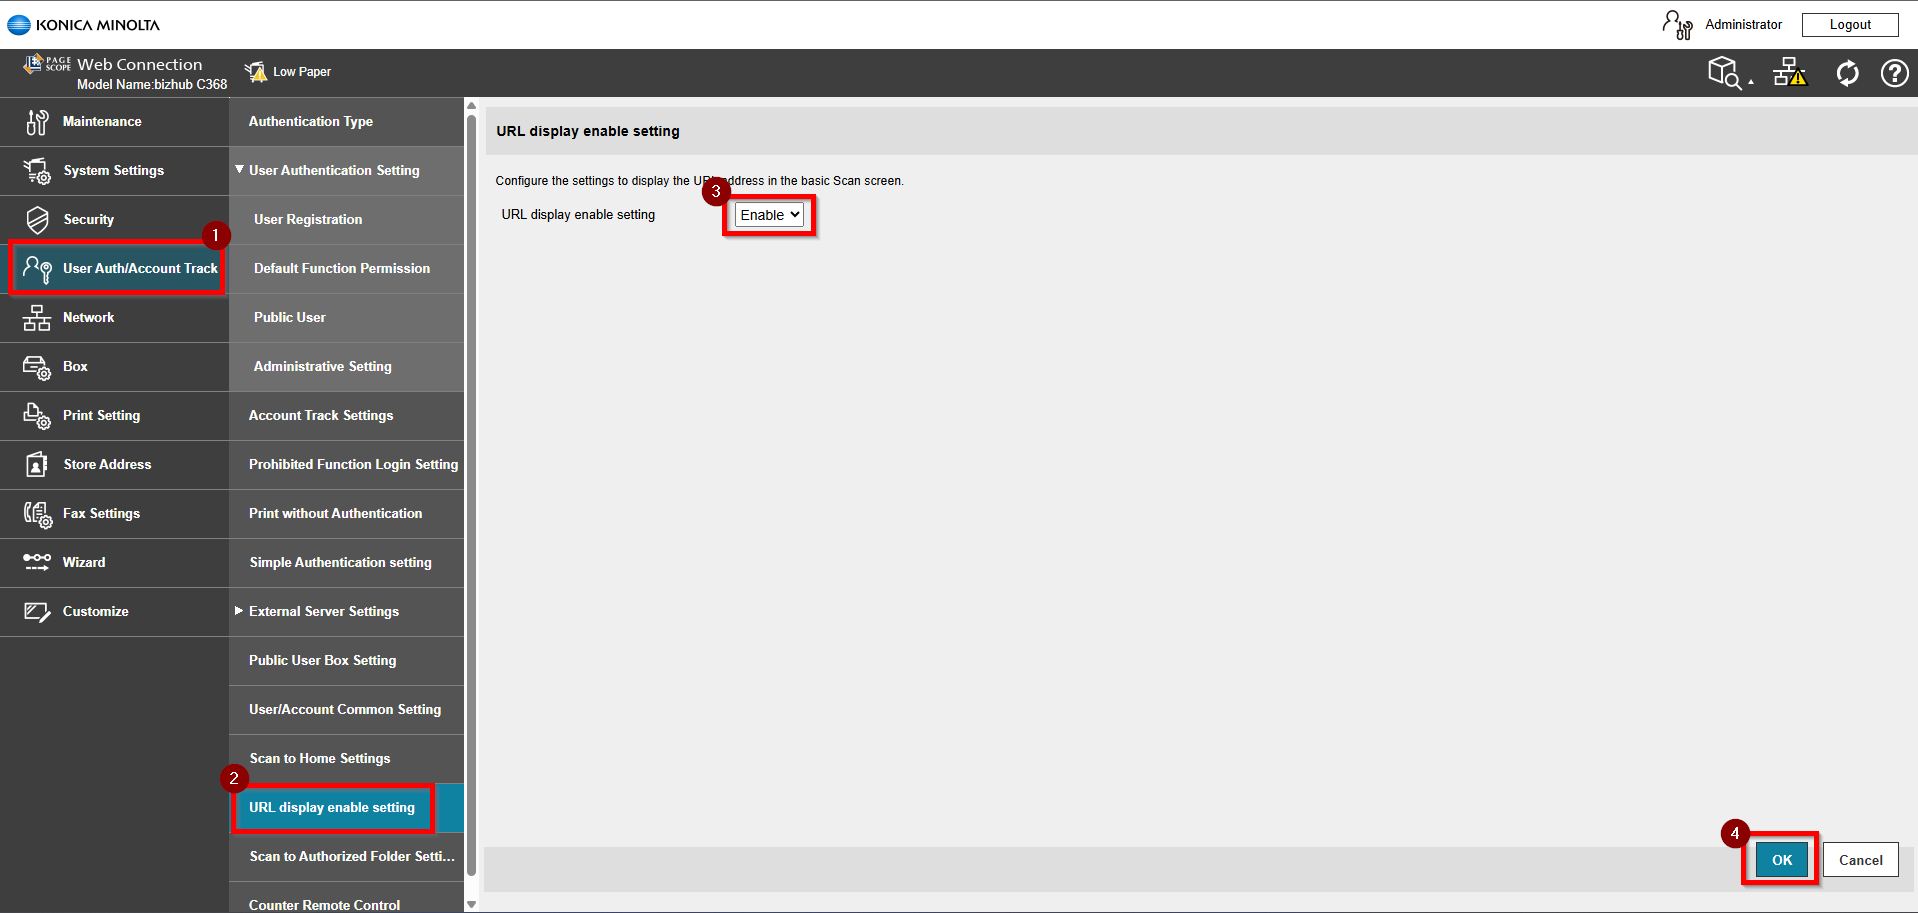
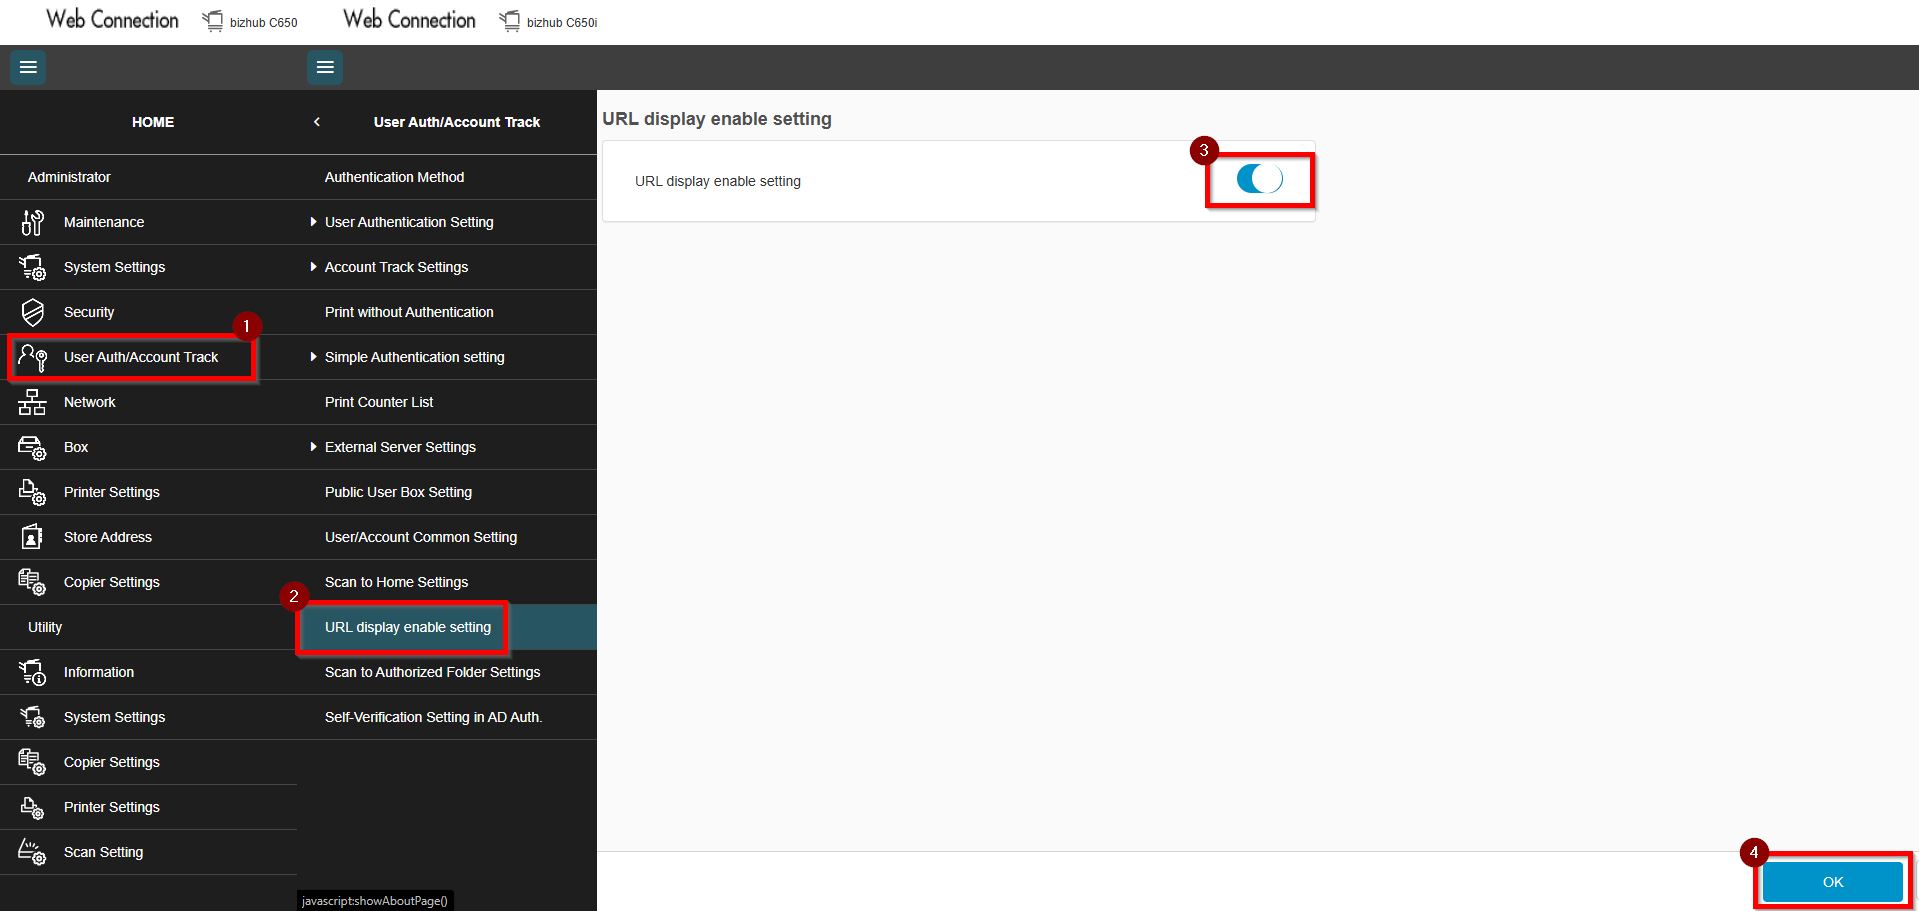
STEP 6 – After completing step above, select [User Auth/Account Track] – [URL Display Enable Setting]. Ensure that the URL display enable setting is [Enable] then click [OK] to save.
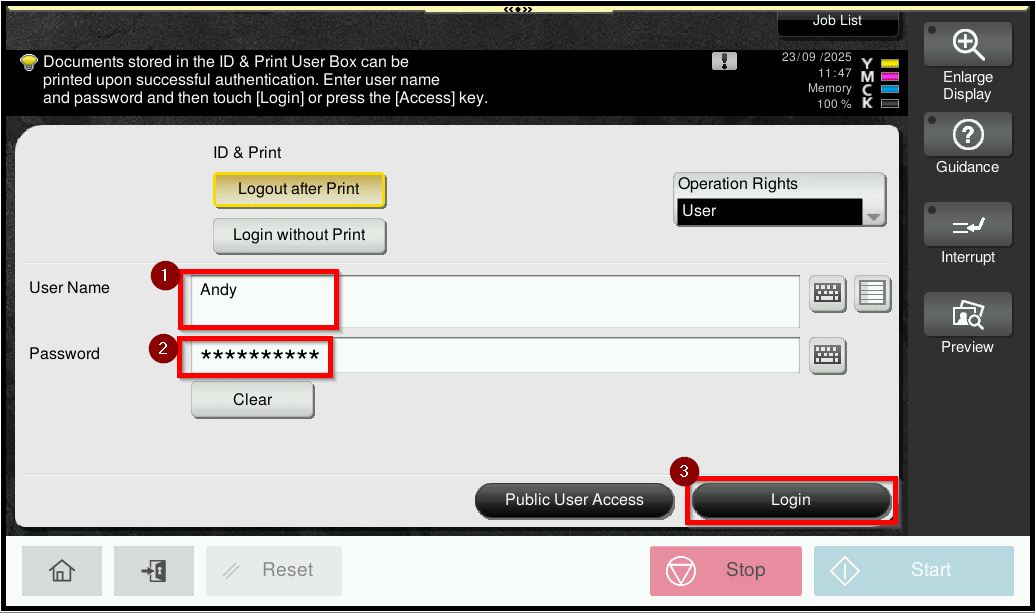
STEP 7 – After completing all the steps above, go to the photocopier machine panel and click on the [Access] button. Key in the username and password that registered and click on [Login].

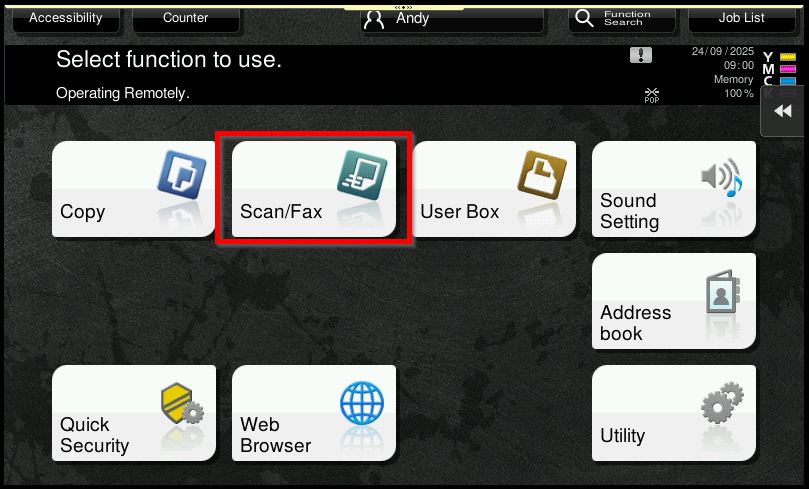
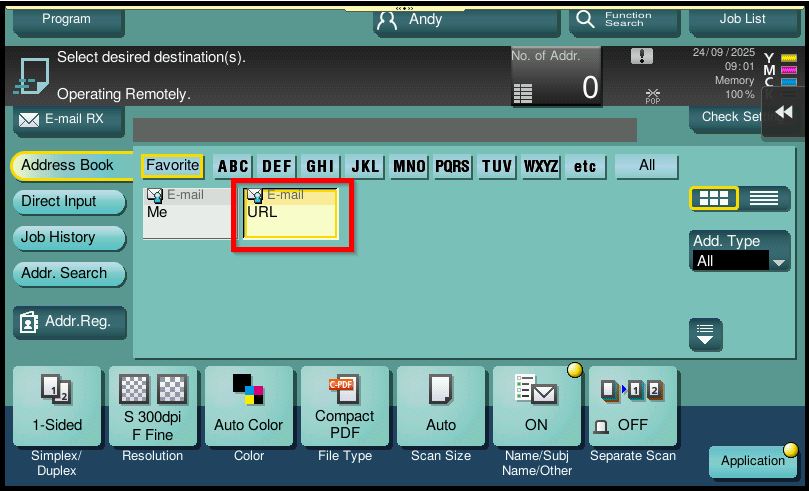
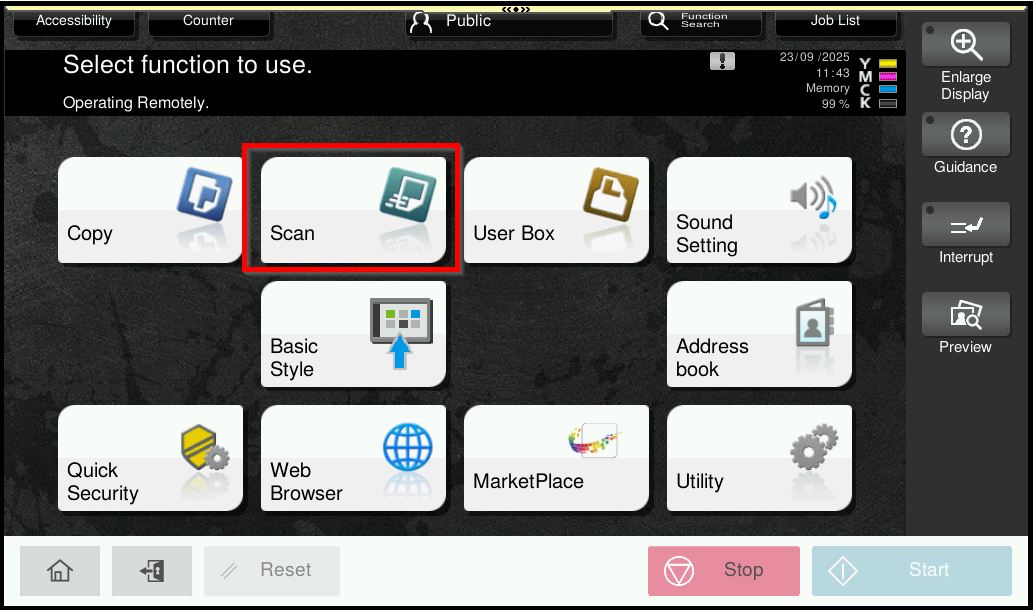
STEP 8 – Select [Scan].
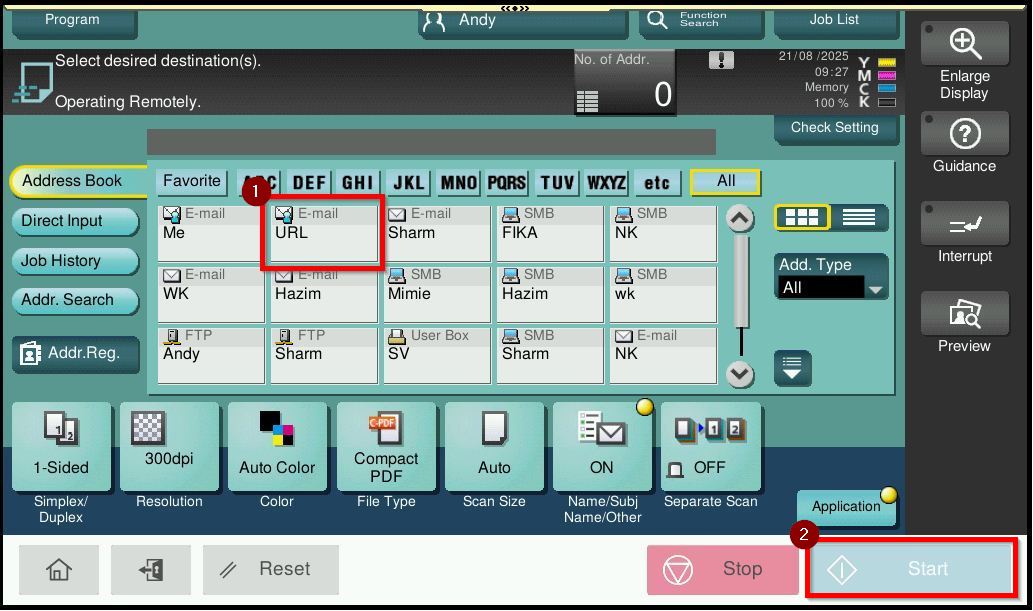
STEP 9 – Select [URL] and click on [Start] button to scan.
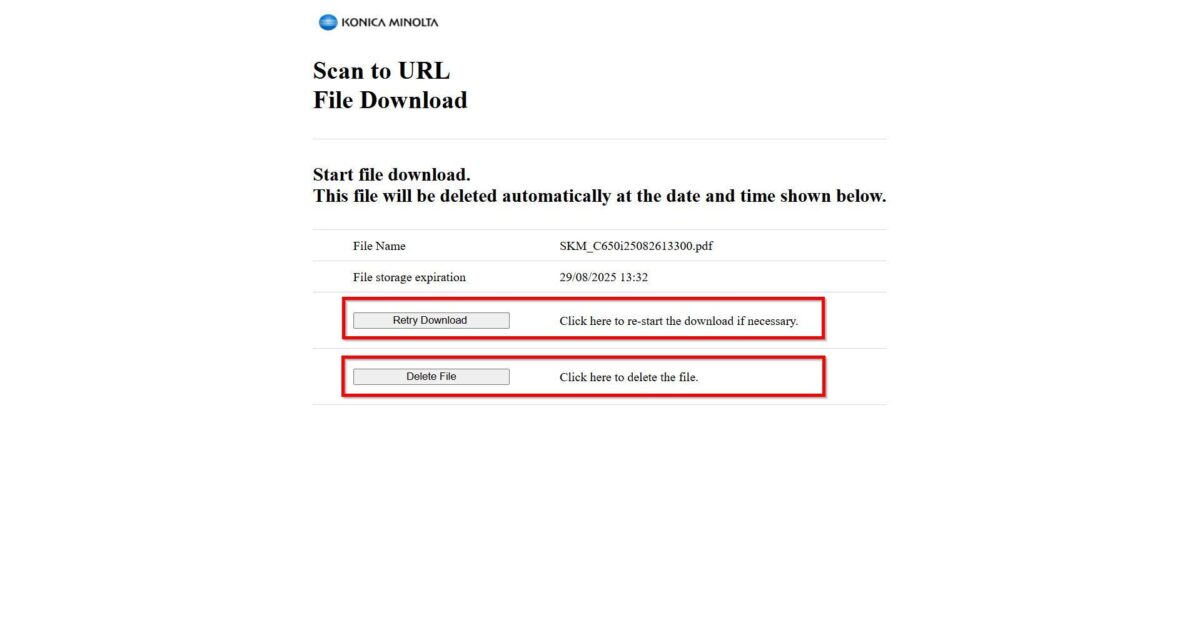
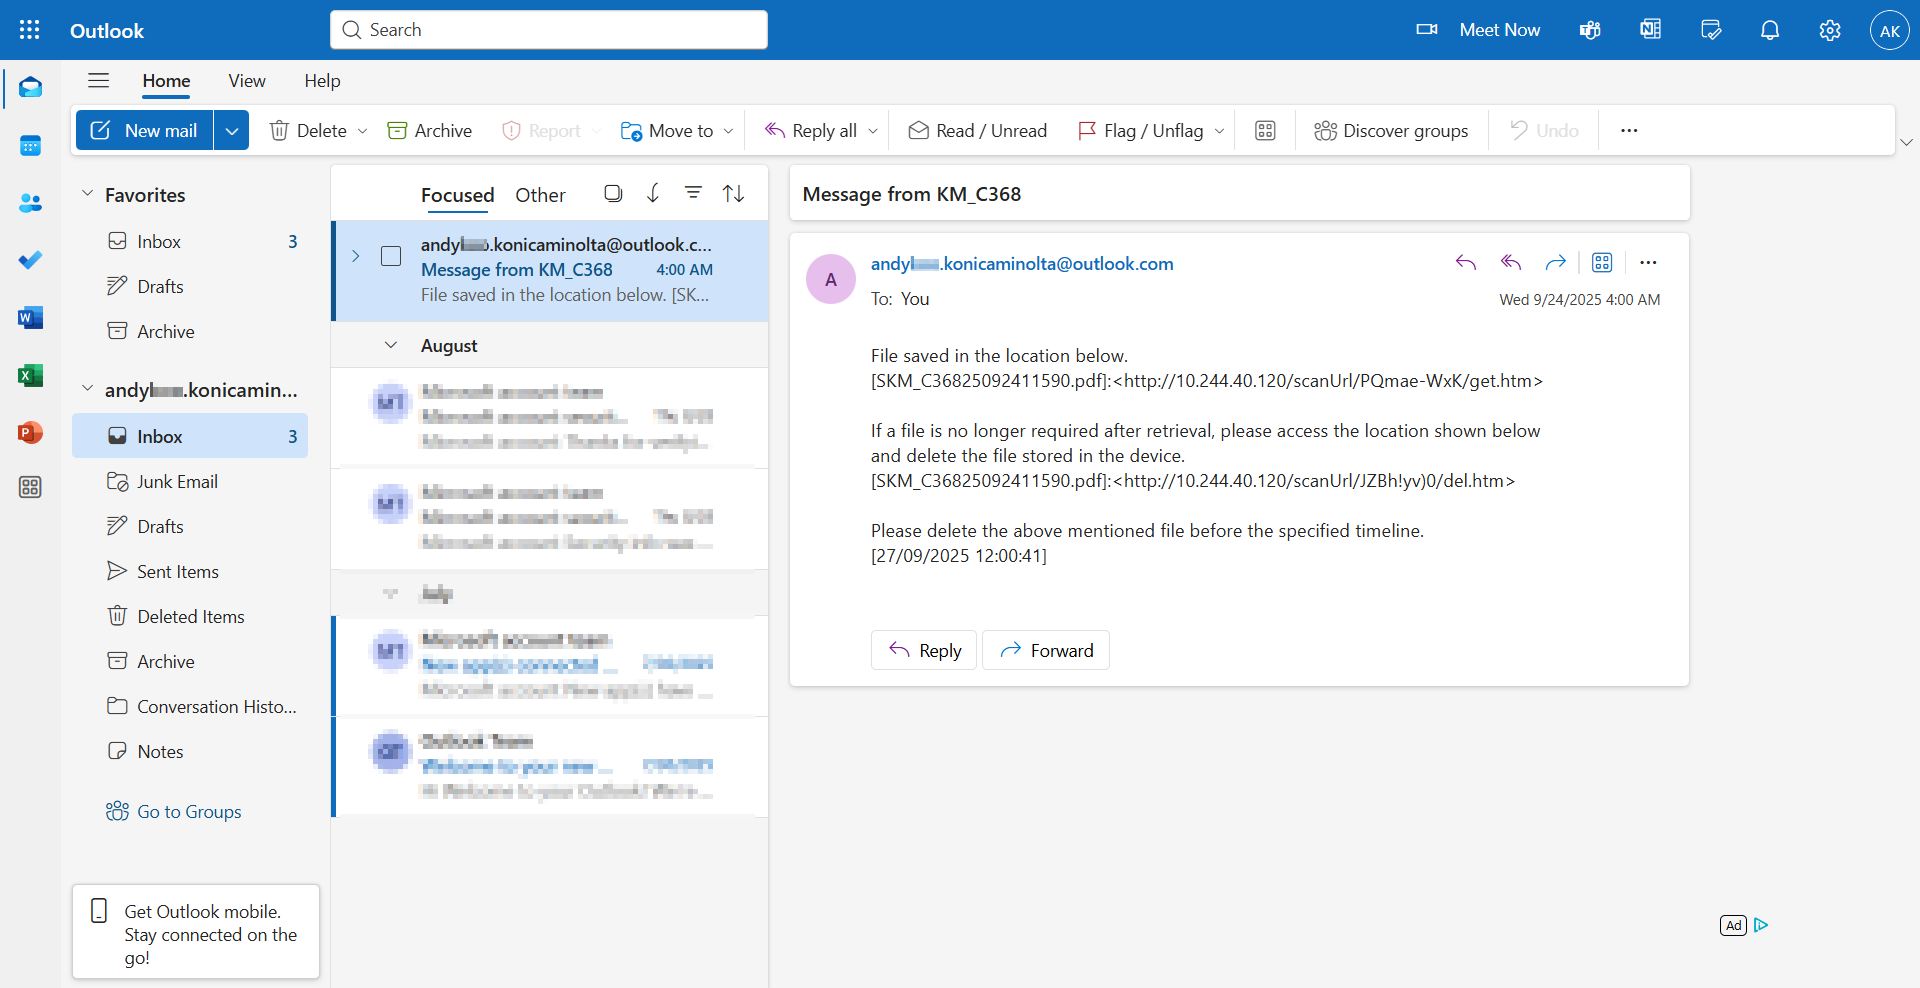
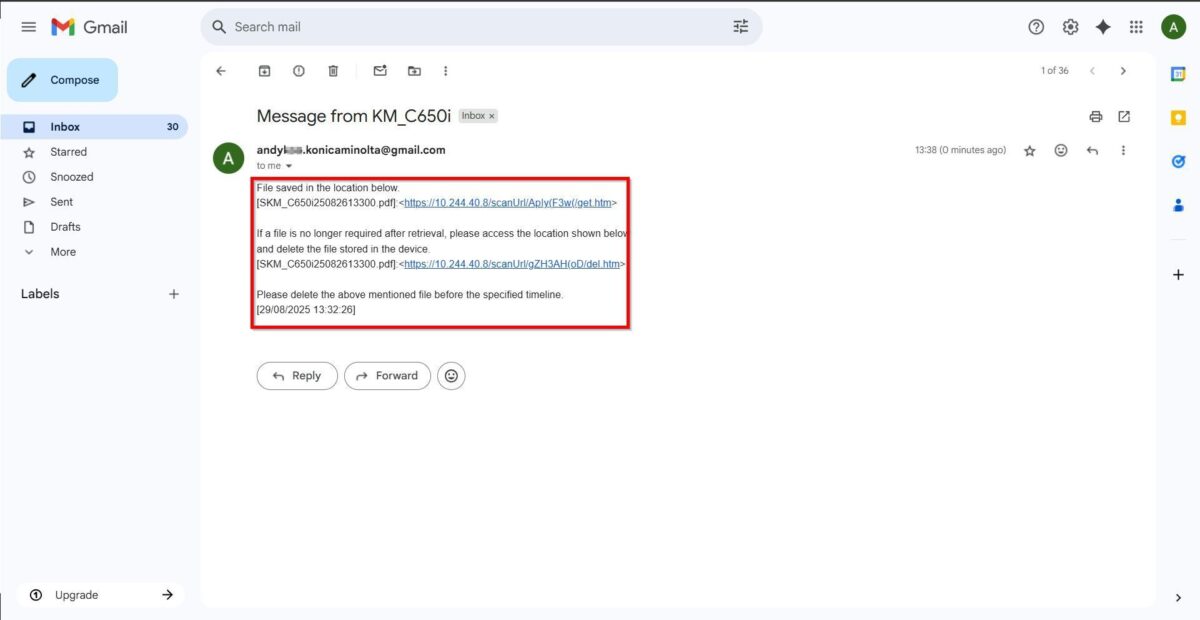
STEP 10 – Kindly check on your email. You will receive a link instead of an attached document. Click the link to download the document.
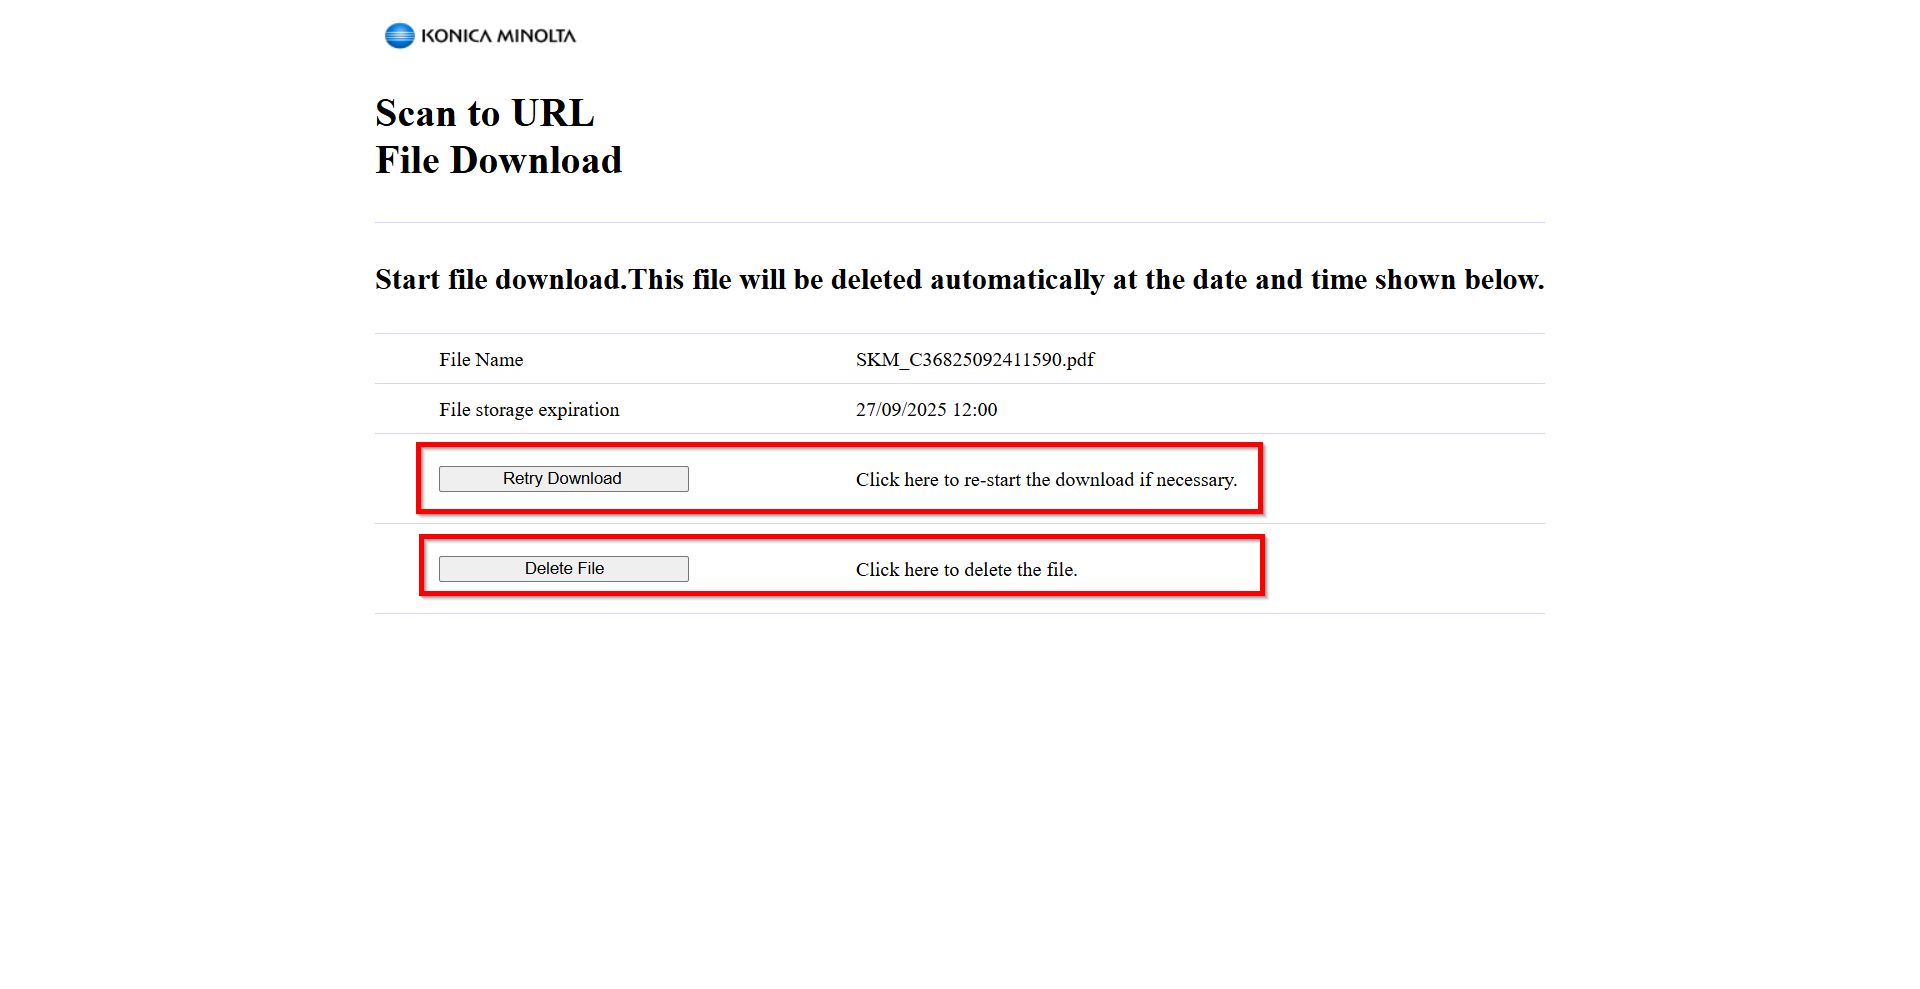
STEP 11 – You may select [Retry Download] to download the document again or select [Delete File] to permanently delete the document.
**Attention: Kindly take note on the file storage expiration date. Once expired, the document will no longer be available for download.
Kindly ensure that the PC is connected to the same network as the printer and that the printer is powered on. Otherwise, the document [cannot] be downloaded.
For the Newer Machine series / I-Series Machine
STEP 1 – Access the machine Web Connection from the PC browser. Click this LINK on how to access Web Connection from the browser.
STEP 2 – Select [Administrator] and select [Login]. Default administrator password will be either [7801261178012611] or [1234567812345678] or [12345678] or [12341234].
STEP 3 – Select [Network Settings] – [Email Settings] – [Email TX (SMTP)] to setup Scan to Email function.
Kindly click on the LINK to complete the step on how to setup scan to email.

STEP 4 – After completing step above, select [User Auth/Account Track] – [Authentication Method] and set the User Authentication to [ON (MFP)].
Kindly click on the LINK to complete the step on how to enable user authentication.

STEP 5 – After completing step above, select [User Auth/Account Track] – [User Authentication Settings] – [User Registration] then click [New Registration] to register a user. Ensure that the email address is entered in the column.
STEP 6 – After completing step above, select [User Auth/Account Track] – [URL Display Enable Setting]. Ensure that the URL display enable setting is [Enable] then click [OK] to save.
STEP 7 – After completing all the steps above, go to the photocopier machine panel and click on the [Access] button. Key in the username and password that registered and click on [Login].
STEP 8 – Select [Scan].
STEP 9 – Select [URL] and click on [Start] button to scan.
STEP 10 – Kindly check on your email. You will receive a link instead of an attached document. Click the link to download the document.
STEP 11 – You may select [Retry Download] to download the document again or select [Delete File] to permanently delete the document.
**Attention: Kindly take note on the file storage expiration date. Once expired, the document will no longer be available for download.
Kindly ensure that the PC is connected to the same network as the printer and that the printer is powered on. Otherwise, the document [cannot] be downloaded.