When the address book has been registered on the machine but the name does not appear in the address book during scanning, it may indicate that the scanning function method has been turned off. This issue can occur with any of the scanning methods SMB, FTP or Email. Below is an example showing that the registered address book entry is not visible when attempting to perform a scan.
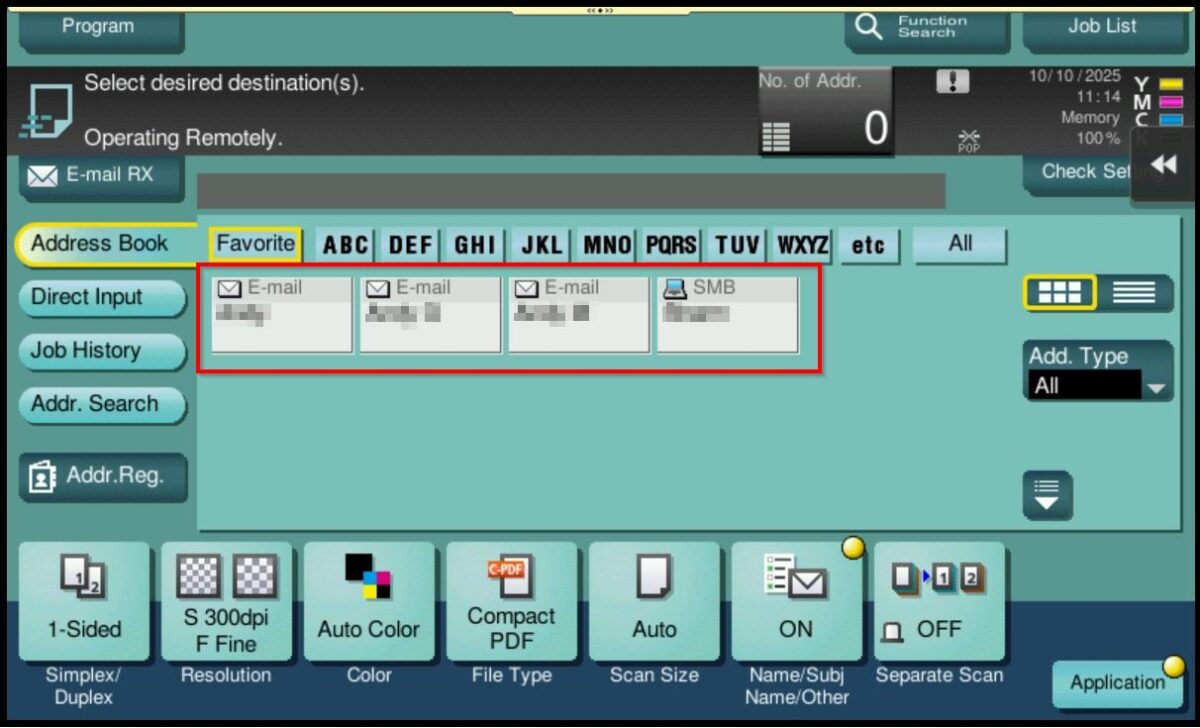
Several example of Address Book not visible on machine
a) E-Mail Address
When attempting to perform a Scan to E-mail, only SMB and FTP options are displayed.

a) SMB
When attempting to perform a Scan to SMB, only E-mail and FTP options are displayed.
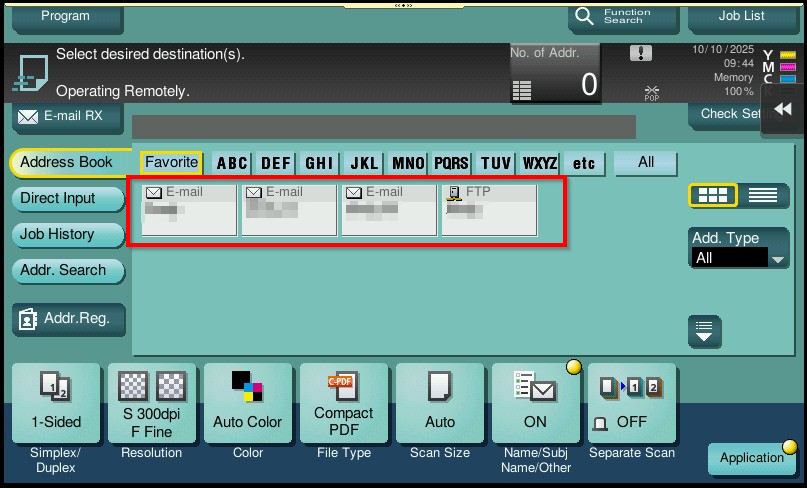
a) FTP
When attempting to perform a Scan to FTP, only SMB and E-mail options are displayed.
For The Older Machine Series / Non I-Series Machine
STEP 1 – Access the machine Web Connection from the PC browser. Click this LINK on how to access Web Connection from the browser.
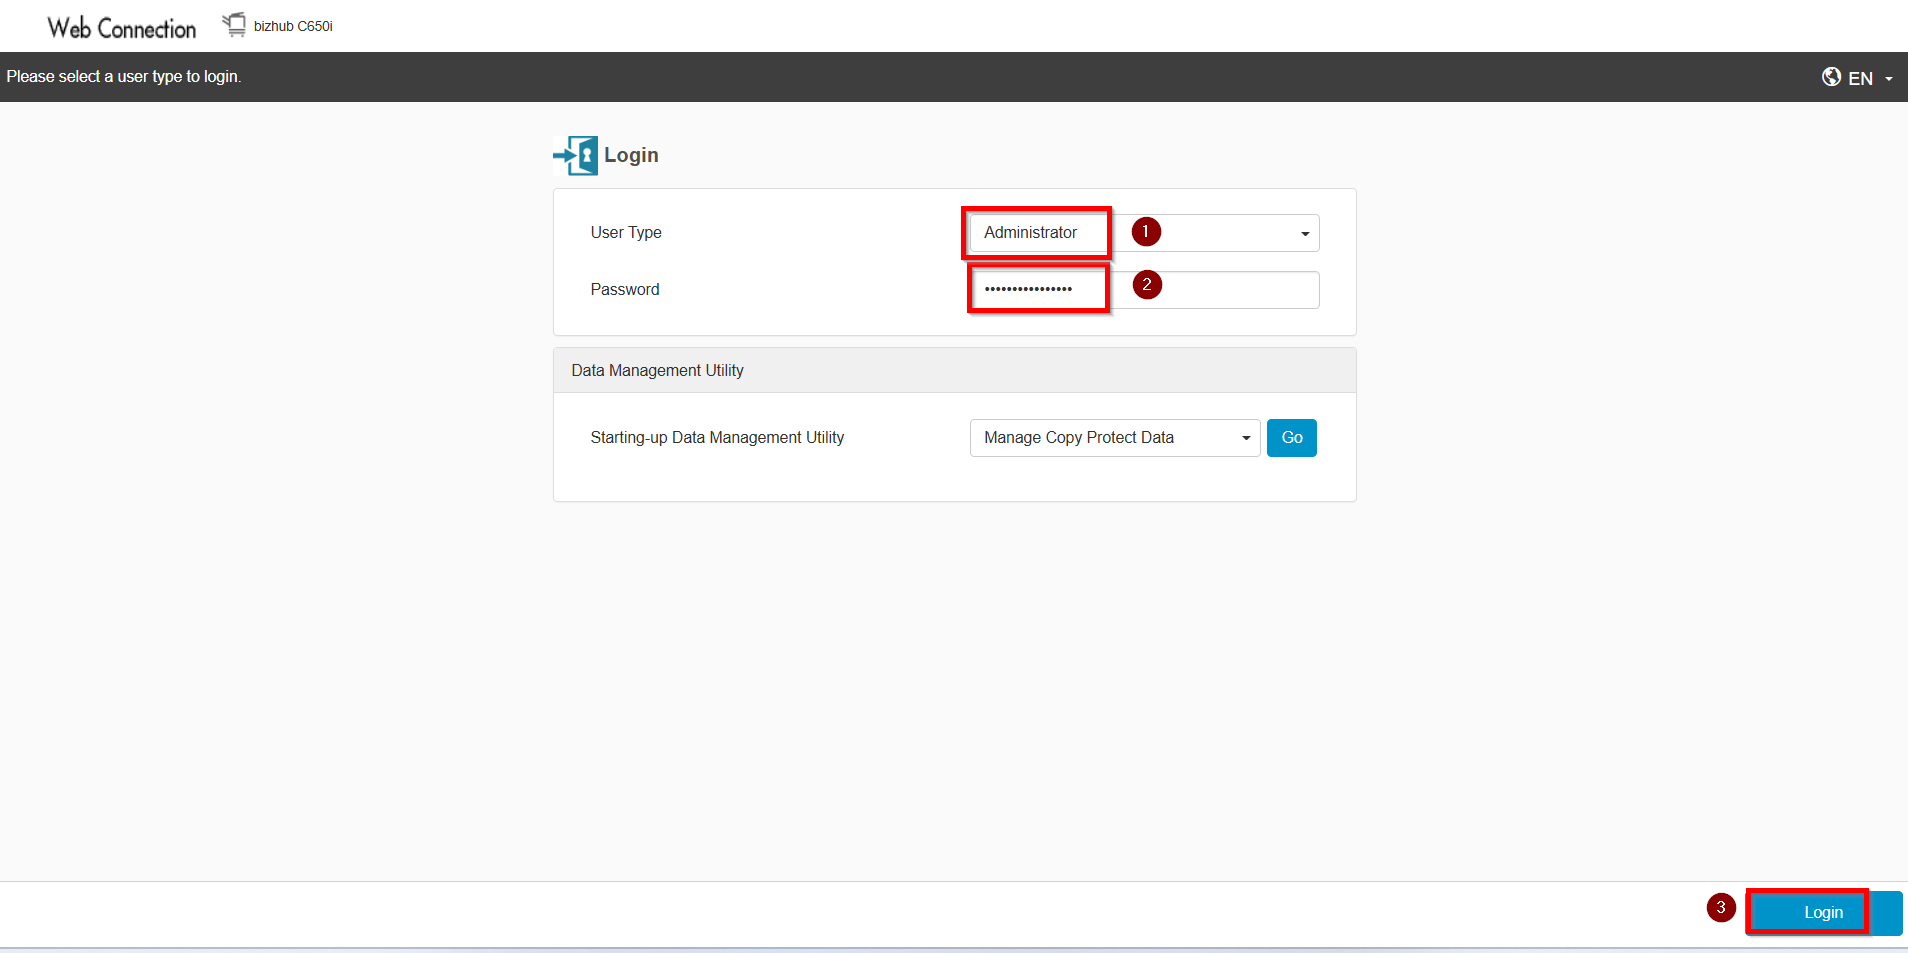
STEP 2 – Select [Administrator] and select [Login]. Key in the [Administrator Password] and click [OK] to login. Default administrator password will be either [7801261178012611] or [1234567812345678] or [12345678] or [12341234].
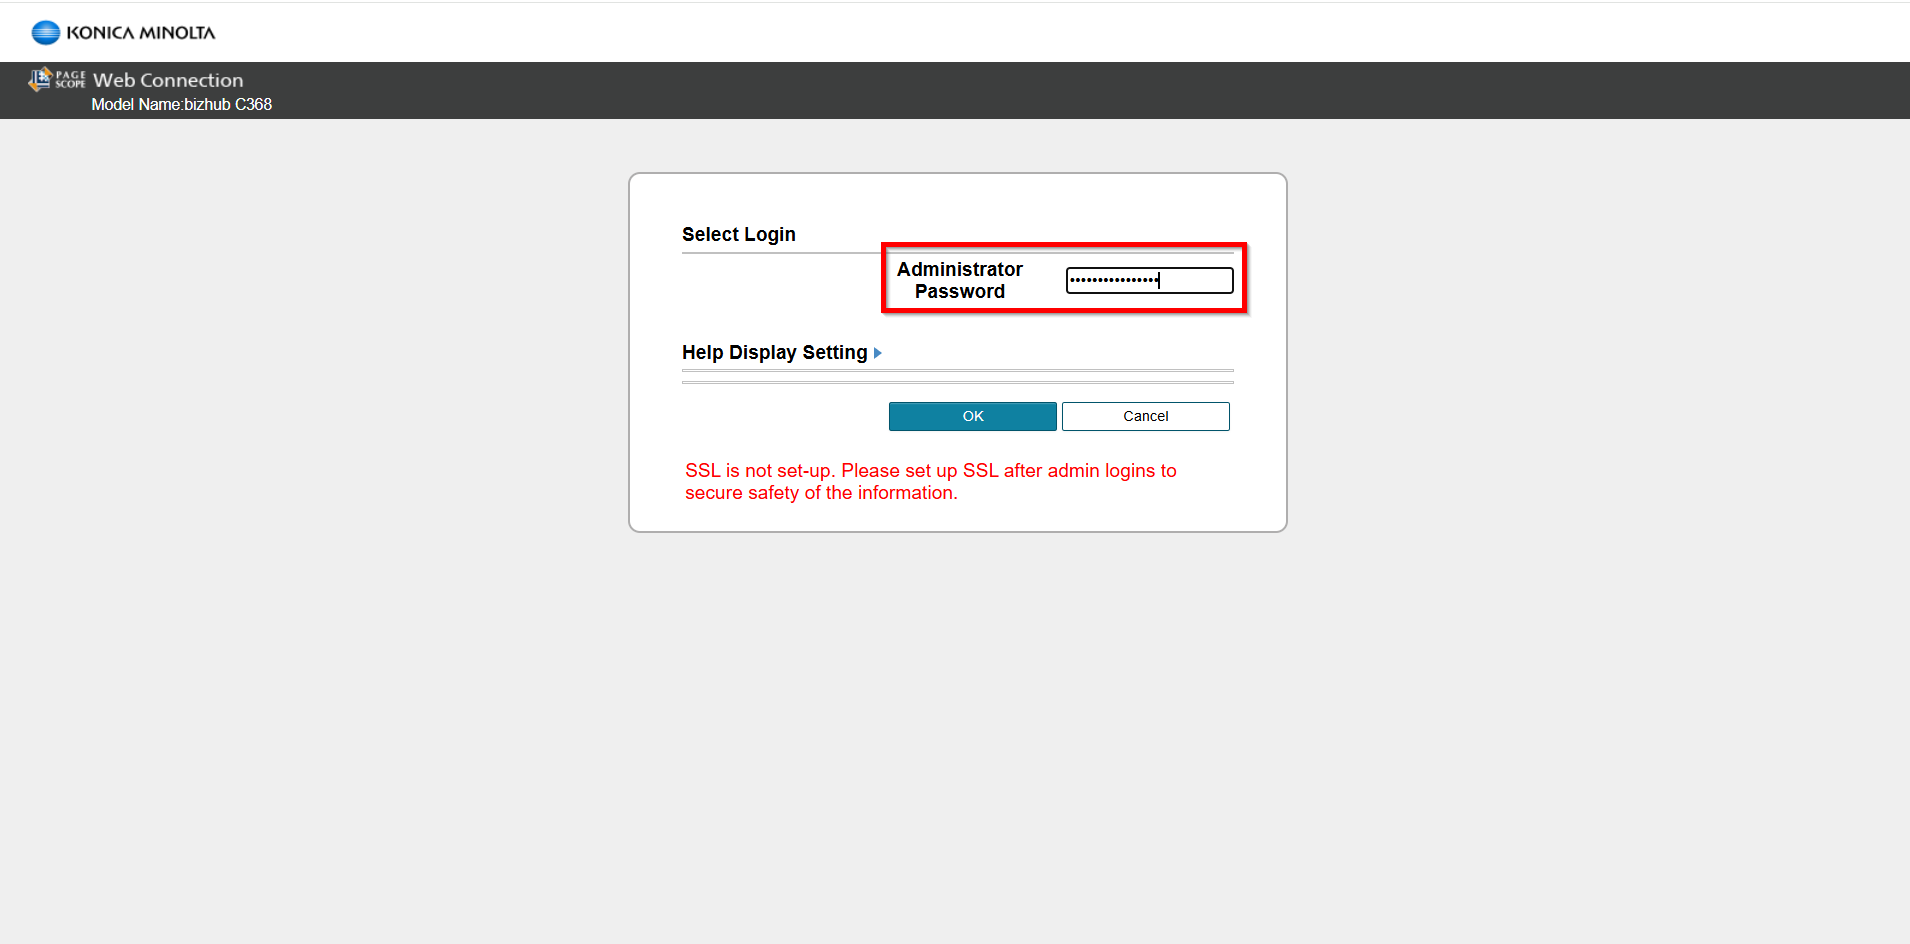
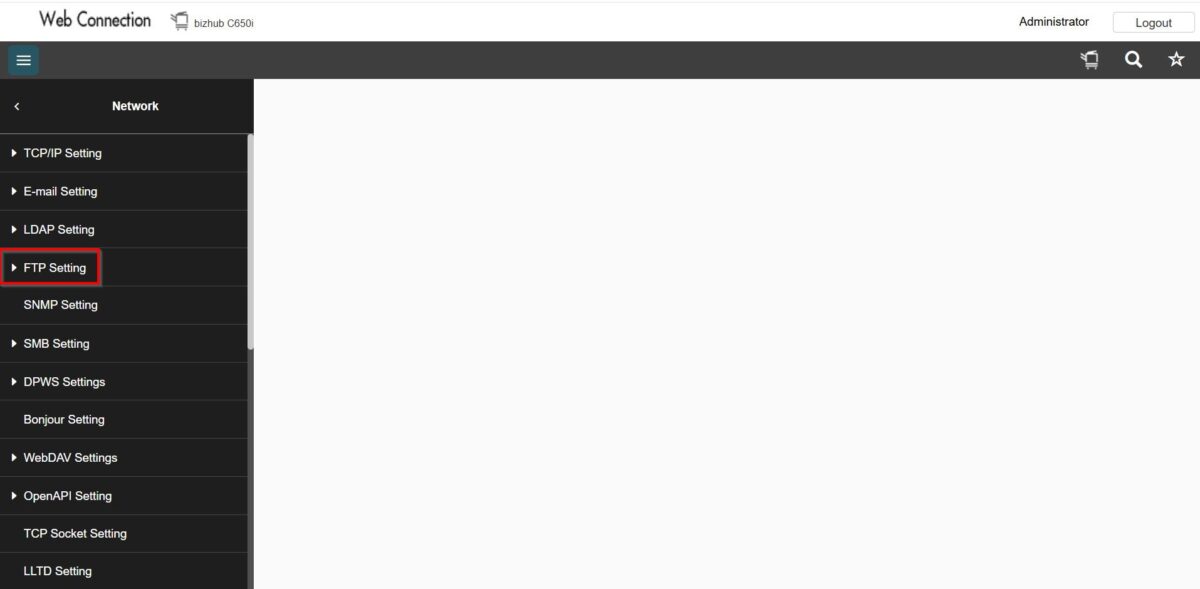
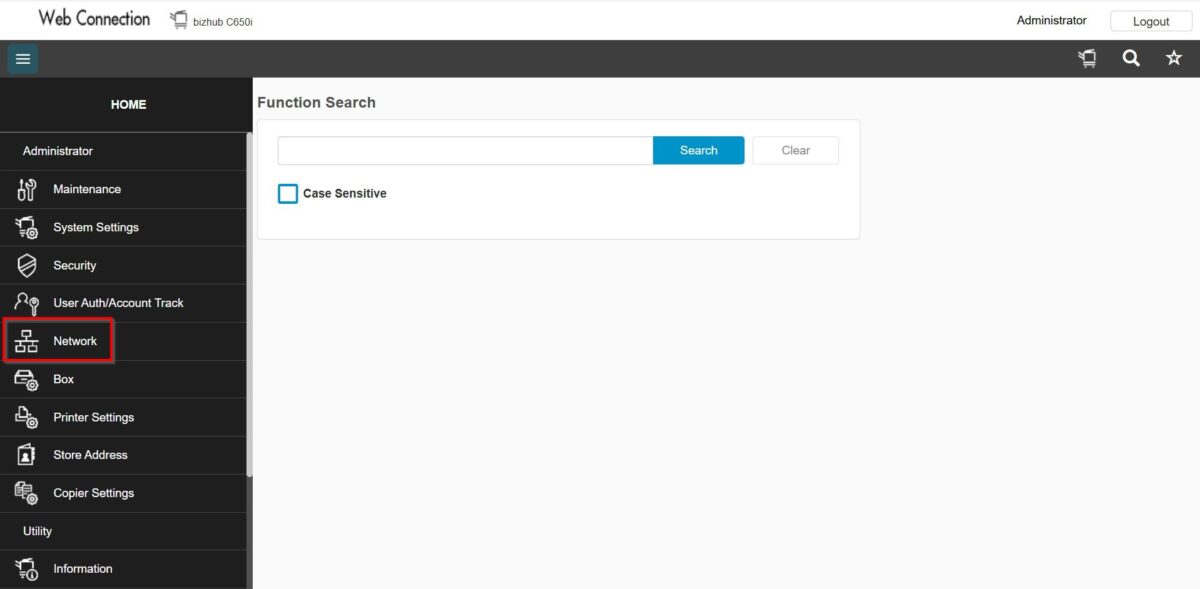
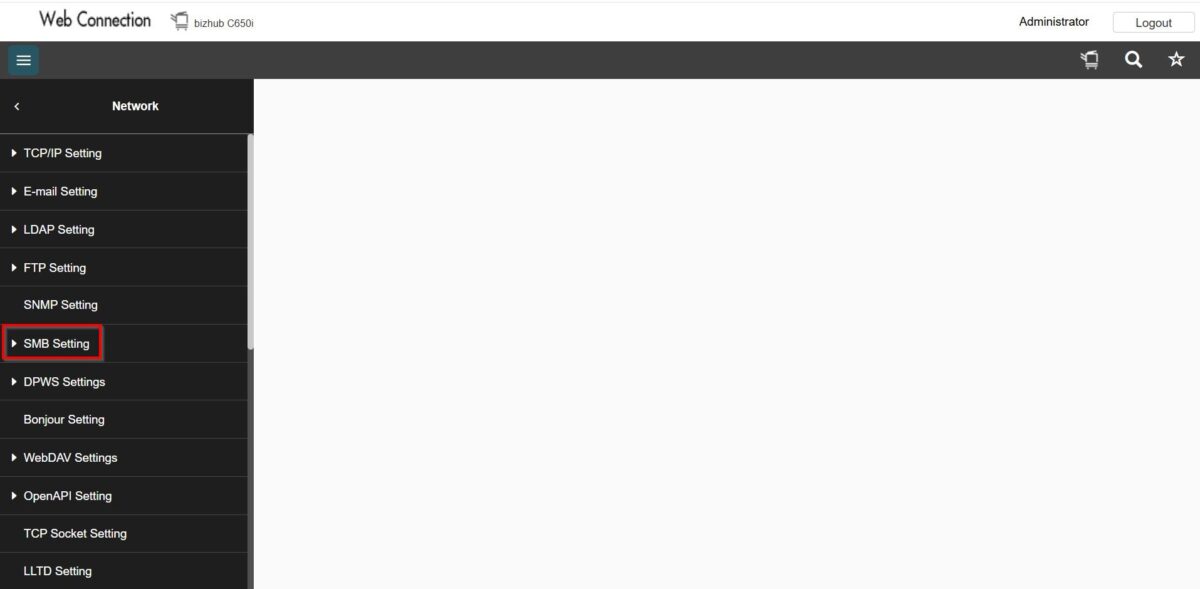
STEP 3 – Select [Network] then proceed to below setting based on different issue.
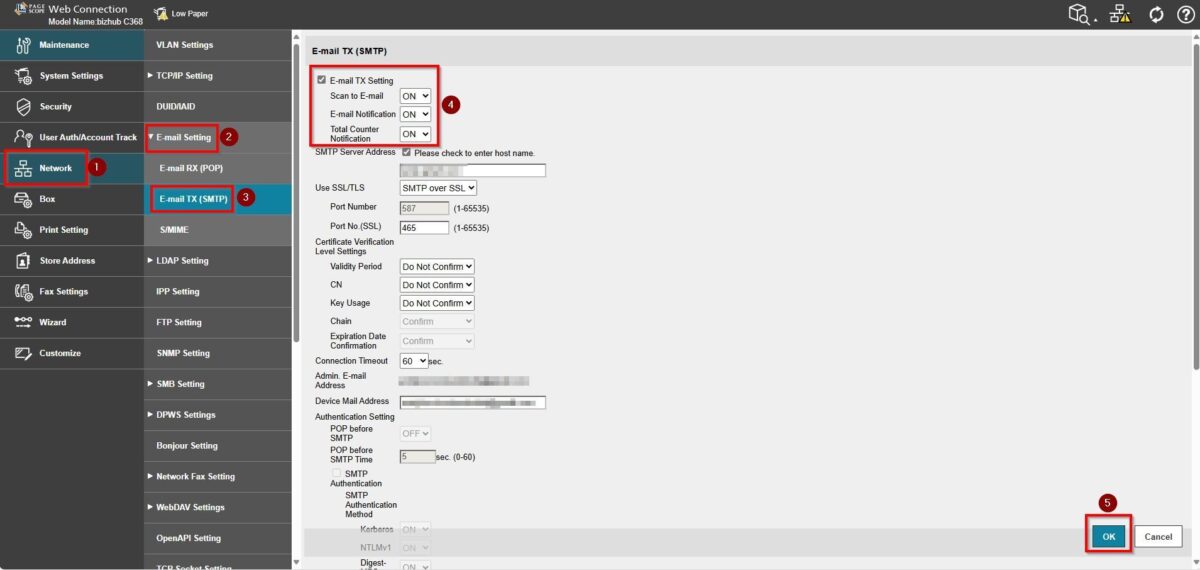
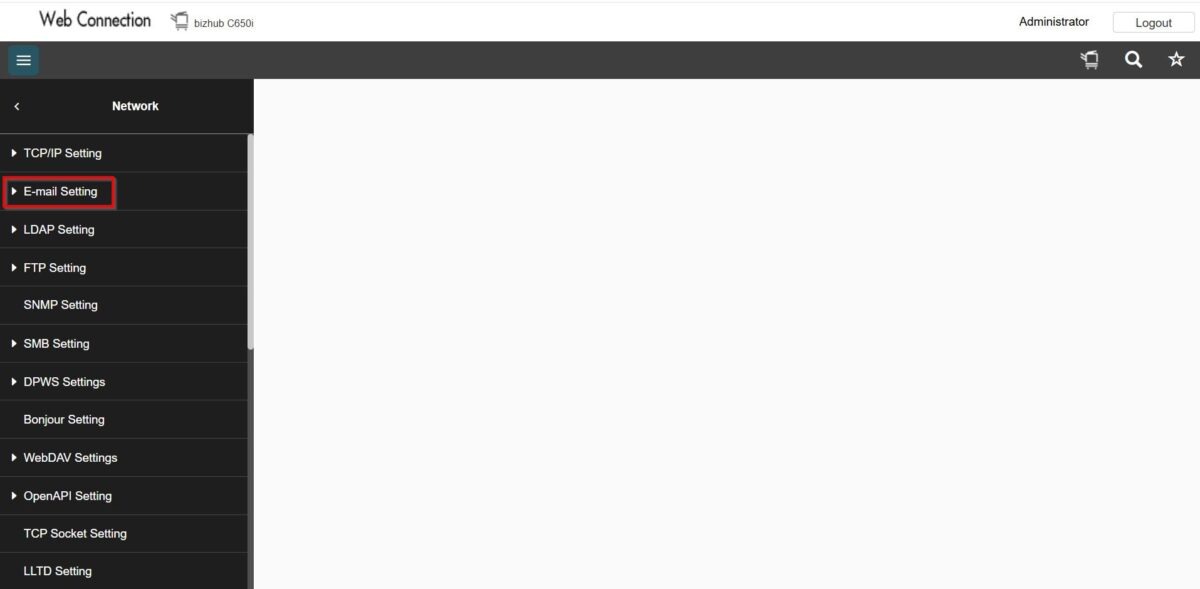
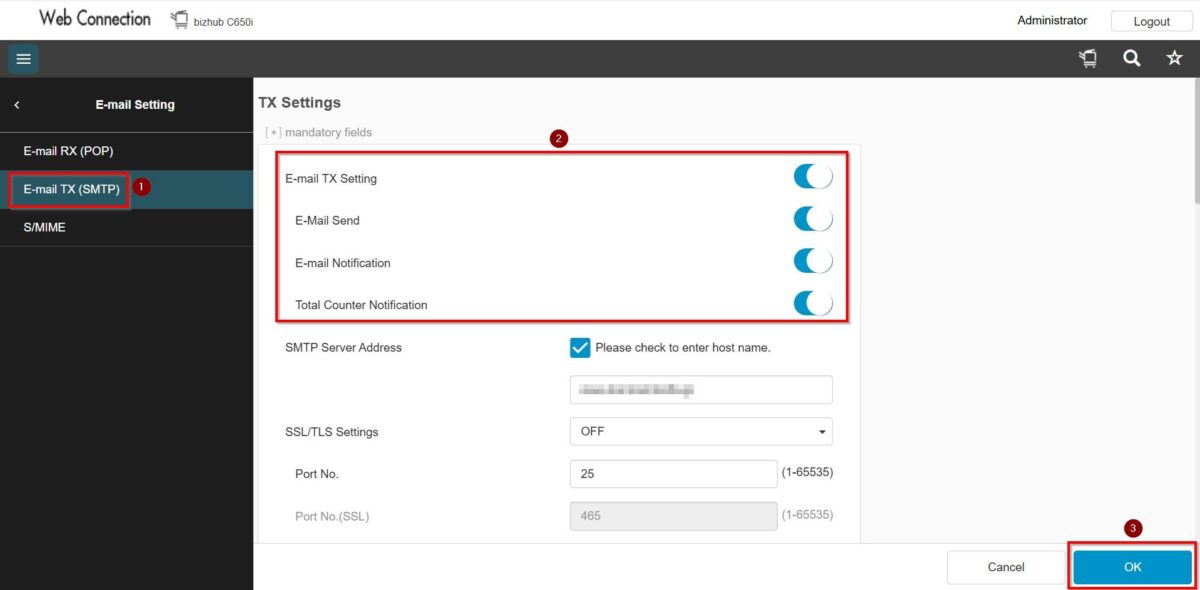
a) If the E-Mail Address is not visible, kindly proceed to [E-mail Setting] – [E-mail TX (SMTP)] – Tick [E-mail TX (SMTP)], select [ON] under [Scan to E-mail] / [E-mail Notification] / [Total Counter Notification] option. After making the changes, click [OK] to save the settings.
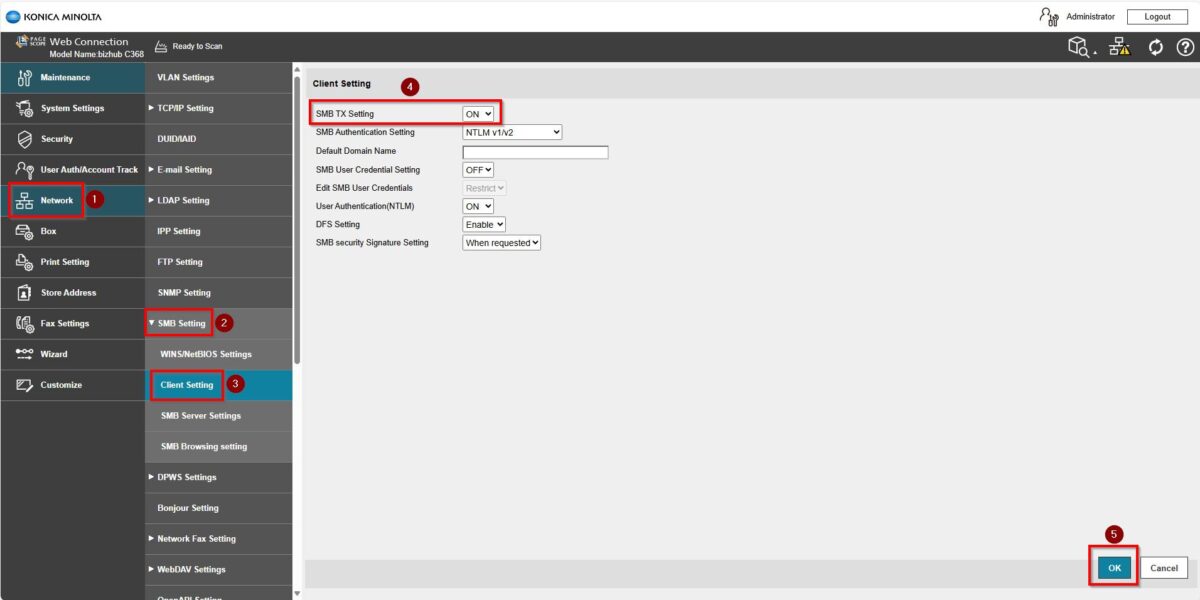
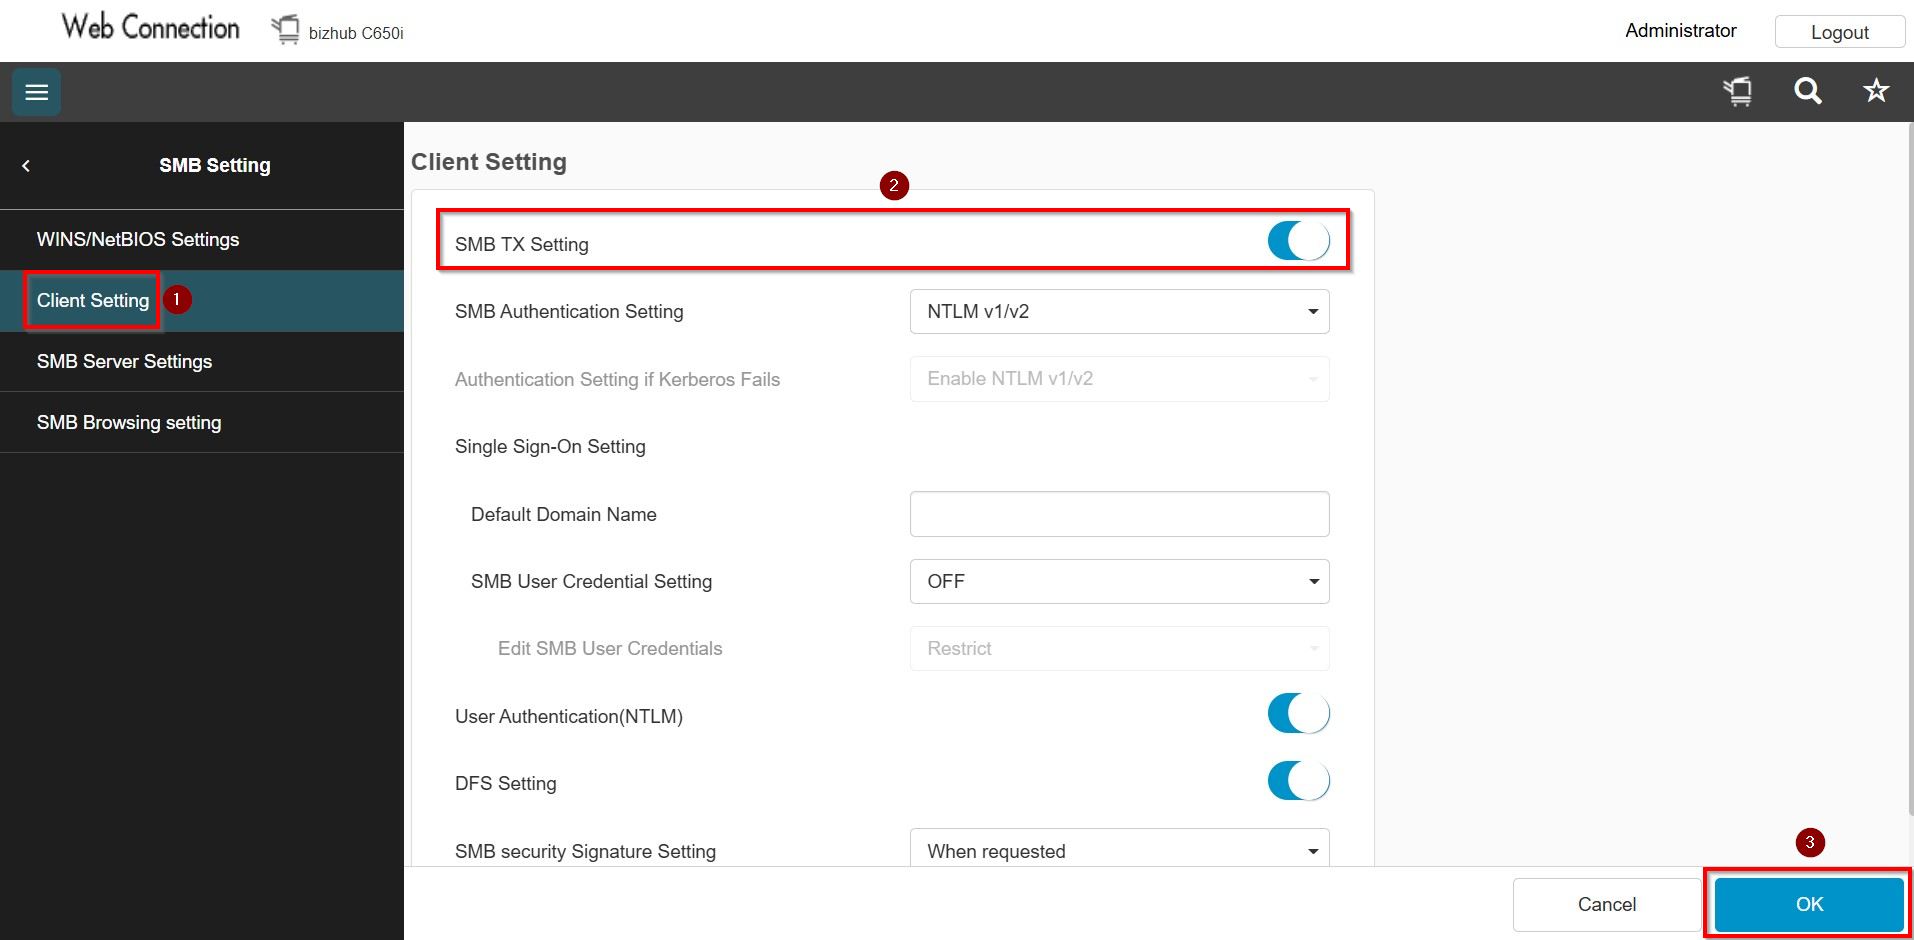
b) If the SMB is not visible, kindly proceed to [Network] – [SMB Setting] – [Client Setting], select [ON] under [SMB TX Setting] option. After making the changes, click [OK] to save the settings.
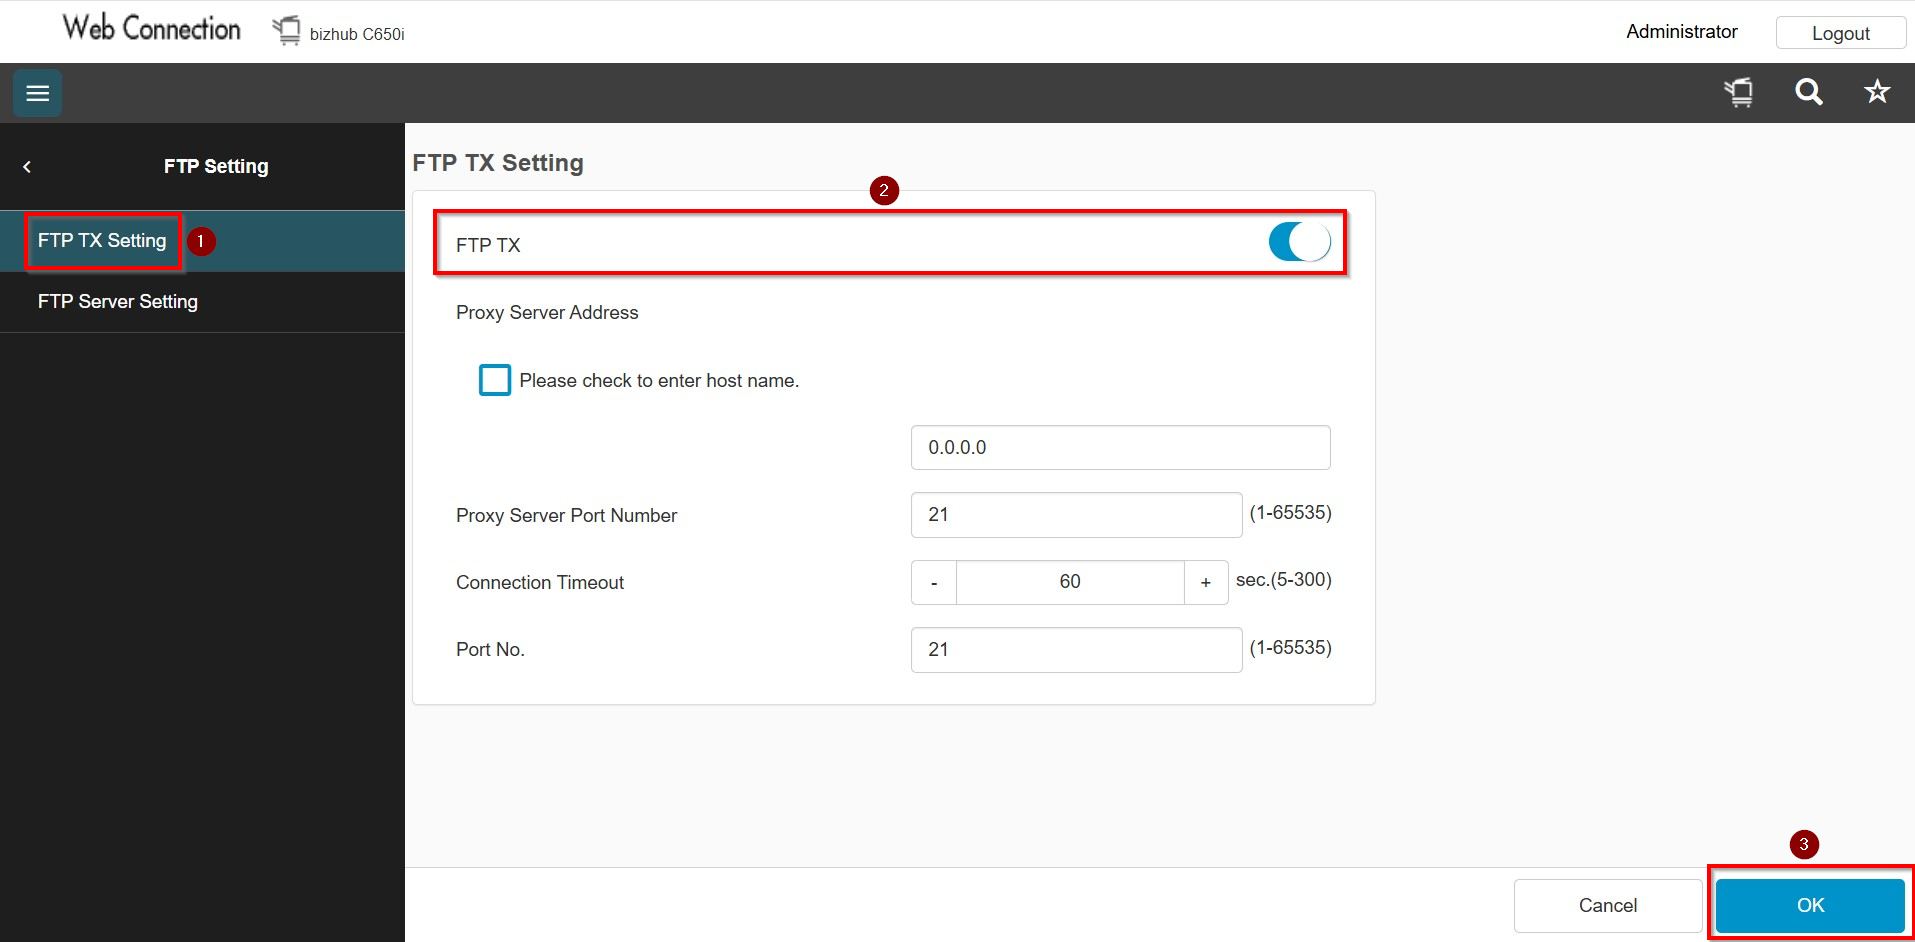
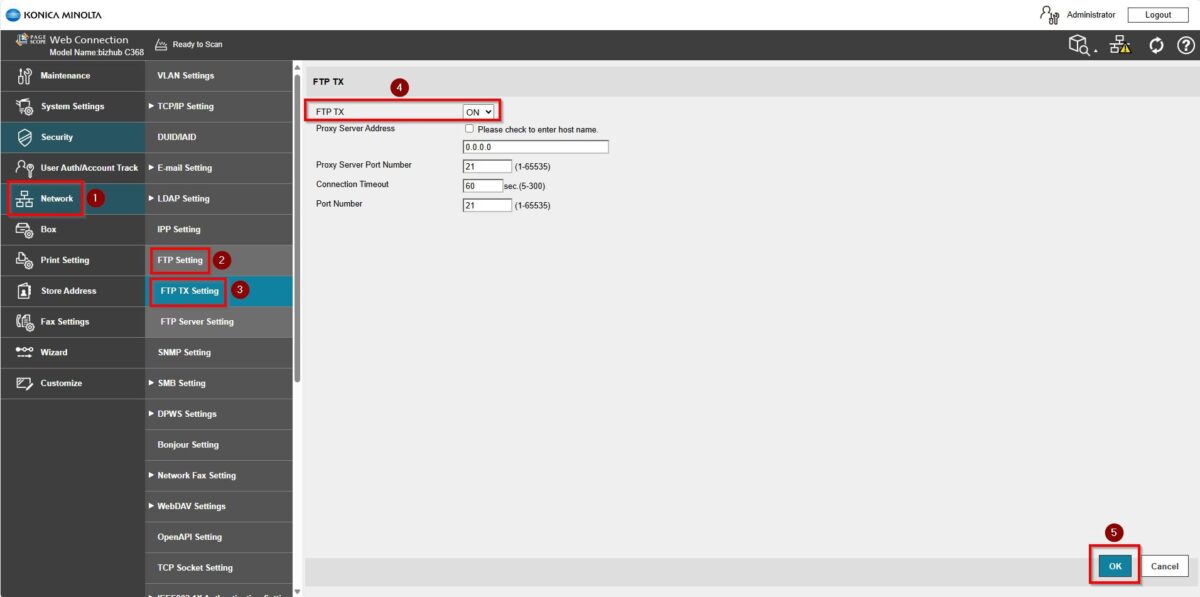
c) If the FTP is not visible, kindly proceed to [Network] – [FTP Setting] – [FTP TX Setting], select [ON] under [FTP TX] option. After making the changes, click [OK] to save the settings.
For The Newer Machine Series / I-Series Machine
STEP 1 – Access the machine Web Connection from the PC browser. Click this LINK on how to access Web Connection from the browser.
STEP 2 – Select [Administrator] and select [Login]. Key in the [Administrator Password] and click [OK] to login. Default administrator password will be either [7801261178012611] or [1234567812345678] or [12345678] or [12341234].
STEP 3 – Select [Network], then proceed to below setting based on different issue.
a) If the E-Mail Address is not visible, kindly proceed to [E-mail Setting] – [E-mail TX (SMTP)] – Tick [E-mail TX (SMTP)], select [ON] under [Scan to E-mail] / [E-mail Notification] / [Total Counter Notification] option. After making the changes, click [OK] to save the settings.
b) If the SMB is not visible, kindly proceed to [Network] – [SMB Setting] – [Client Setting], select [ON] under [SMB TX Setting] option. After making the changes, click [OK] to save the settings.
c) If the FTP is not visible, kindly proceed to [Network] – [FTP Setting] – [FTP TX Setting], select [ON] under [FTP TX] option. After making the changes, click [OK] to save the settings.