

Guide on how to install a universal printer driver PS on a Windows OS.
REQUIREMENTS:
- Machine IP Address – click Here for the guide on how to get the machine IP Address
- Downloaded Printer Driver – click Here for the guide on how to download the printer driver from the Download Centre website
Before the installation begins, make sure to extract the [ZIP] file for the EXE file to be visible when installing the printer driver.


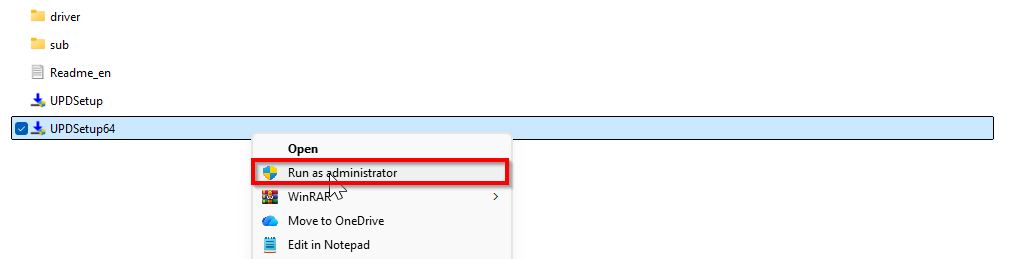
STEP 1 – Open the file as choose [Run as administrator].
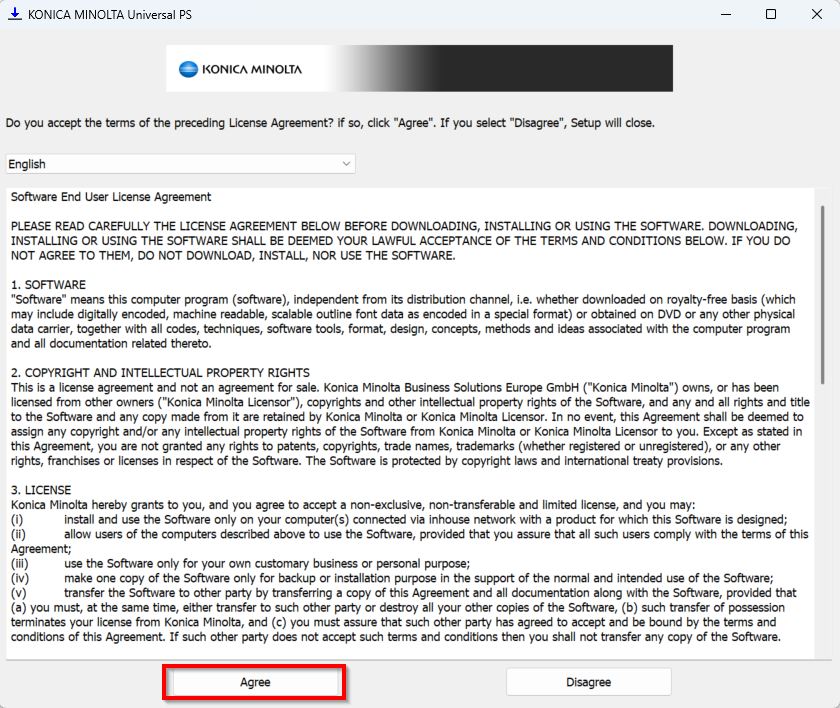
STEP 2 – Select [Agree].
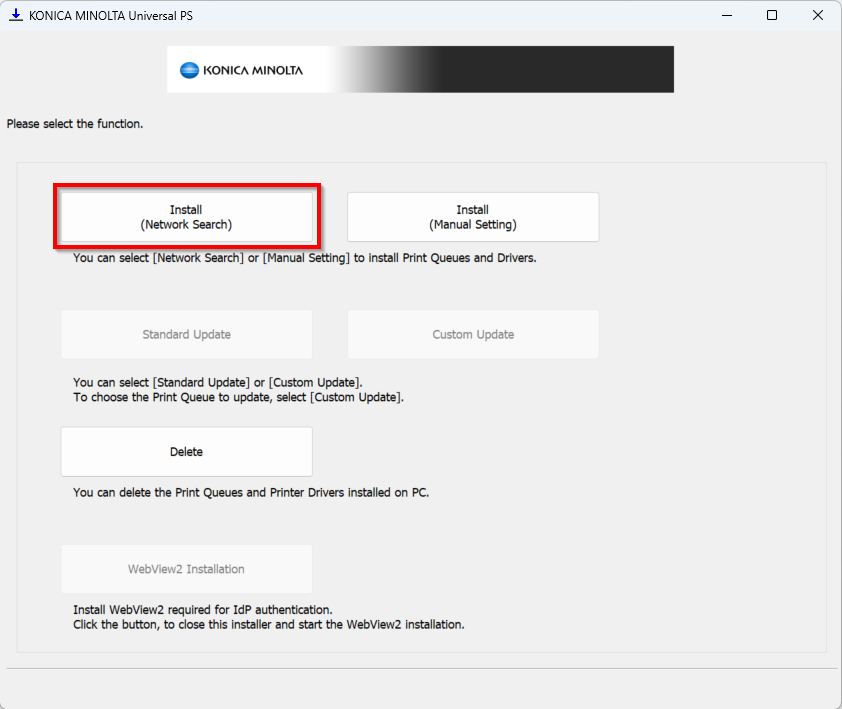
STEP 3 – Select [Install (Network Search)].
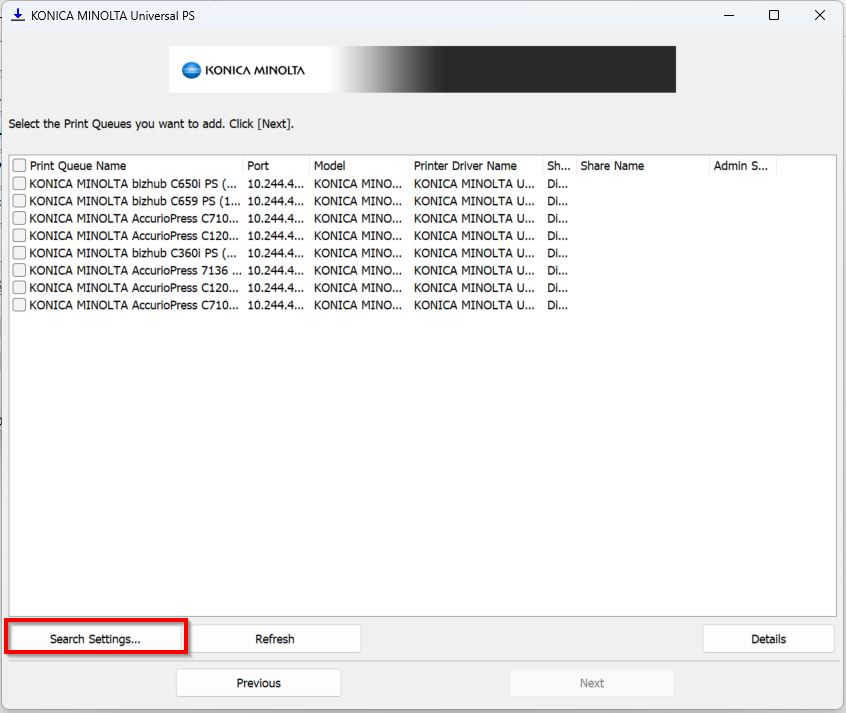
STEP 4 – It will automatically search for the printers. Select the [Correct] printer you want to install, then click [Next].

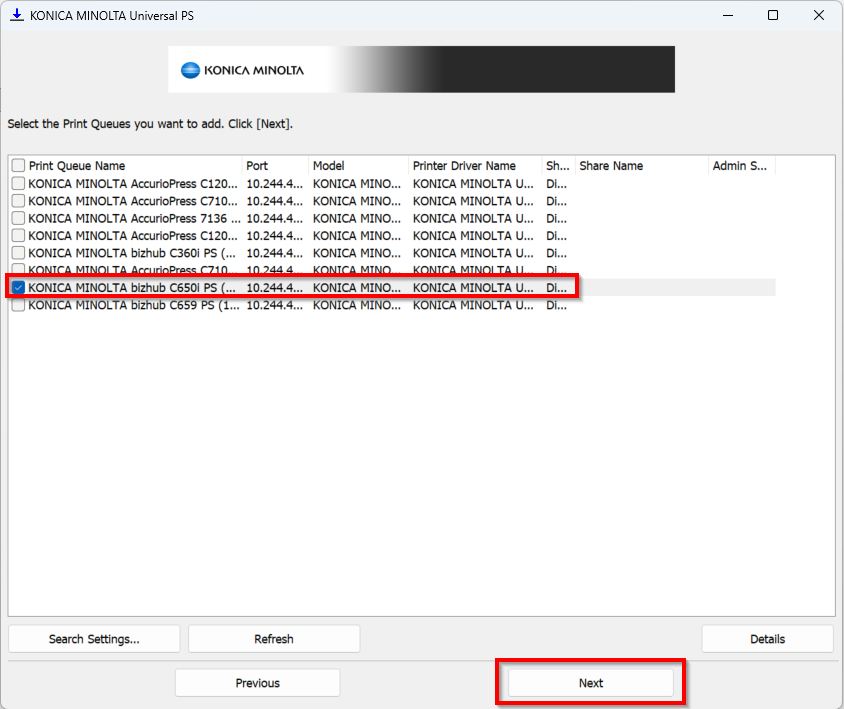
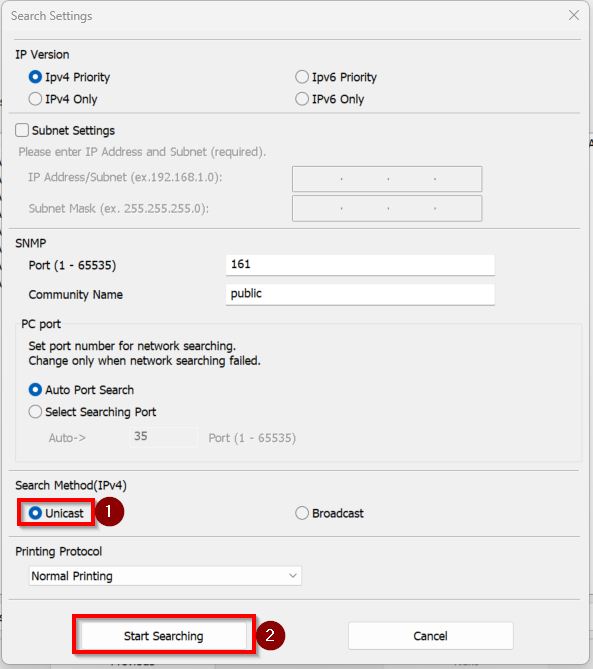
*In case the printer is not found or its showing IPv6, kindly proceed to [Search Settings] – [Unicast], then proceed to [Start Searching] to search again the printer before proceed to next step.
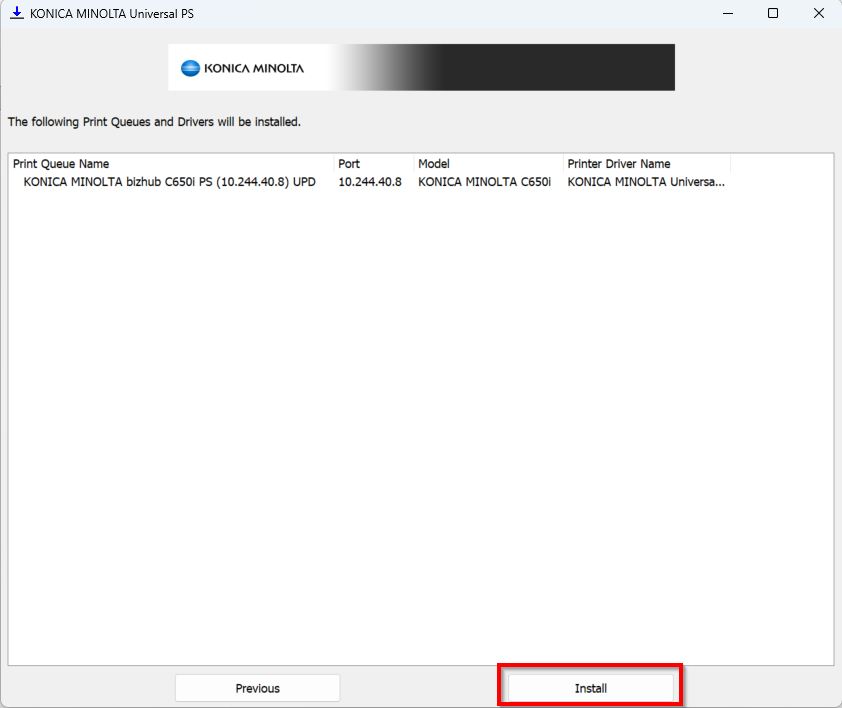
STEP 5 – Select [Install] to install the universal printer driver PS.
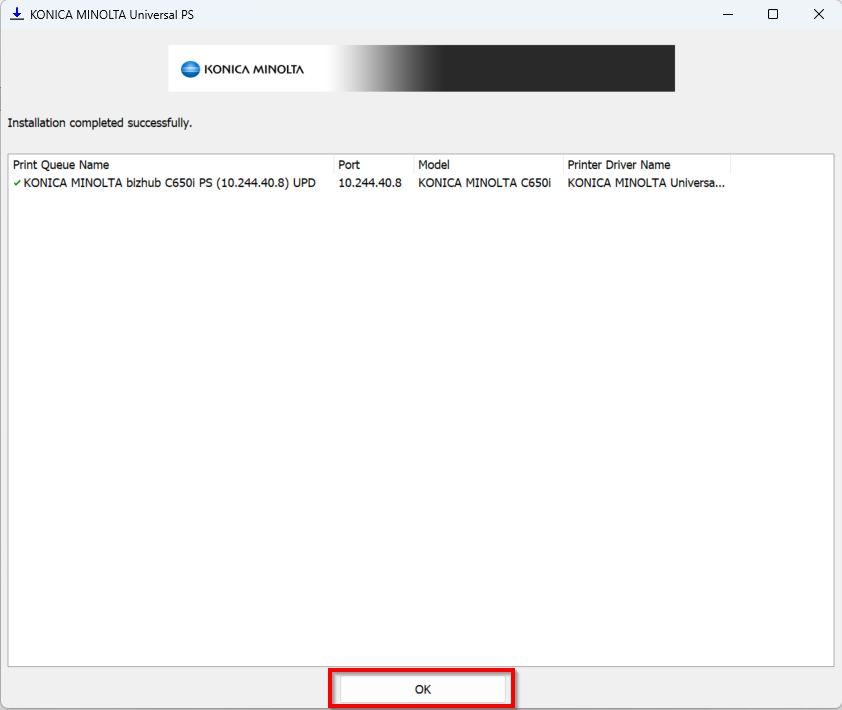
STEP 6 – Click [OK] once finish install to exit the wizard.
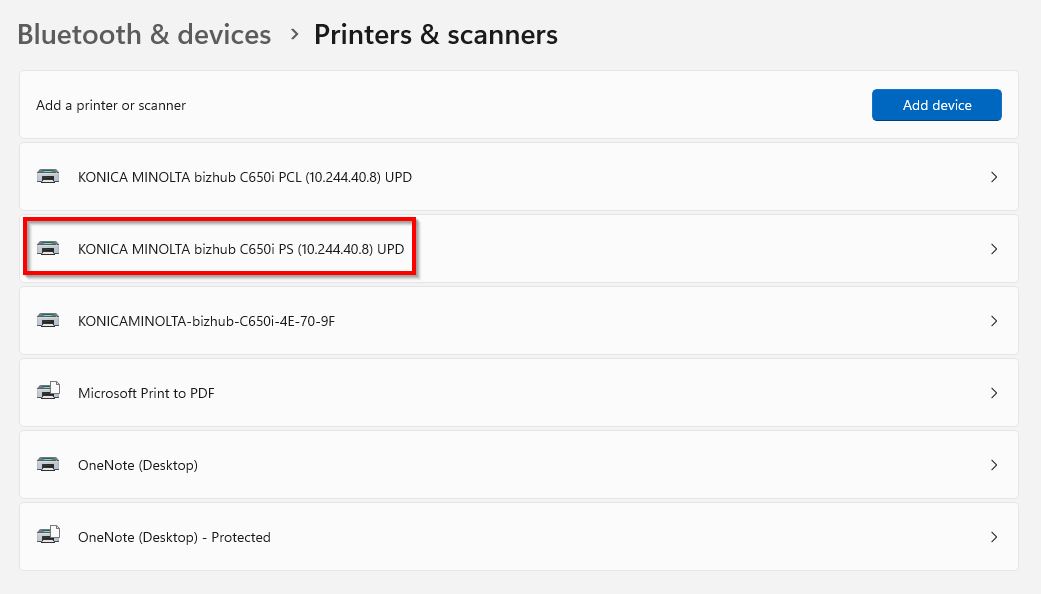
STEP 7 – The printer will be install as per screenshot below.
STEP 8 – After installation, try printing a test page to verify that the connection to the printer is working.
Additional Note: If getting an error or unable to print, kindly make sure that the authentication details has been updated on the printer driver before printing. Click Here for the guide on how to update the authentication details on the printer driver.