Guide On How To Add The FTP Utility In Windows Defender Firewall With Advanced Security For Scanning
STEP 1 – Click on the windows [Start] button, type [Firewall], select the [Windows Defender Firewall with Advanced Security] and click on [Run As Administrator].

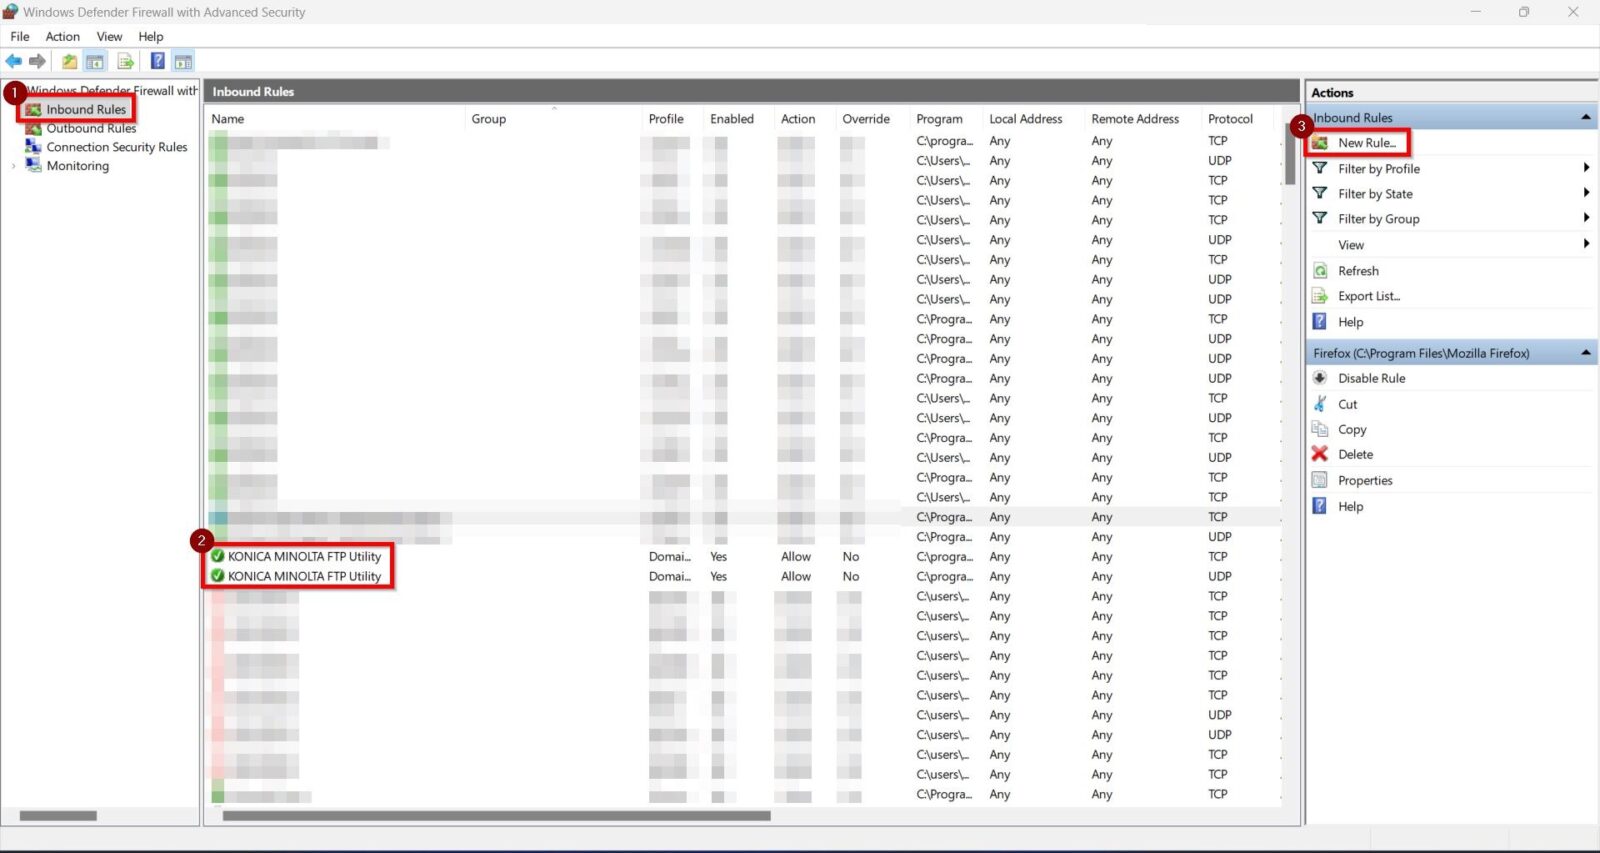
STEP 2 – Click on the [Inbound Rules] and check for the [Konica Minolta FTP Utility]. If the FTP Utility not showing on the list, meaning that the firewall will not allowed for scanning. Click on the [New Rules] to add the FTP Utility application.
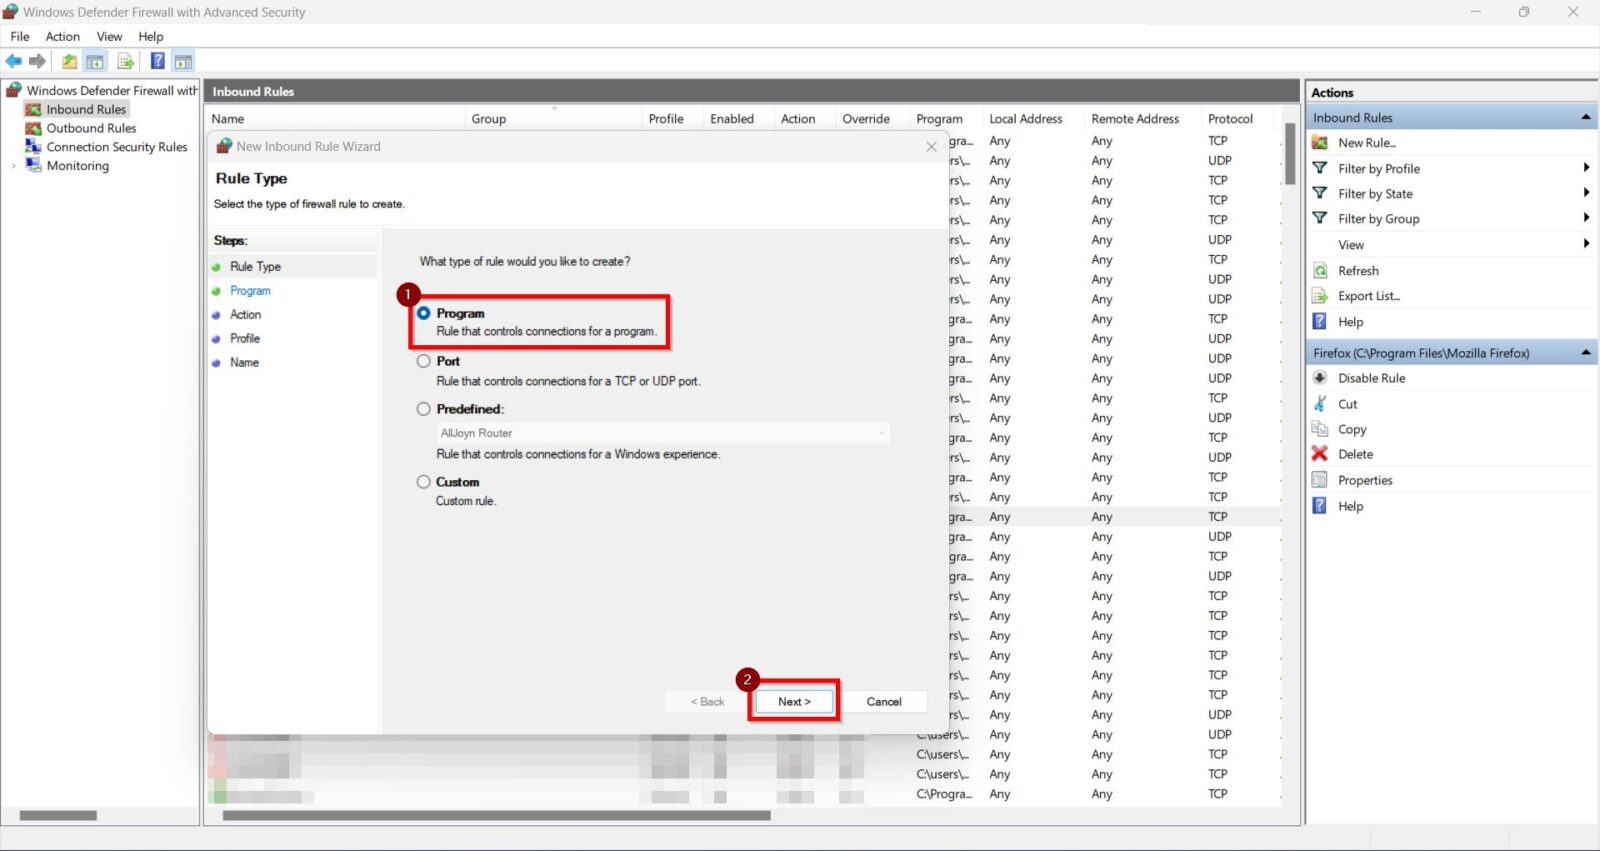
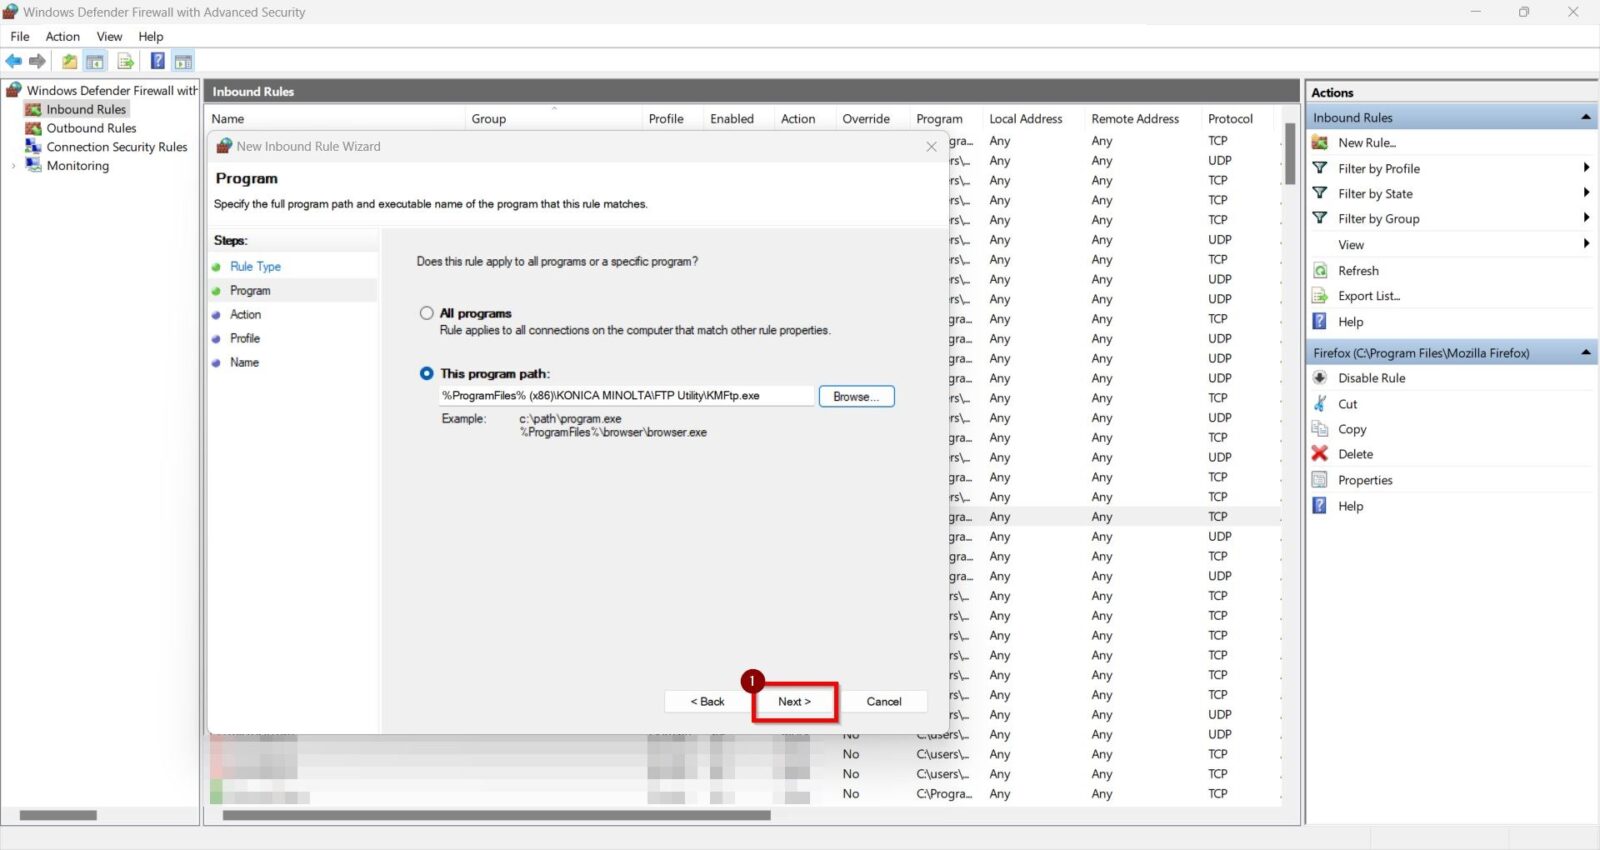
STEP 3 – Select [Program] and then click on the [Next] button.
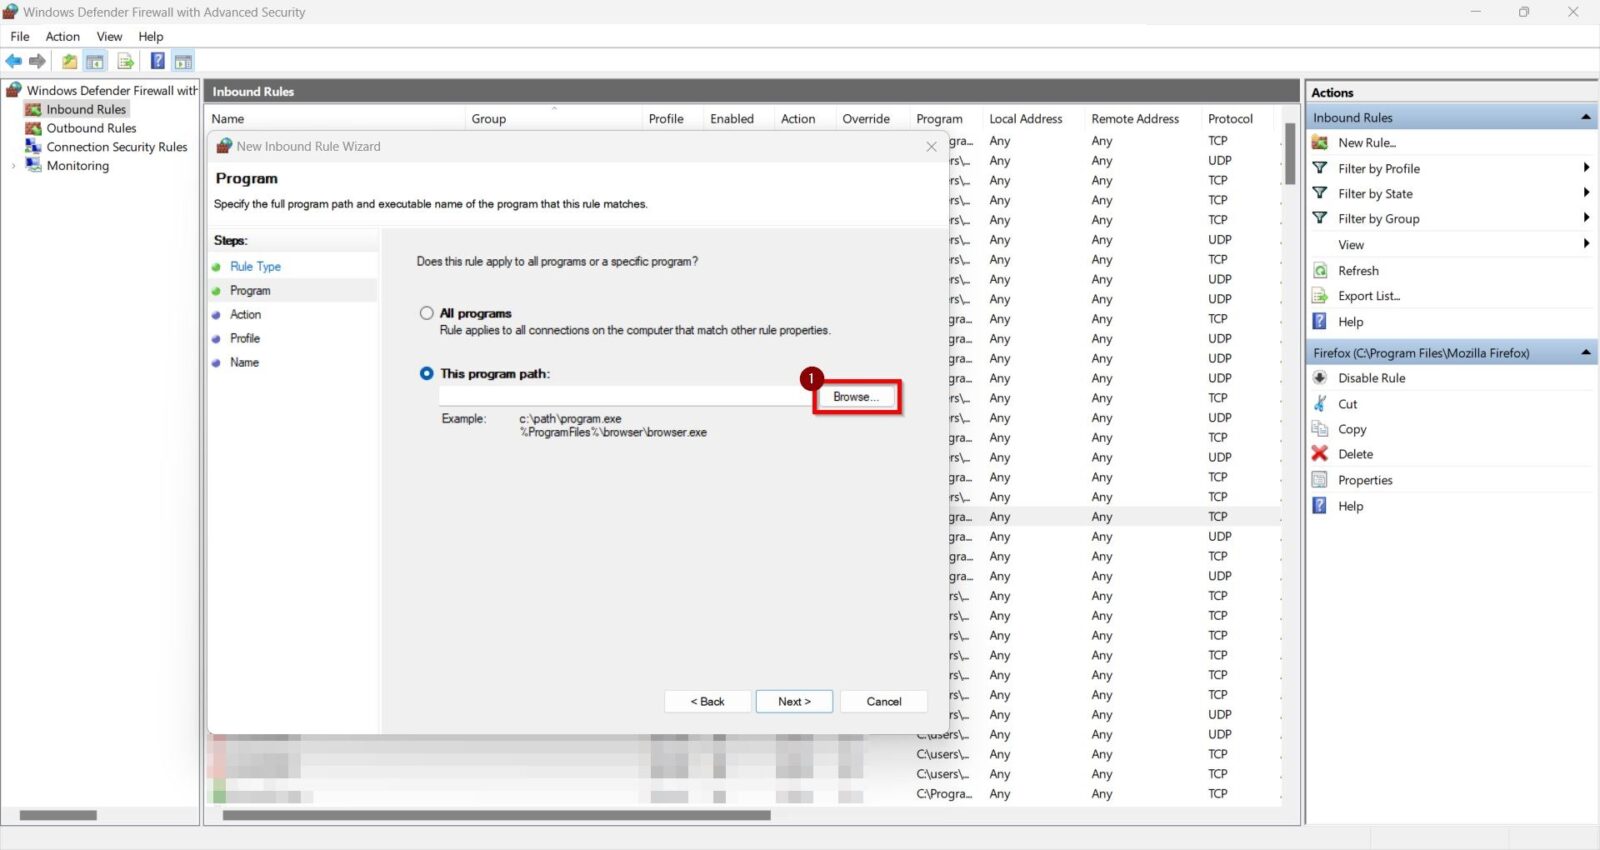
STEP 4 – Click on [Browse].
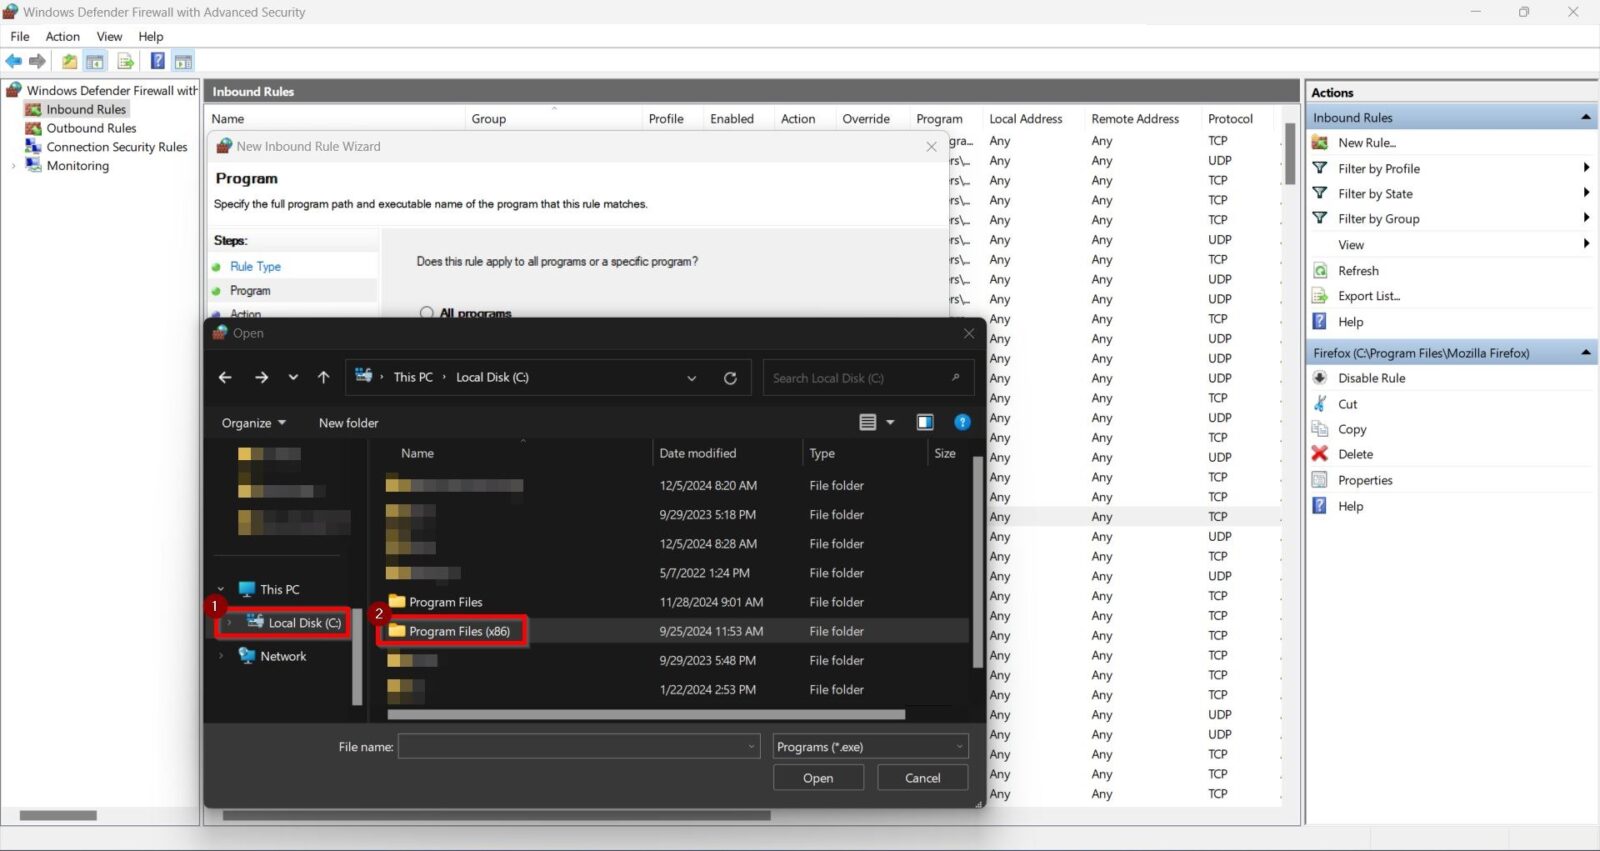
STEP 5 – Select [Local Disk (C:)], click on [Program Files (x86)] folder.
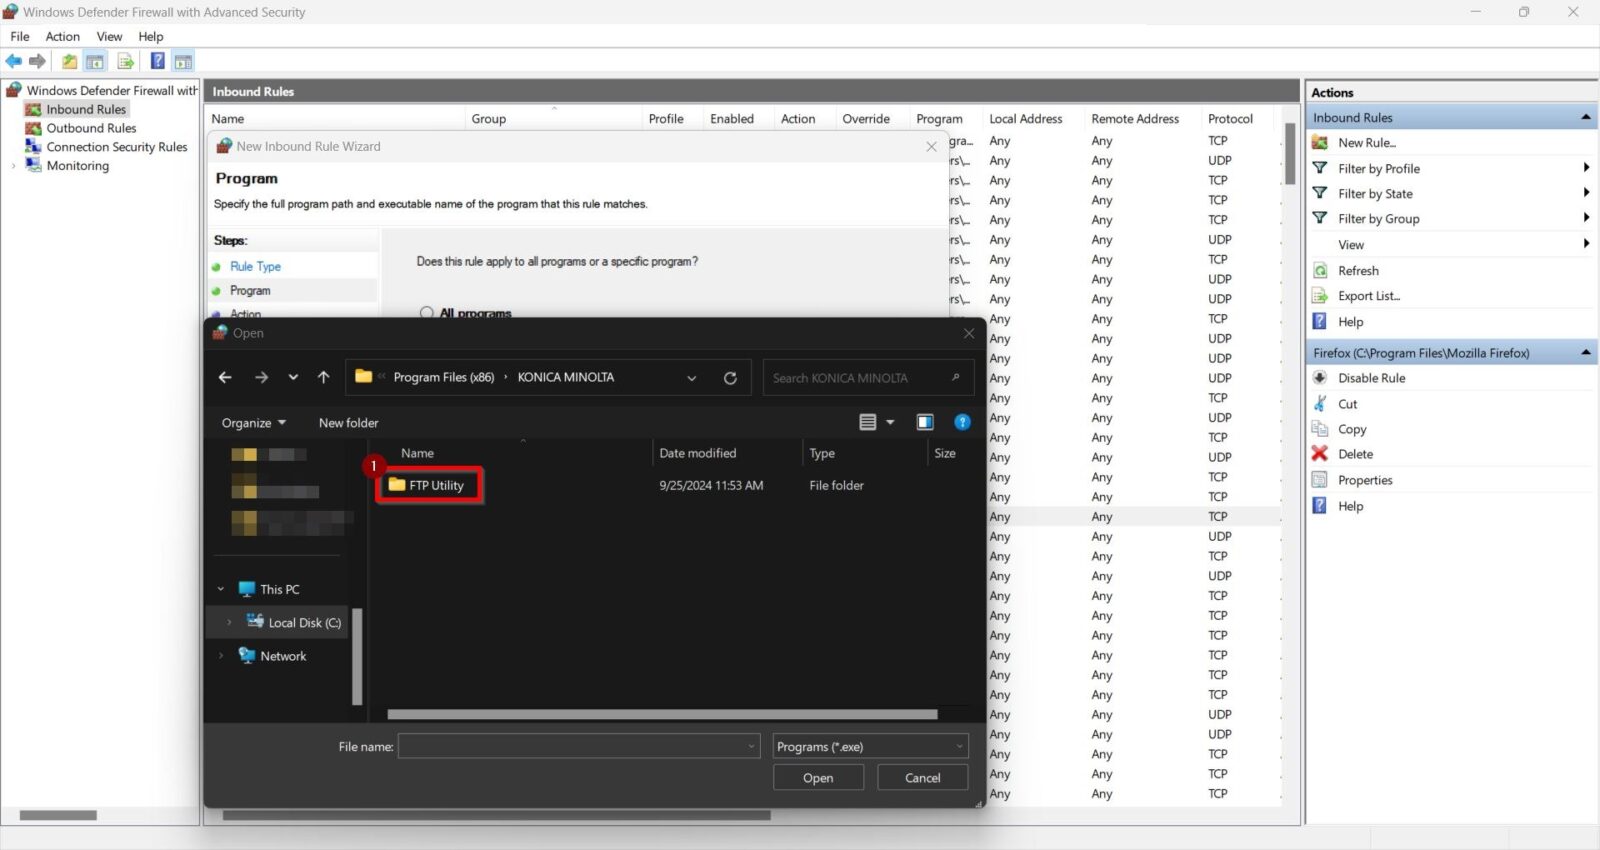
STEP 6 – Select [KONICA MINOLTA] folder.

STEP 7 – Select [FTP Utility] folder.
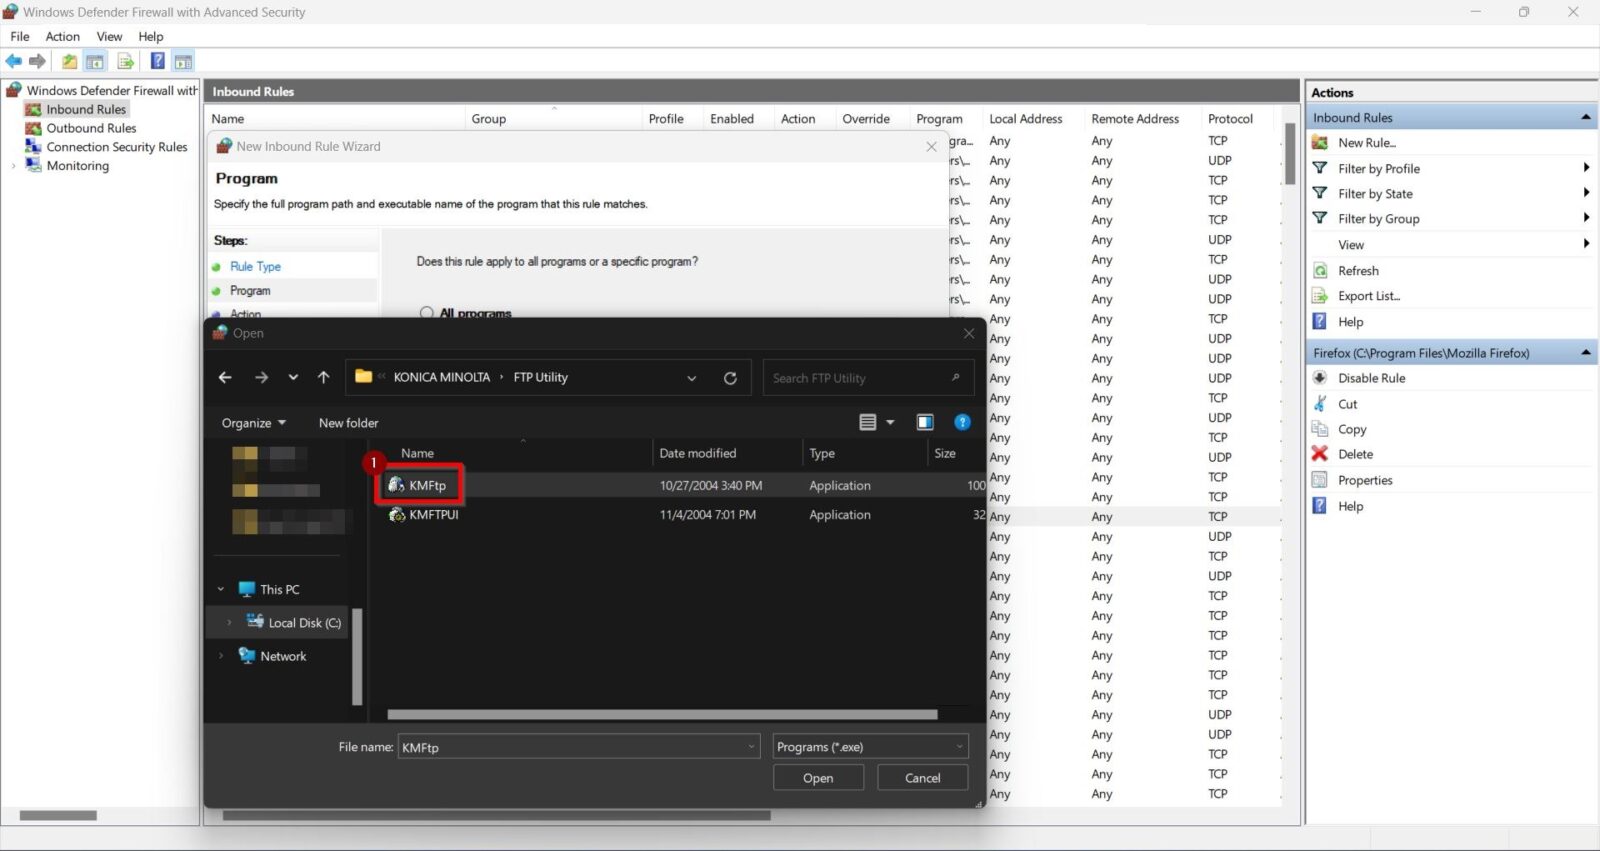
STEP 8 – Select [KMFtp] application. (If the FTP Utility application is not in this folder path, kindly browse to the correct folder)
STEP 9 – Click on [Next] button.
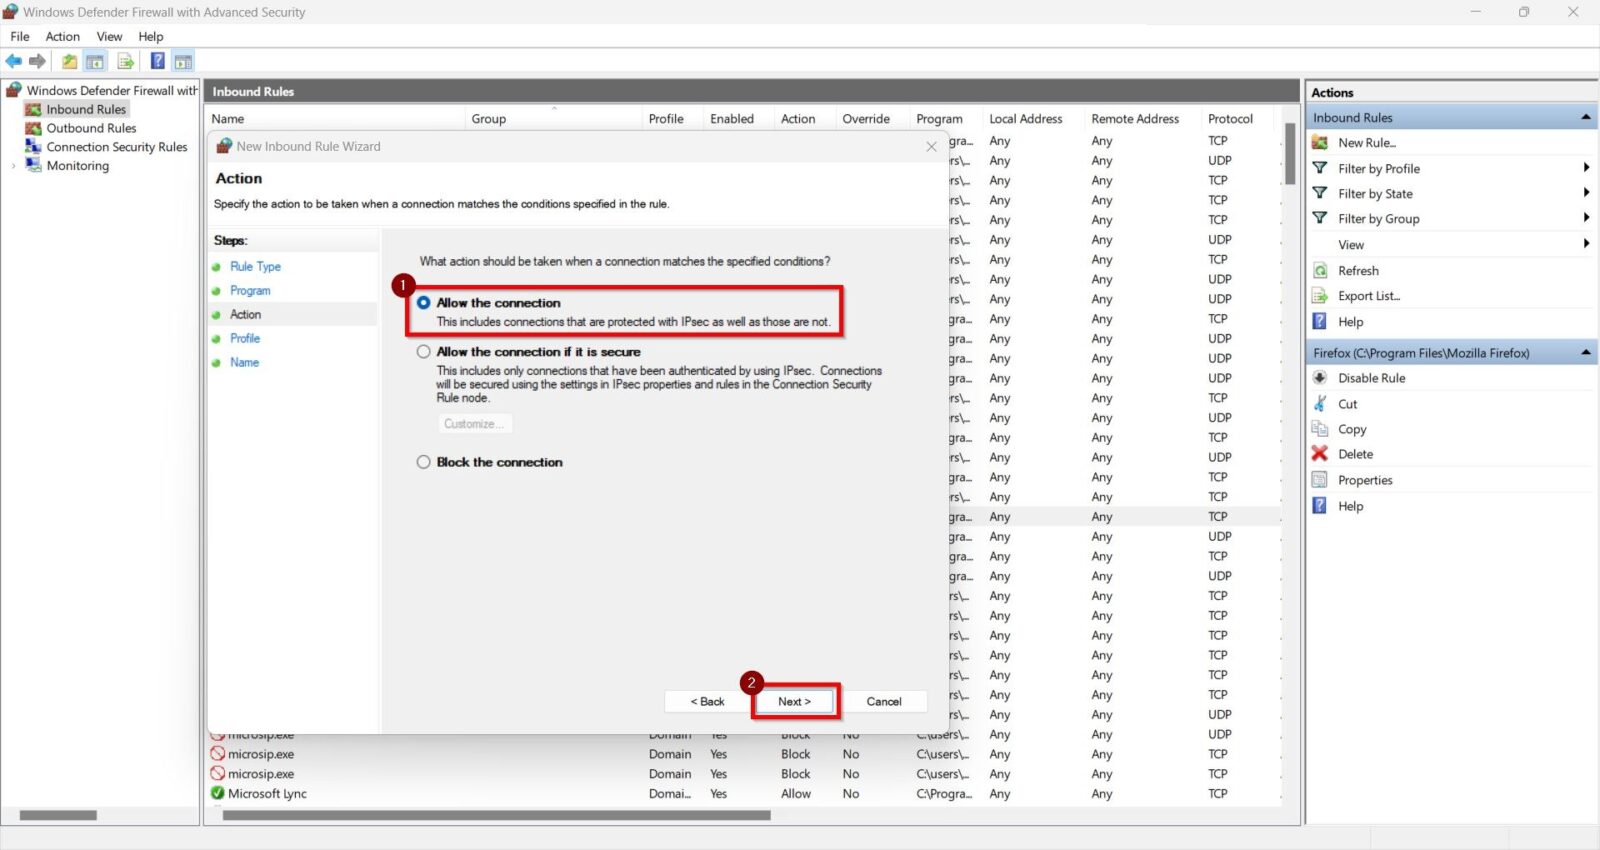
STEP 10 – Select [Allow The Connection] and click on [Next] button.
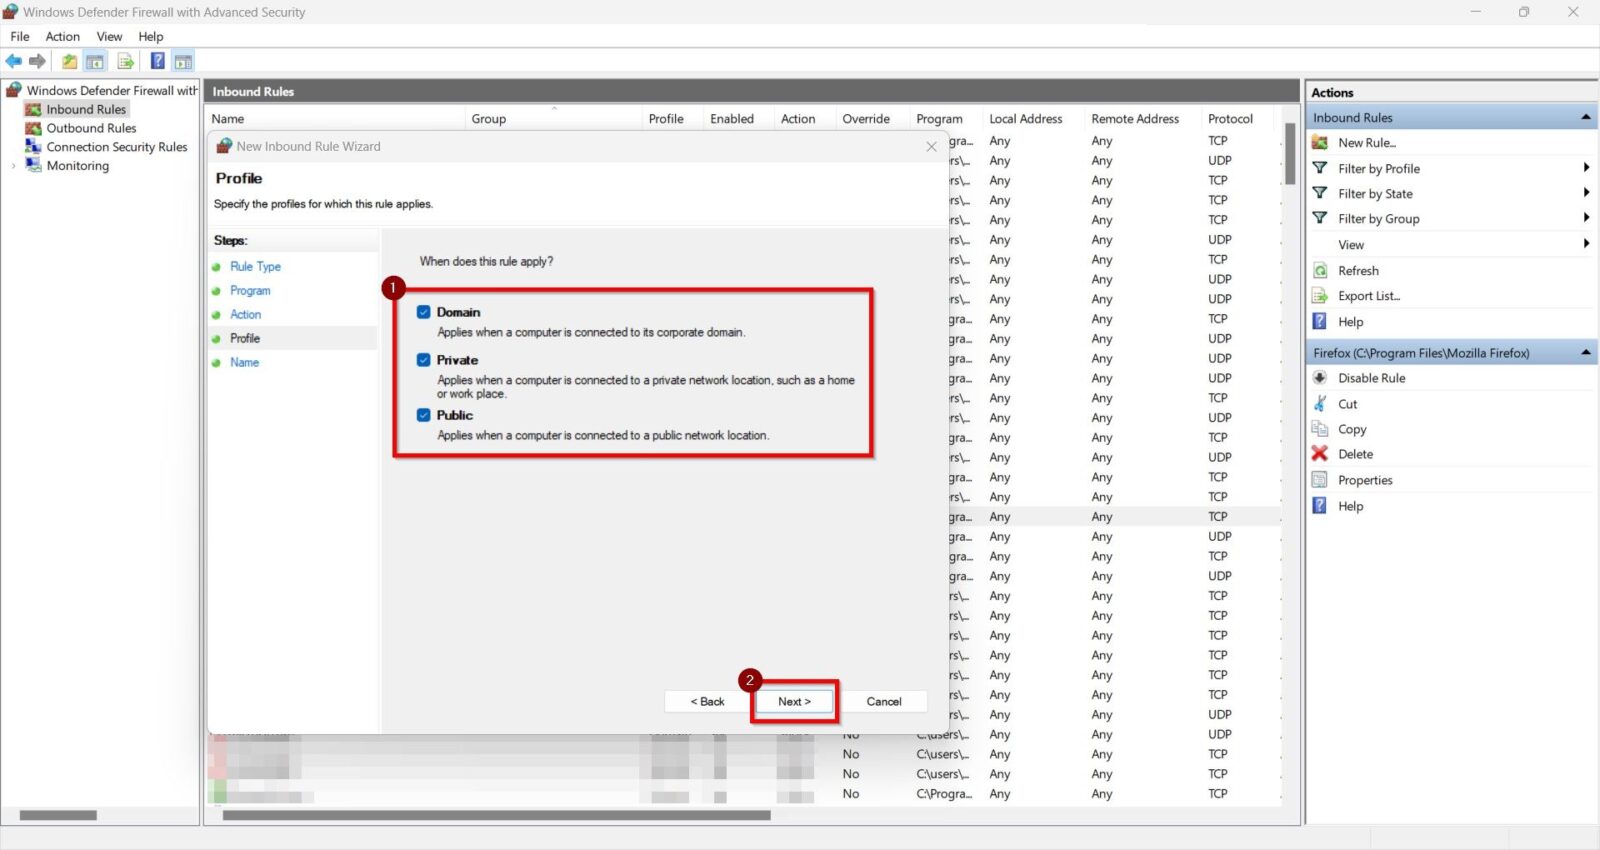
STEP 11 – Tick under the [Domain], [Private], [Public] and click on [Next] button.
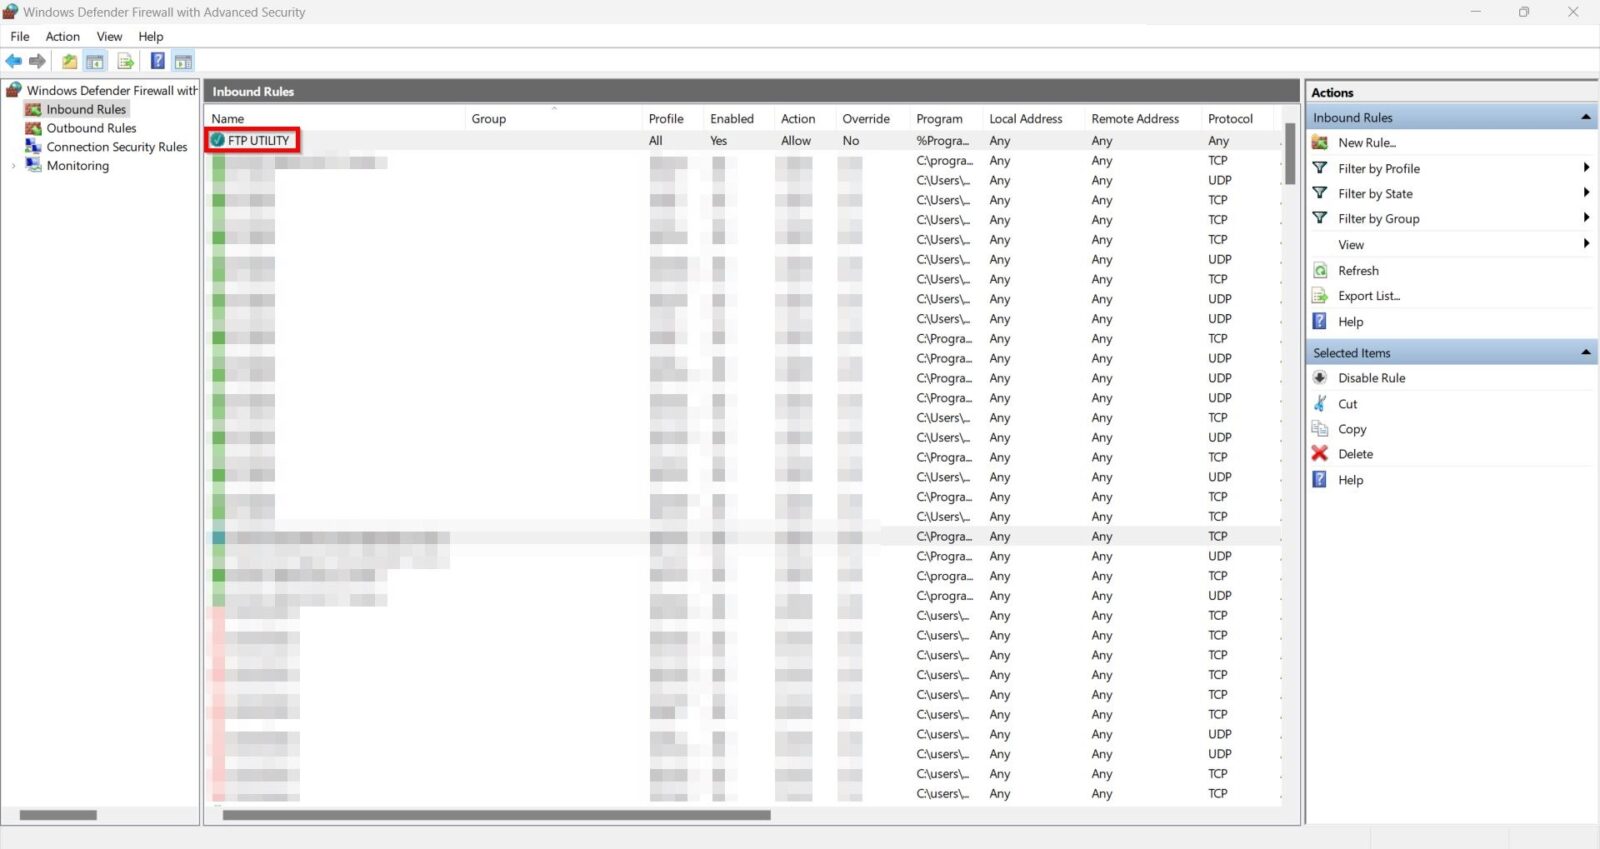
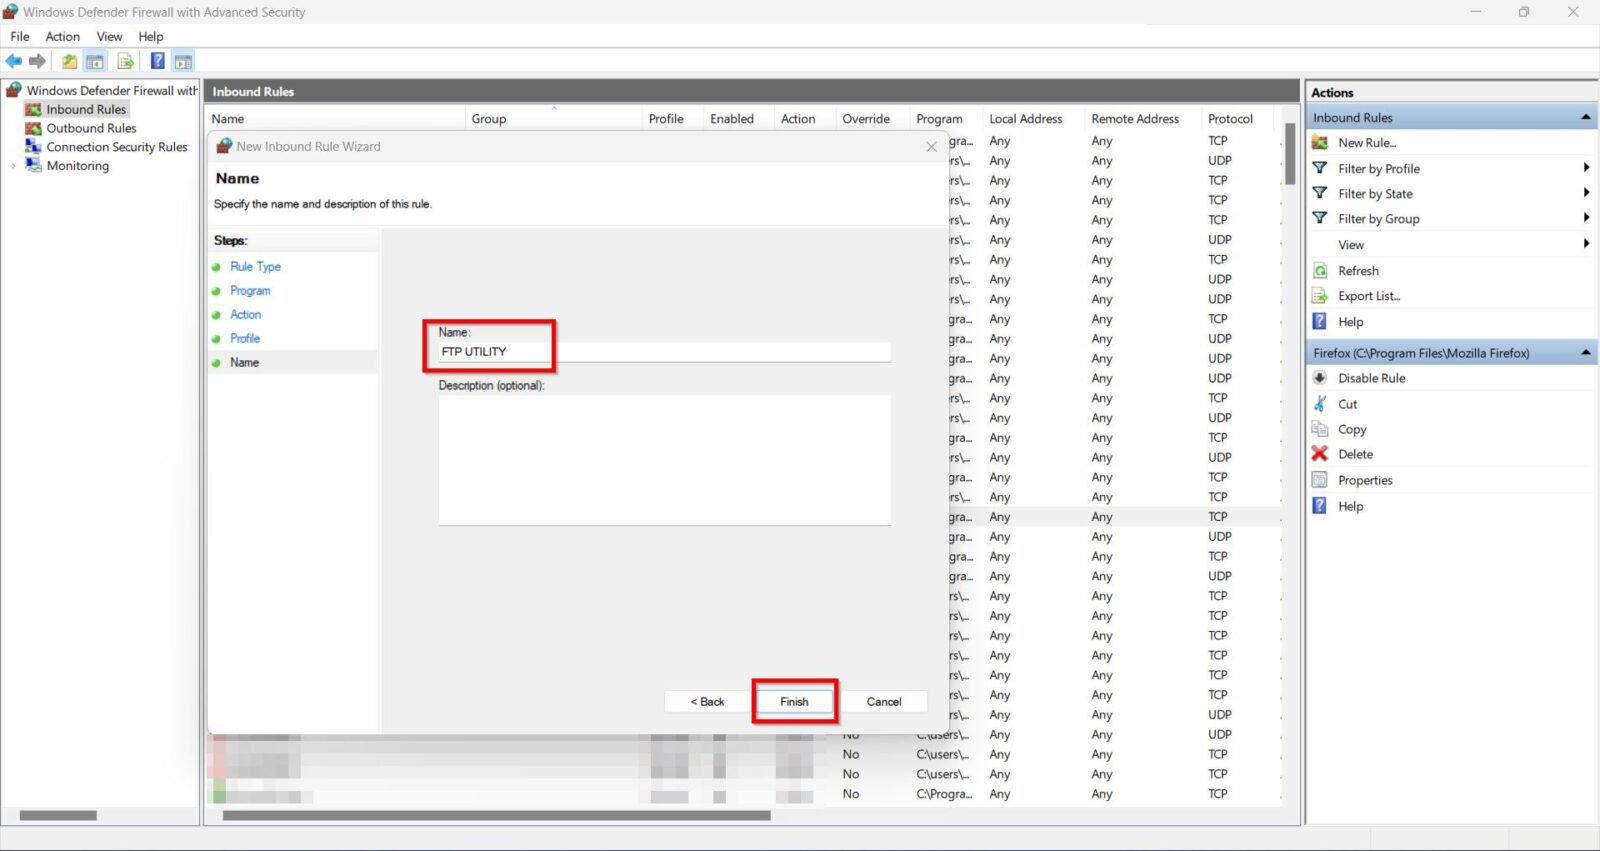
STEP 12 – Rename to [FTP UTILITY] and click on [Finish] button.
STEP 13 – After completing the step, the [FTP UTILITY] is showing in the list and the icon is showing [Green] which mean the firewall allowed the FTP Utility for scanning.