Guide on how to enable multiple scan destination when perform scan on machine.
For the Older Machine series / Non I-Series Machine
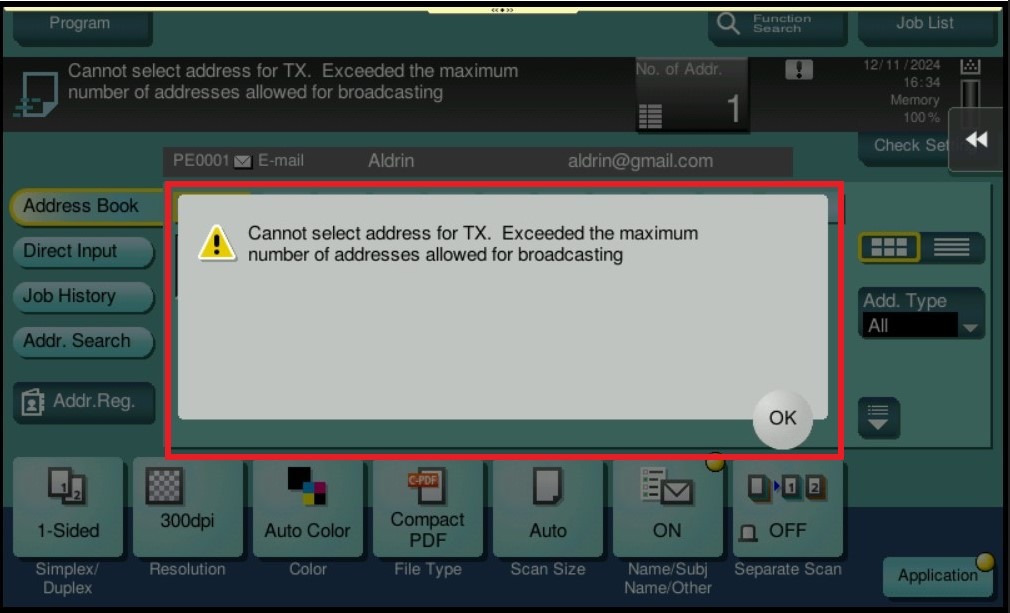
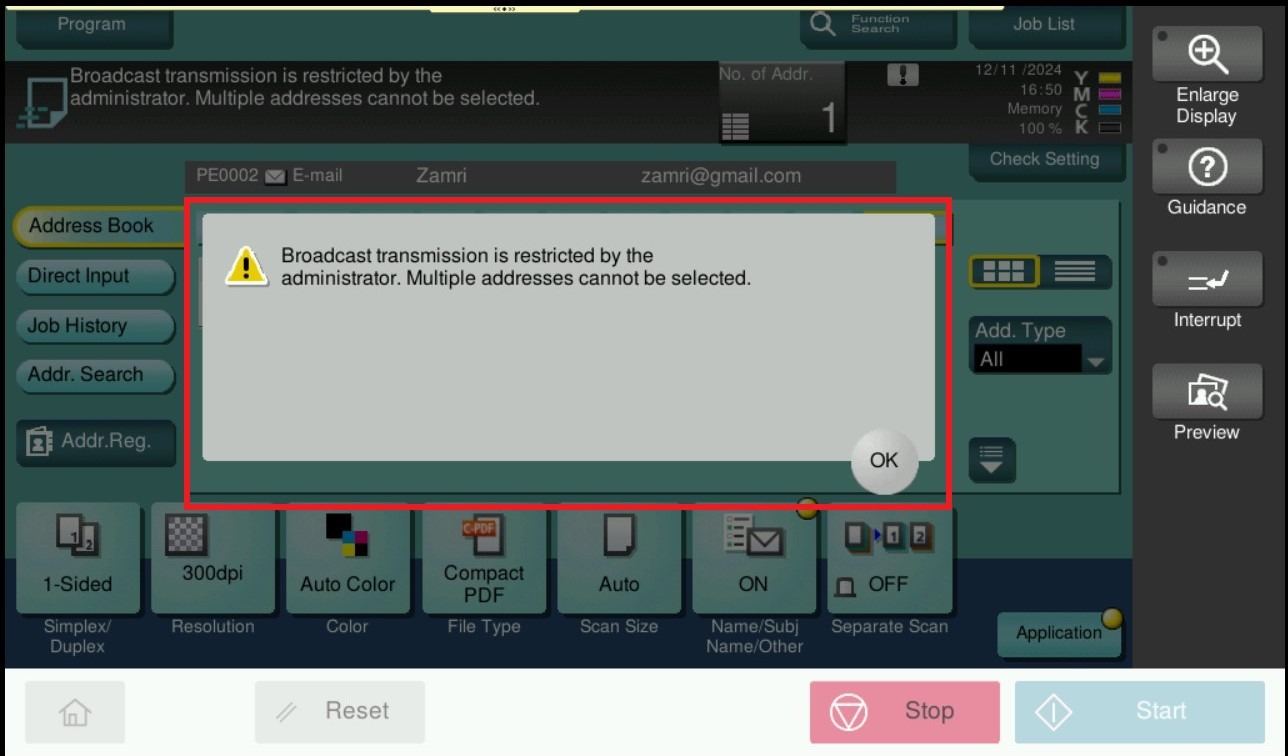
Before enable the setting, the machine will show error when selected more than 1 destination when perform scan.
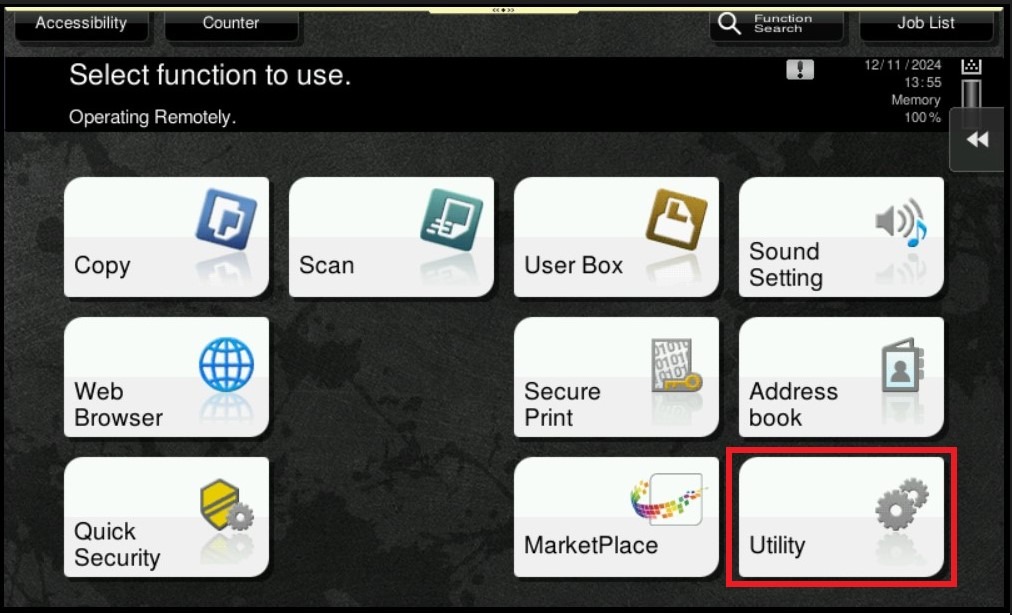
STEP 1 – On the Konica Minolta machine control panel, click on the [Menu] button then select [Utility].
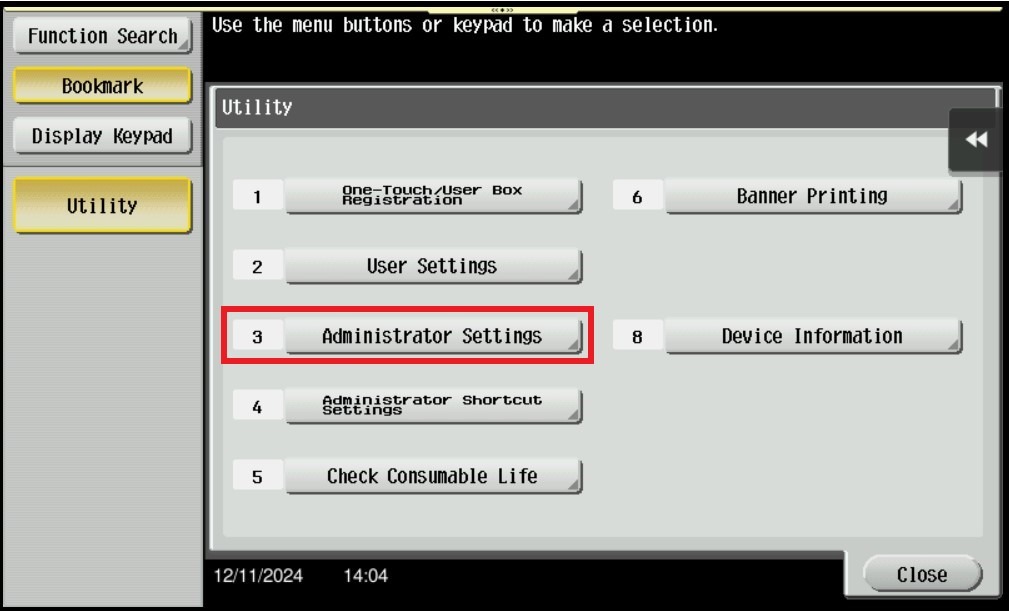
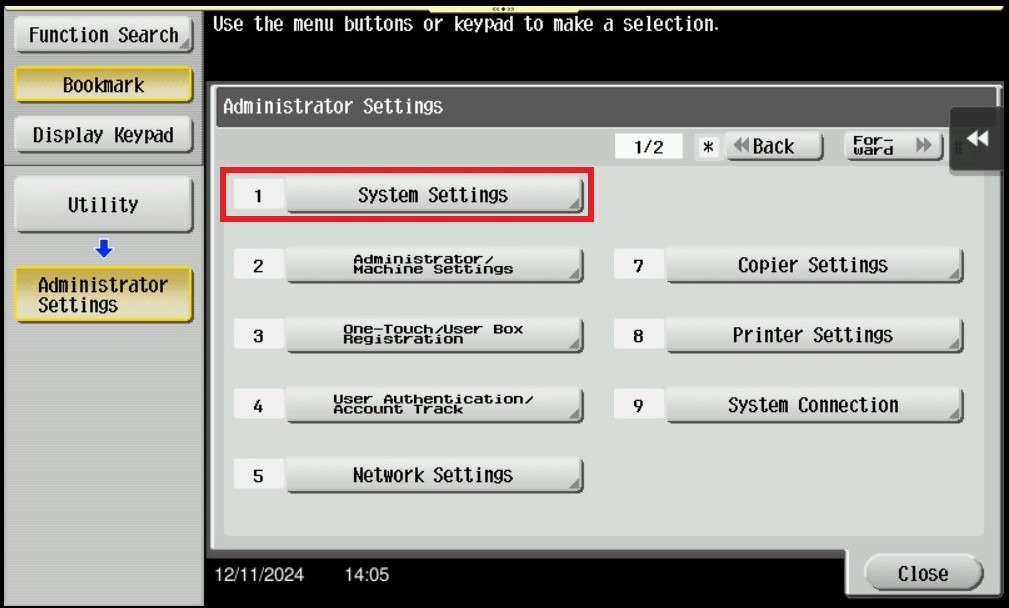
STEP 2 – Select [Administrator Settings].
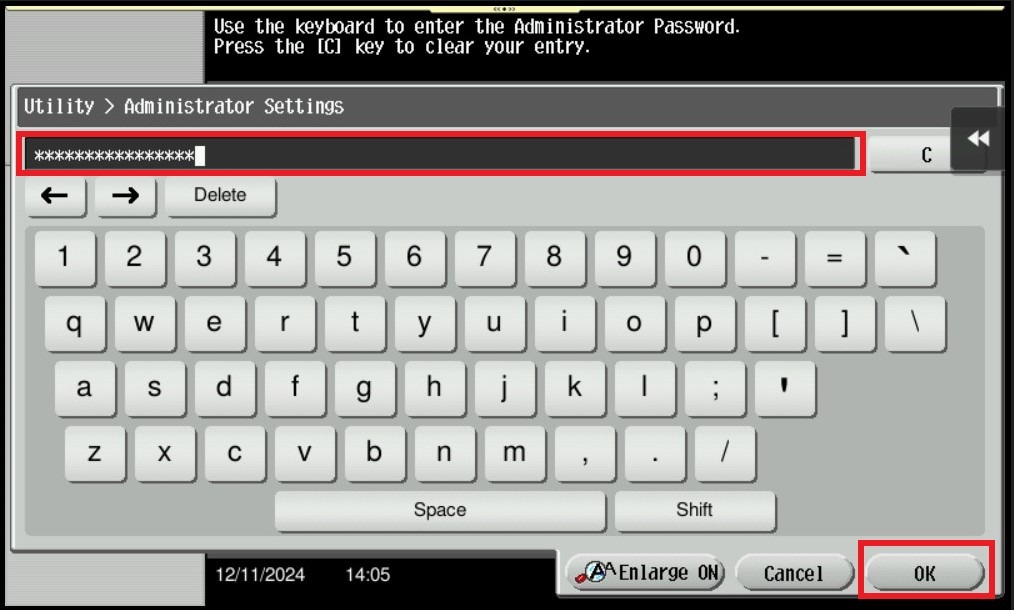
STEP 3 – Key in the default administrator password and click [OK] button.
Default administrator password:
[7801261178012611] or [1234567812345678] or [12345678] or [12341234].
STEP 4 – Select [System Settings].
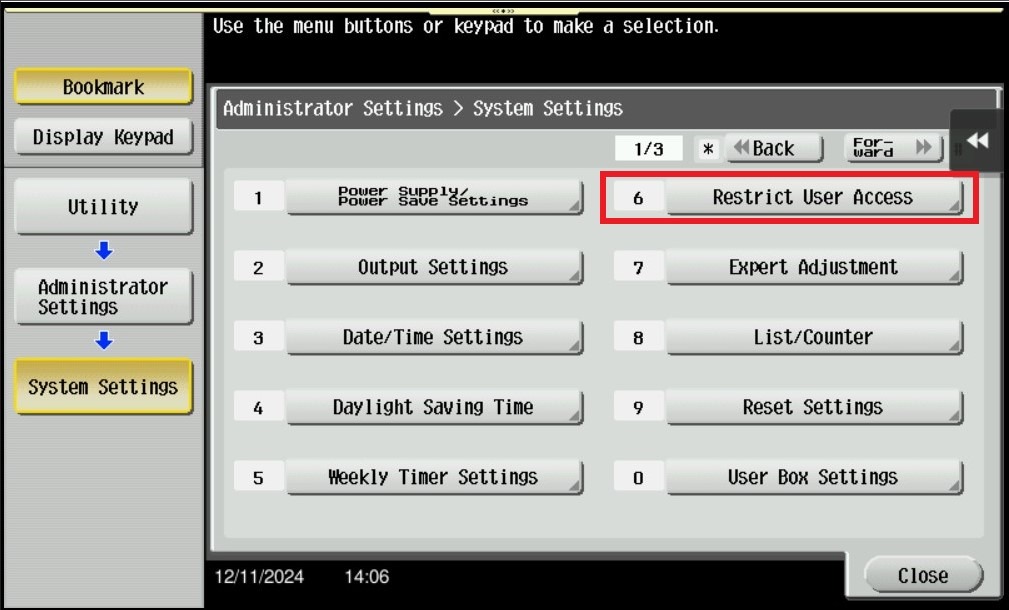
STEP 5 – Click on [Restrict User Access].
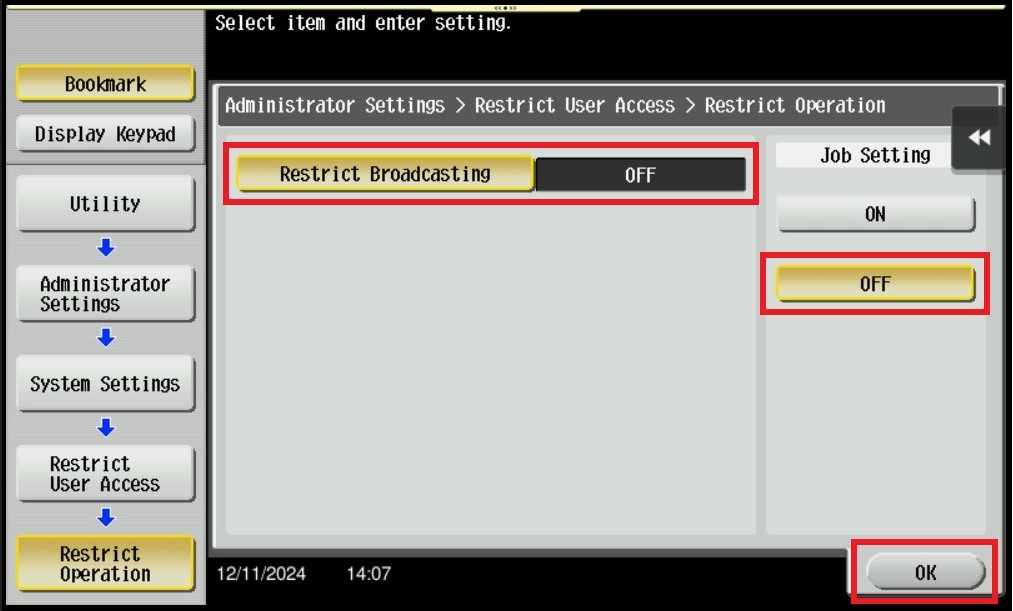
STEP 6 – Change from [ON] to [OFF] for Restrict Broadcasting, click on [OK] to save the setting.
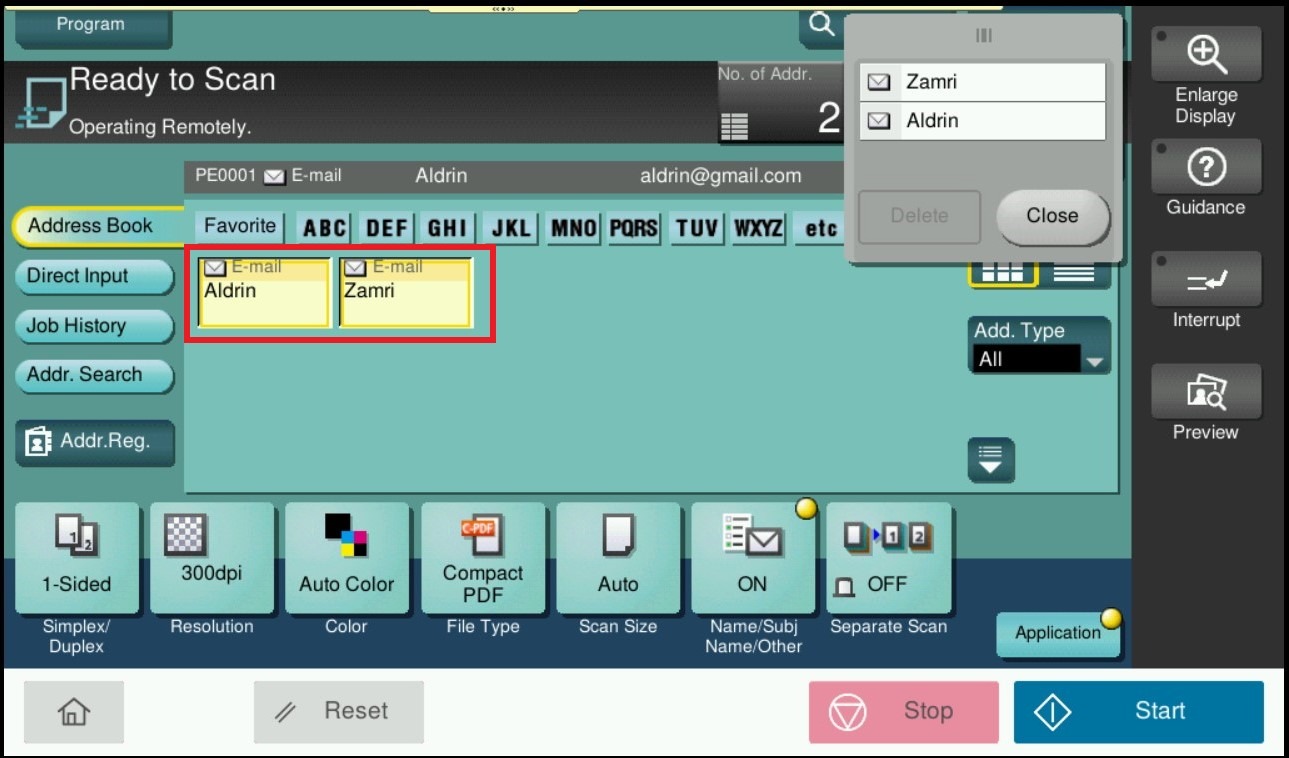
STEP 7 – After save the setting, it will be able to select multiple scan destination on machine as per screenshot below.

For the Newer Machine series / I-Series Machine
Before enable the setting, the machine will show error when selected more than 1 destination when perform scan.
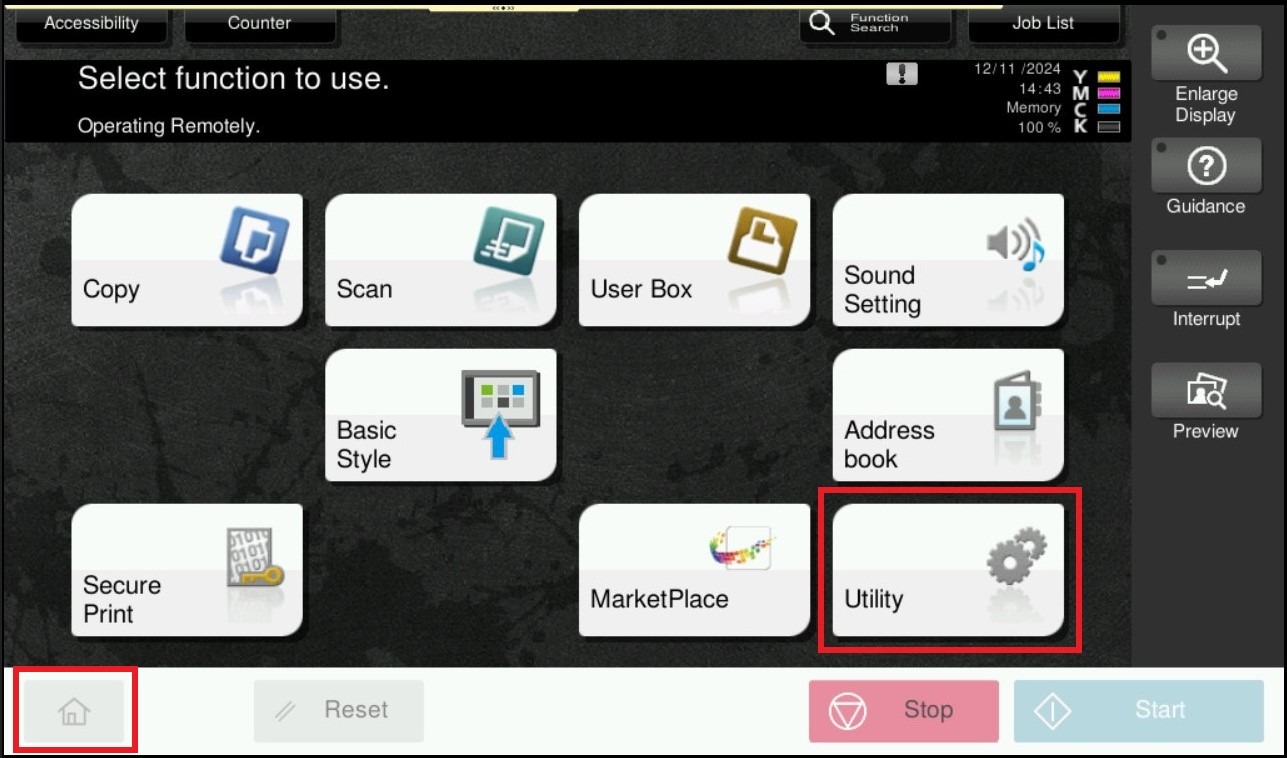
STEP 1 – On the Konica Minolta machine control panel, click on the [Home] button then select [Utility].
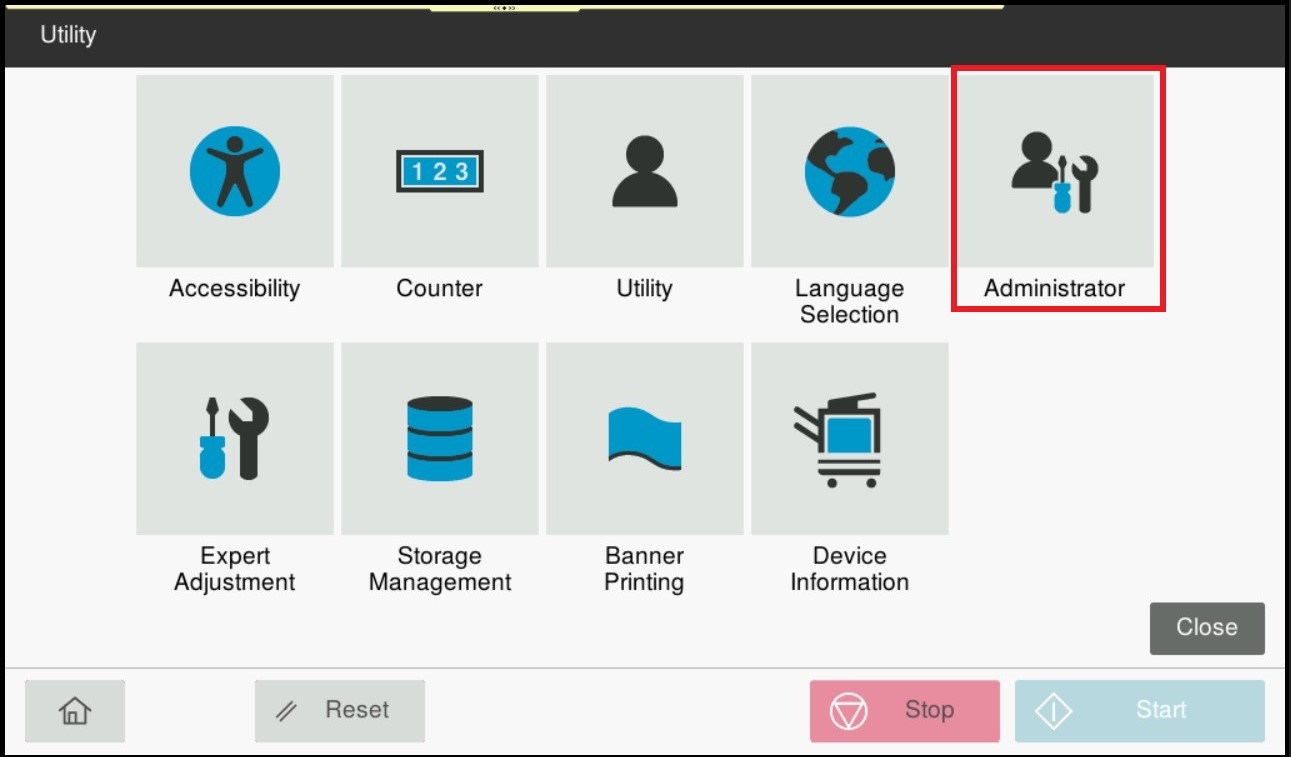
STEP 2 – Select [Administrator].
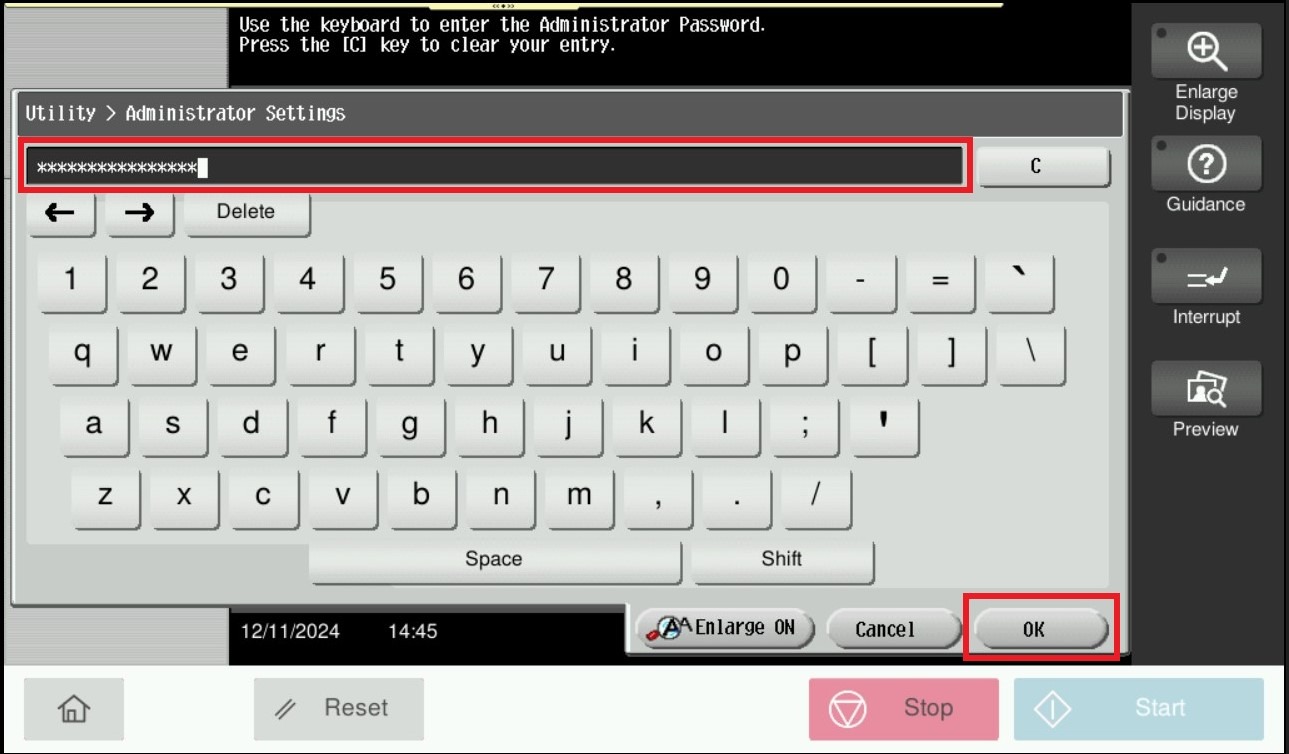
STEP 3 – Key in the default administrator password and click [OK] button.
Default administrator password:
[7801261178012611] or [1234567812345678] or [12345678] or [12341234].
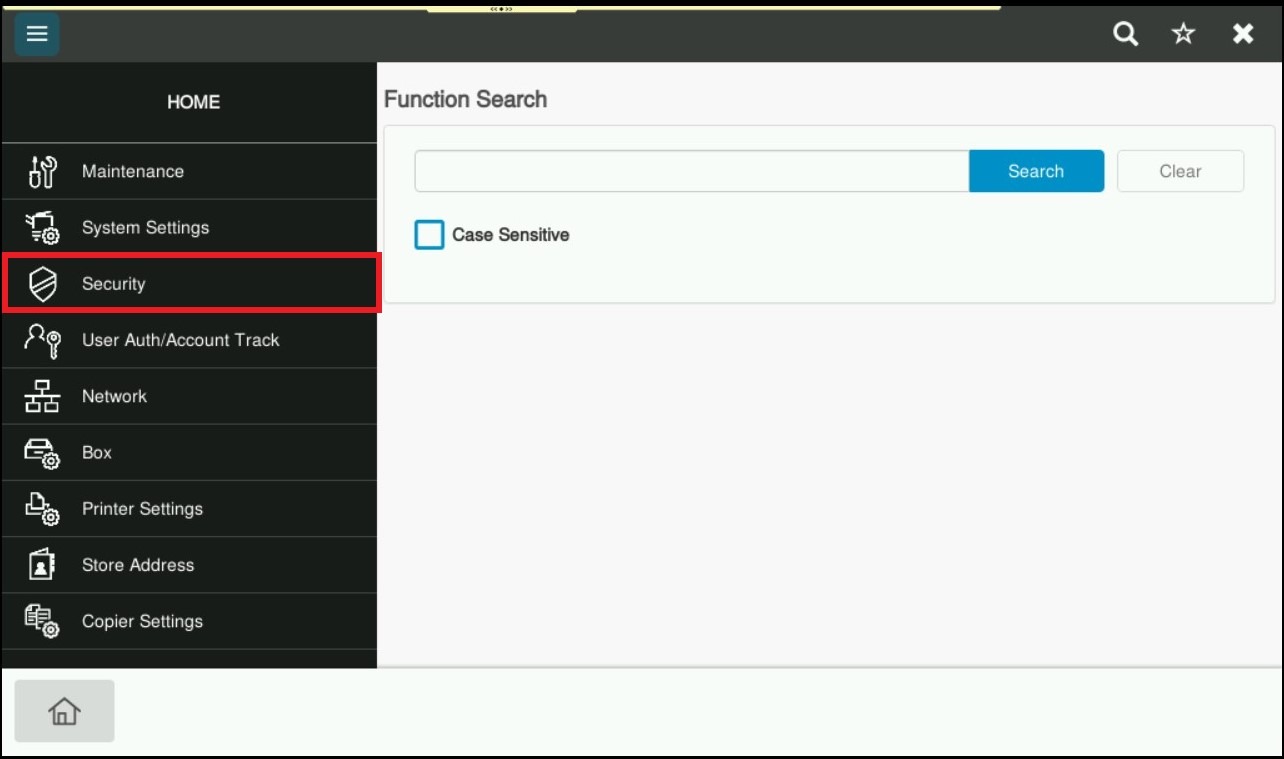
STEP 4 – Select [Security].
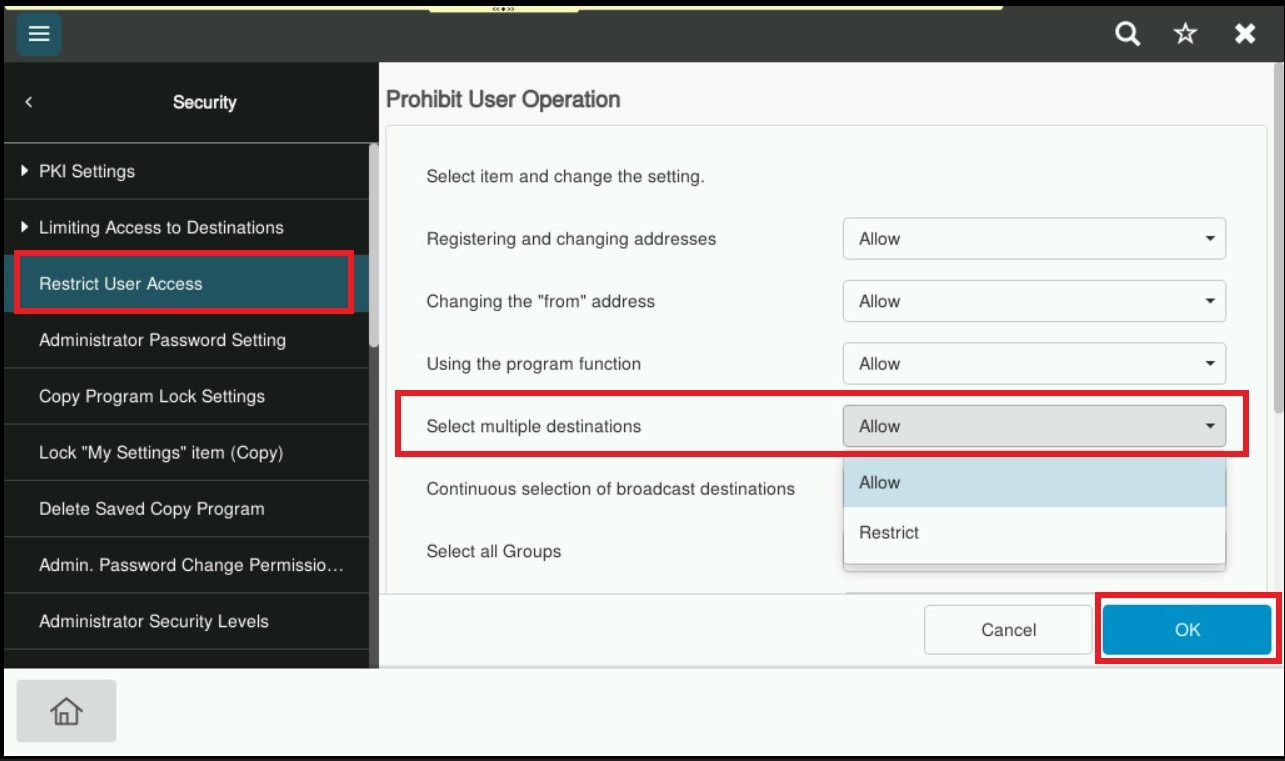
STEP 5 – Select [Restrict User Access], choose [Allow] under [Select multiple destination] and click [OK] to apply the setting.
STEP 6 – After save the setting, it will be able to select multiple scan destination on machine as per screenshot below.