

Guide On How To Change Default Scan File Name On Photostat Machine Or Web Connection
Scan file name by default after scan will be in [Initial of function]+[Machine Model]+[Date], it can be change to the name that is desired. Example remove the name of initial of function example [Text to be added]+[Date] as attached sample below. Kindly follow below step on how to change the scan name either on Photostat Machine or Web Connection.

For the Older Machine series / Non I-Series Machine
How To Change Scan File Name on Photostat Machine
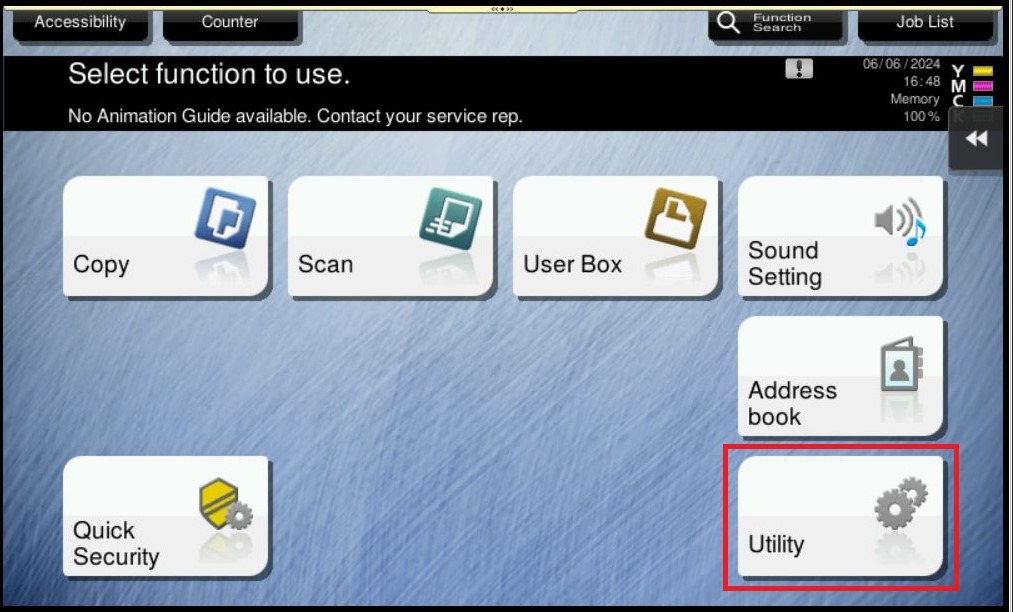
STEP 1 – Select [Utility].
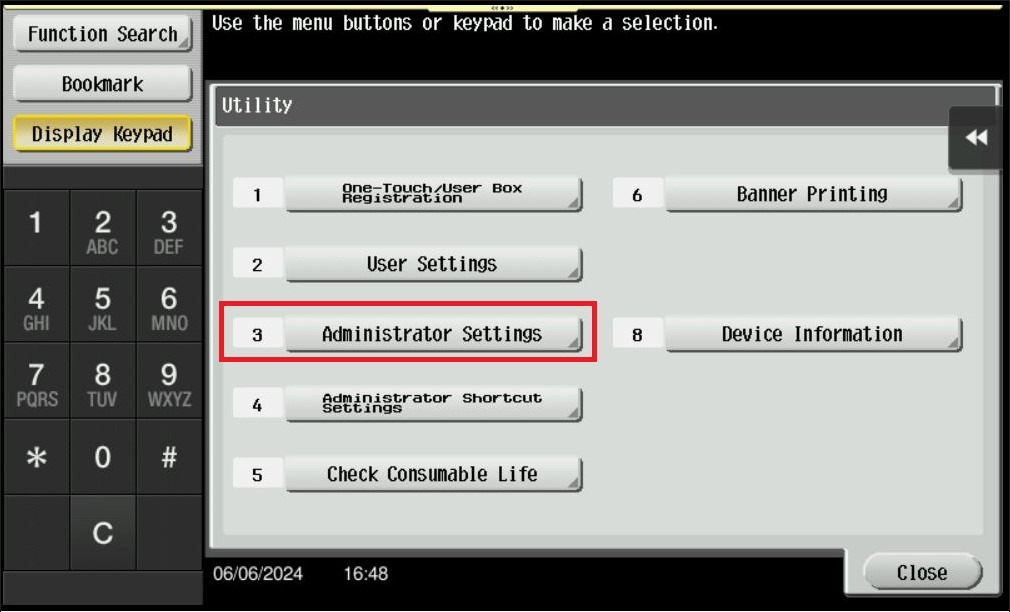
STEP 2 – Select [Administrator Settings].
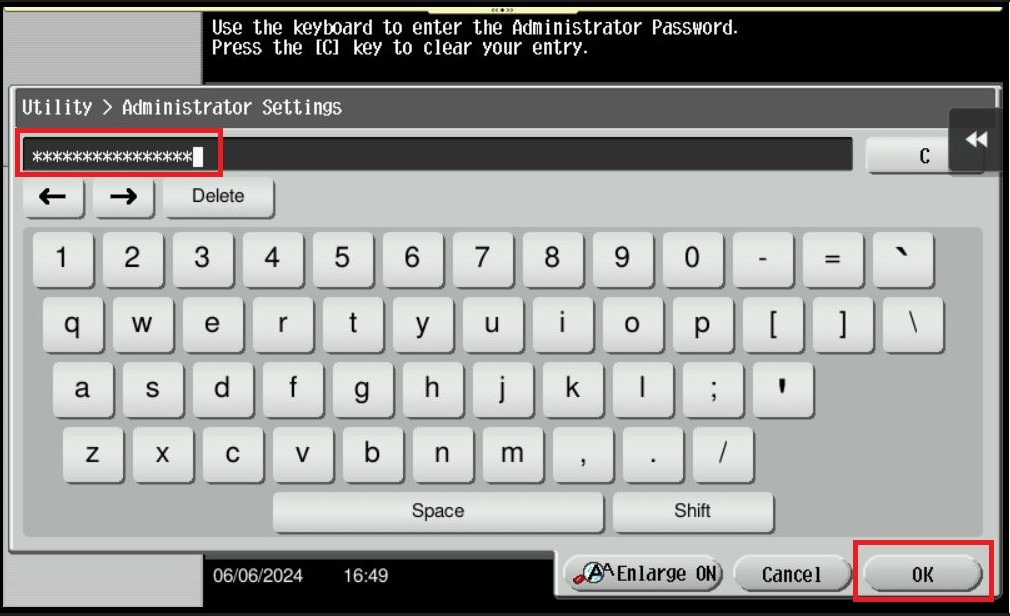
STEP 3 – Key in the default administrator password and click [OK] button.
Default administrator password: [7801261178012611] or [1234567812345678] or [12345678] or [12341234].
**If the default administrator password not able to login, kindly refer to the IT for the password.
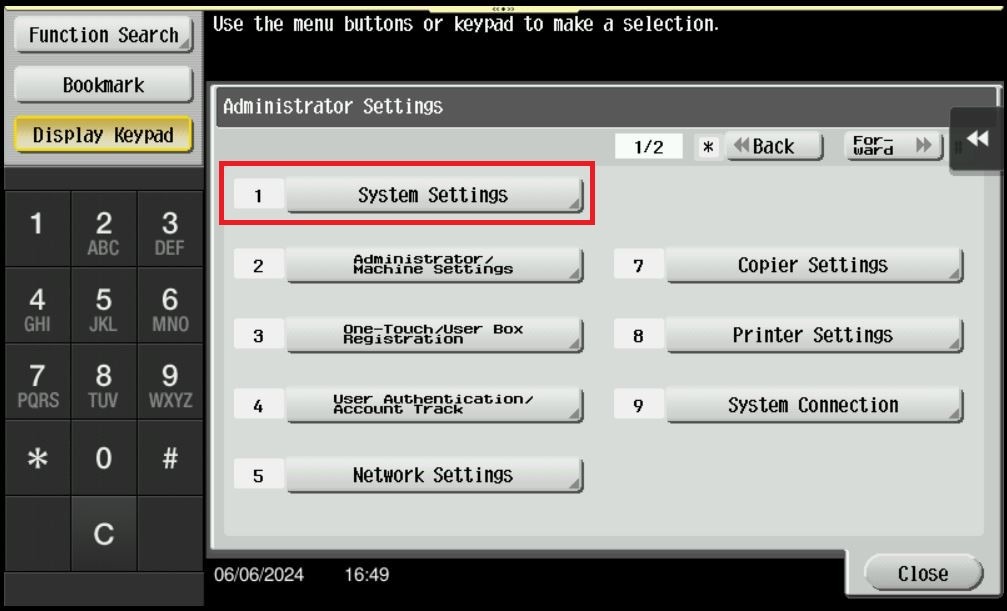
STEP 4 – Select [System Settings] button.
STEP 5 – Select [Scan File Name Settings].
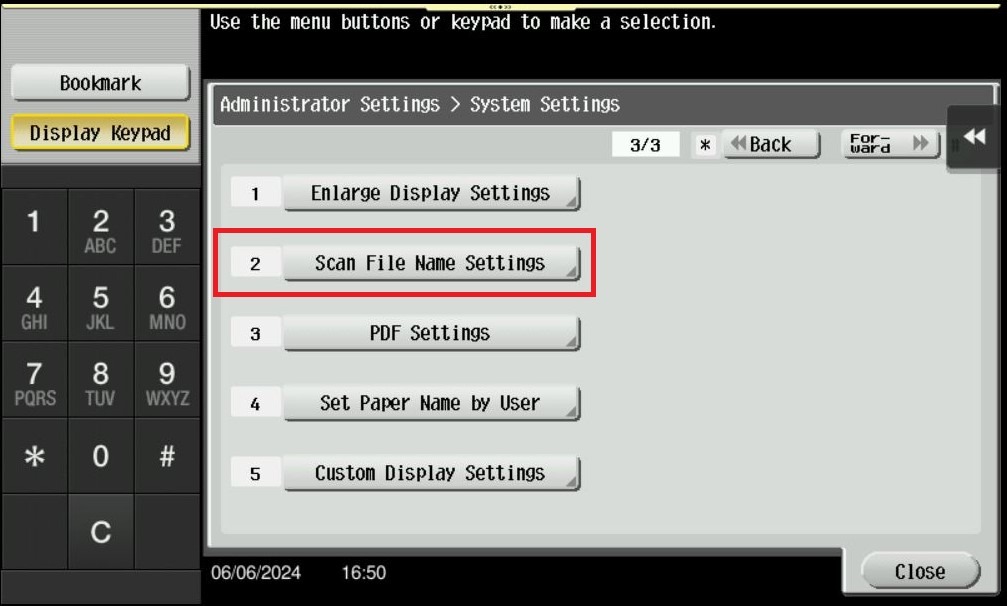
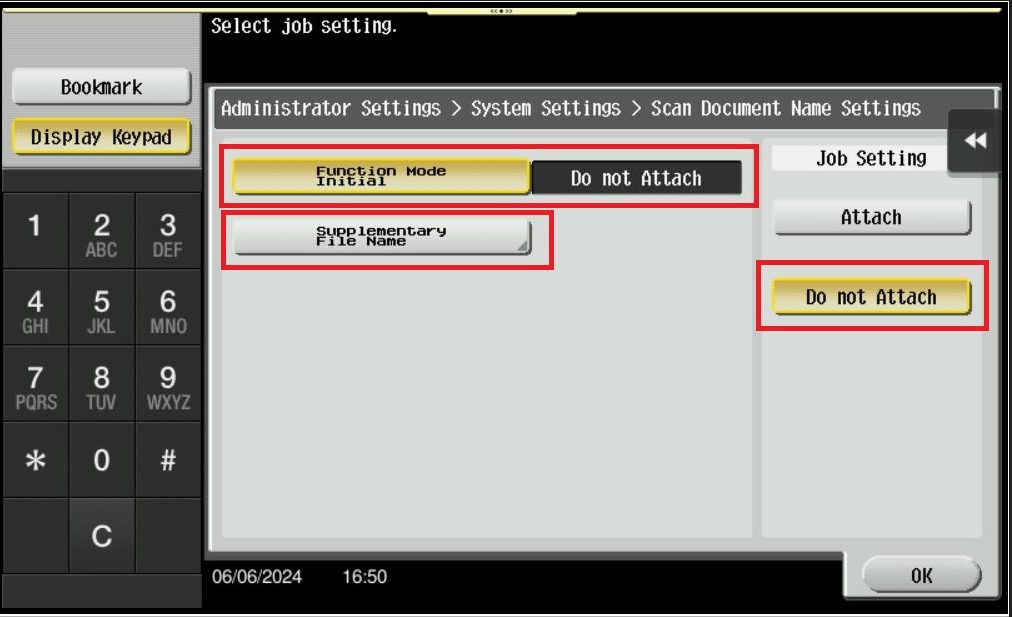
STEP 6 – There will be 2 options available, [Function Mode Initial] & [Supplementary File Name]. Kindly refer to Table A & Table B for explanation and example.
| Display Settings | Description |
| Function Mode Initial | Select whether want to use an initial of the relevant function as prefix. S: Scan/Fax or User box [Attach] is specific by default. If don’t want to specific initial name to be display, kindly select [Not Attach]. |
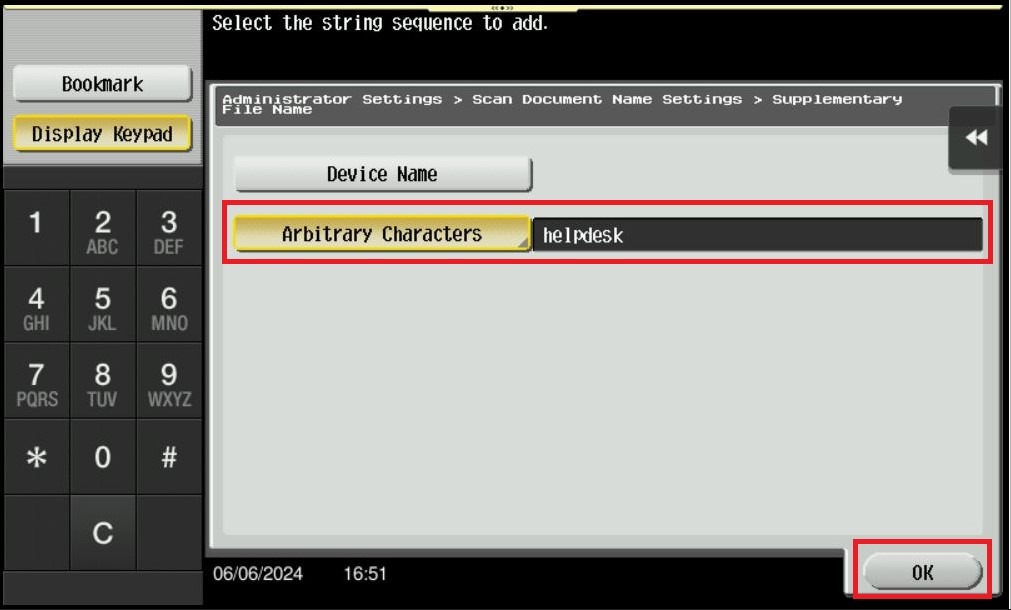
| Supplementary File Name | Select whether to add a device name or desired text to the file name. The name of this machine can be found by login to administrator mode then [System Settings] – [Machine Setting] – [Device Name]. – [Device Name]: Use the machine name for the file name. – [Arbitrary Characters]: Use any desired text for the file name up to 10 characters. |
Table A: Explanation of the Function Mode Initial and Supplementary File Name function.
| Function Mode Initial | Description | Example Output |
| [Attach] | [Device Name] | SKM_C368XXXXXXXXXX |
| [Attach] | [Arbitrary Characters] (Using own desired characters Helpdesk as example) | SHelpdeskXXXXXXXXXXX |
| [Not Attach] | [Device Name] | KM_C368XXXXXXXXXXX |
| [Not Attach] | [Arbitrary Characters] (Using own desired characters Helpdesk as example) | HelpdeskXXXXXXXXXXX |
Table B: Example combination of the Function Mode Initial and Supplementary File Name function.
How To Change Scan File Name on Web Connection
STEP 1 – At the web browser, enter the IP address of the Konica Minolta device. Click Here for the guide on how to get the machine IP Address.
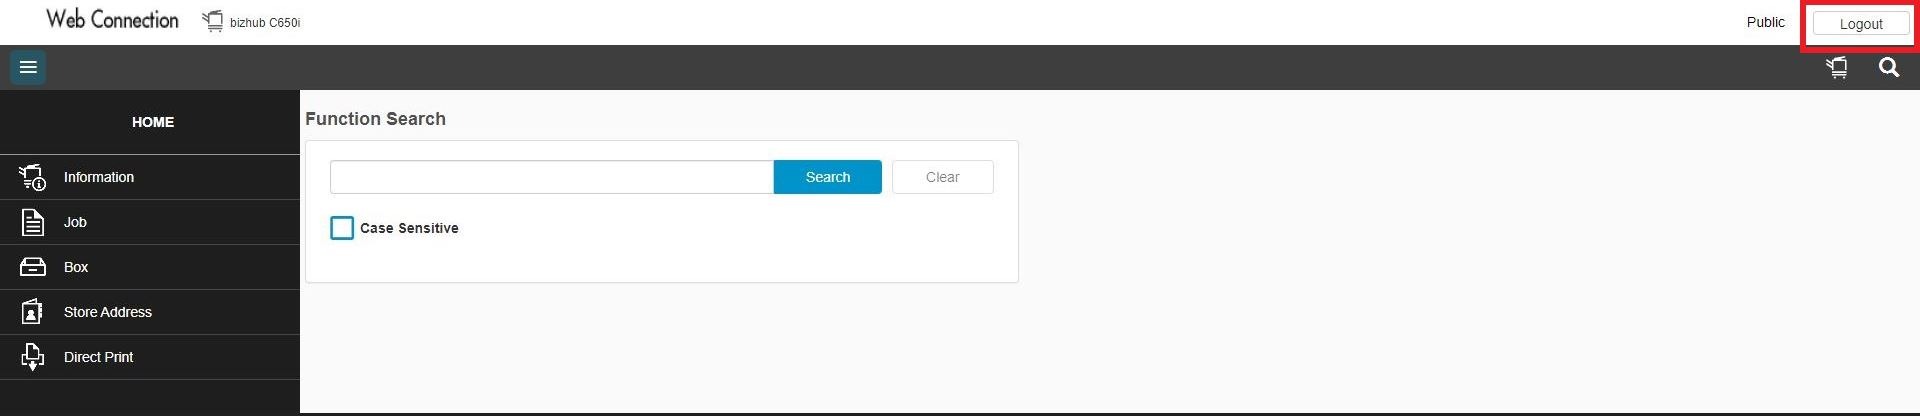
STEP 2 – Select [To Login Screen] to logout from public user, skip this step if the webpage is already on login page.

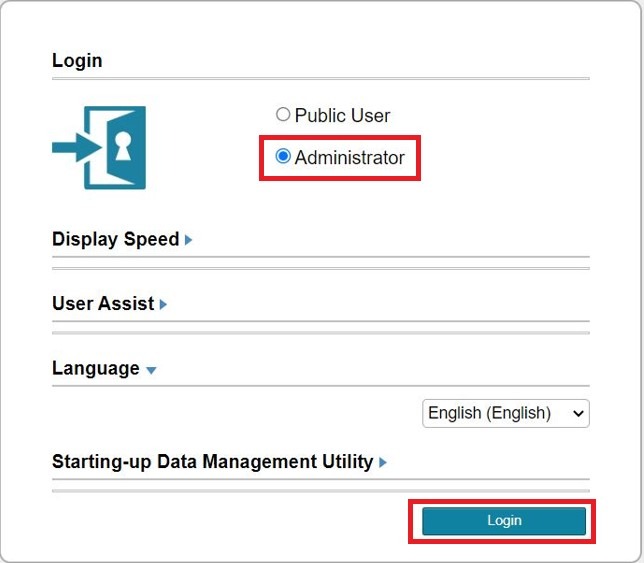
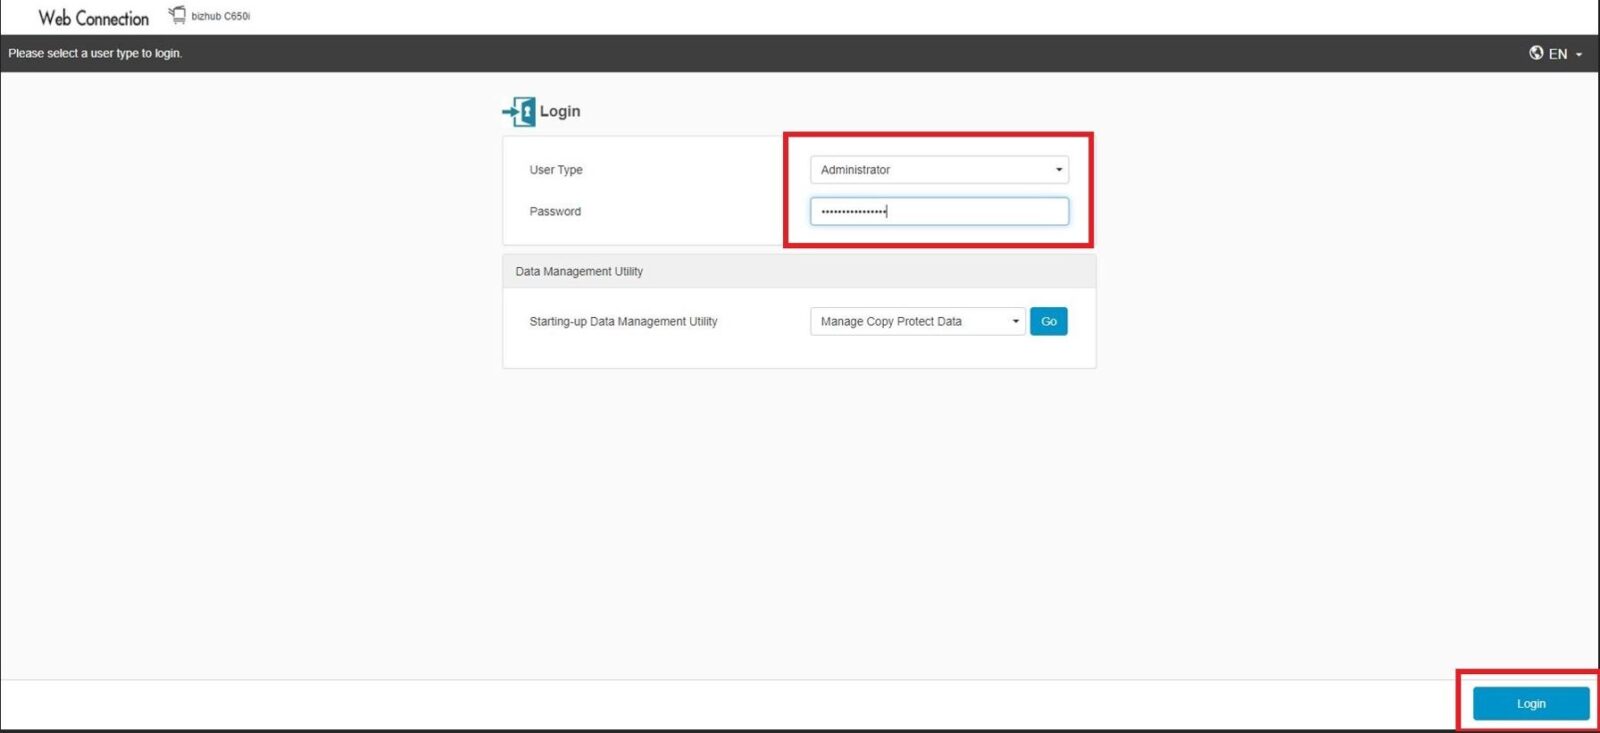
STEP 3 – Select [Administrator] option, click on [Login].
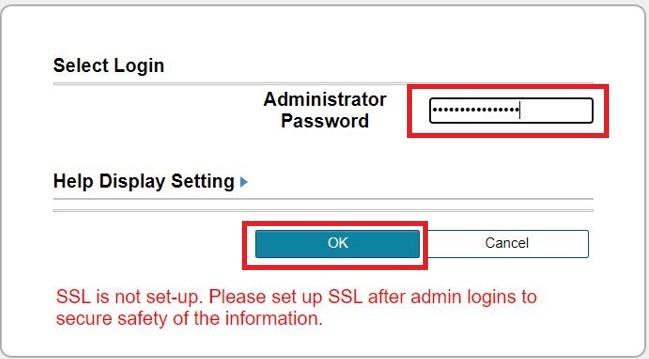
STEP 4 – Key in the default administrator password and click [OK] button.
Default administrator password: [7801261178012611] or [1234567812345678] or [12345678] or [12341234].
**If the default administrator password not able to login, kindly refer to the IT for the password.
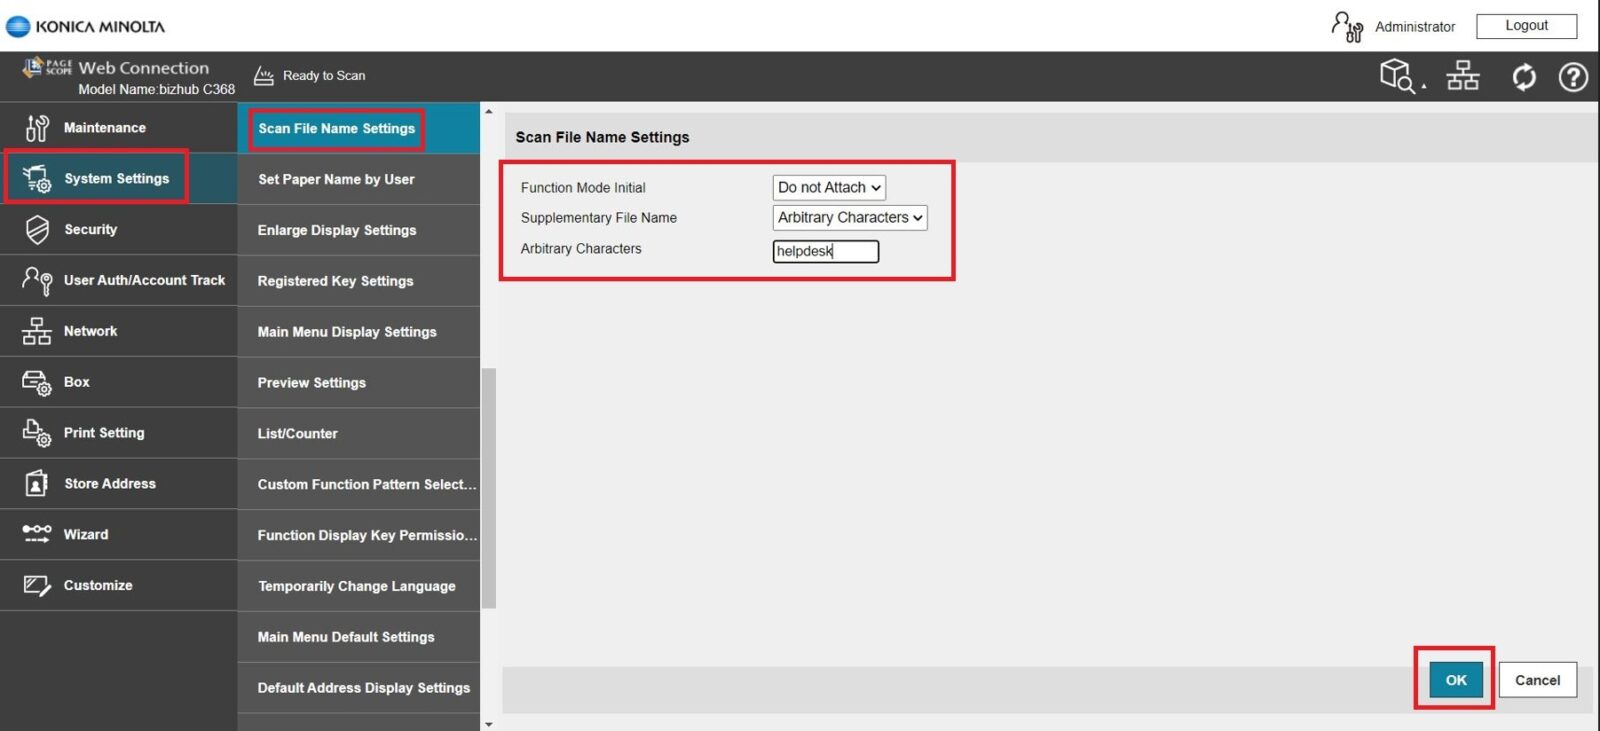
STEP 5 – Select [System Settings] – [Scan File Name Settings], edit the several options below. Then click [OK] to save the setting.
- [Function Mode Name]: Select [Do not attach] if don’t want to specific initial name to be display.
- [Supplementary File Name]: Select [Arbitrary Characters] if use any desired text for the file name using up to 10 characters.
- [Arbitrary Characters]: Key in the desired text for the file name using up to 10 characters.
For the Newer Machine series / I-Series Machine
How To Scan File Name on Photostat Machine or Web Connection
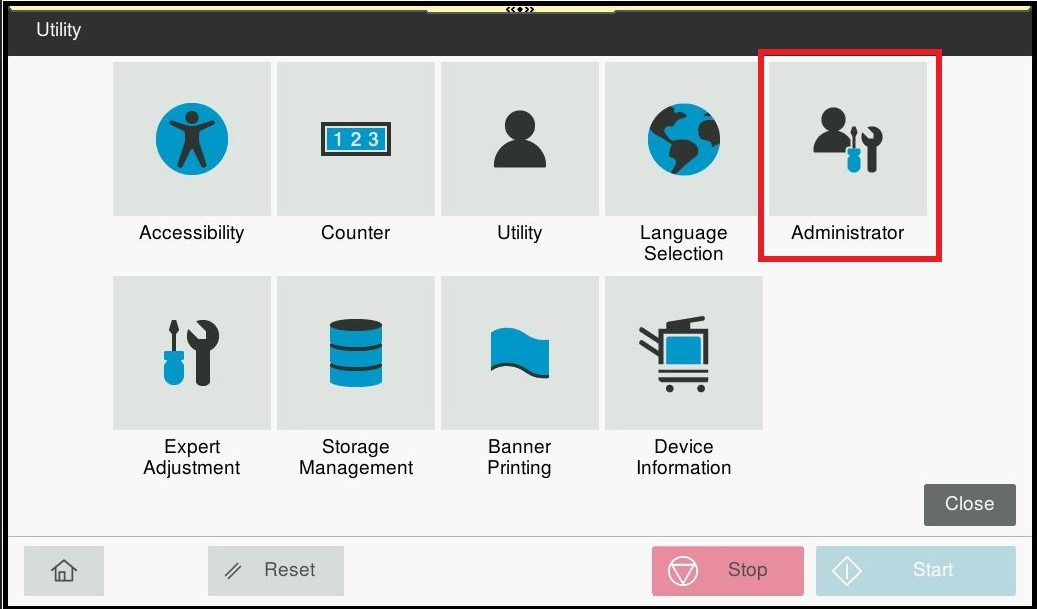
STEP 1 – Select [Home] – [Utility].
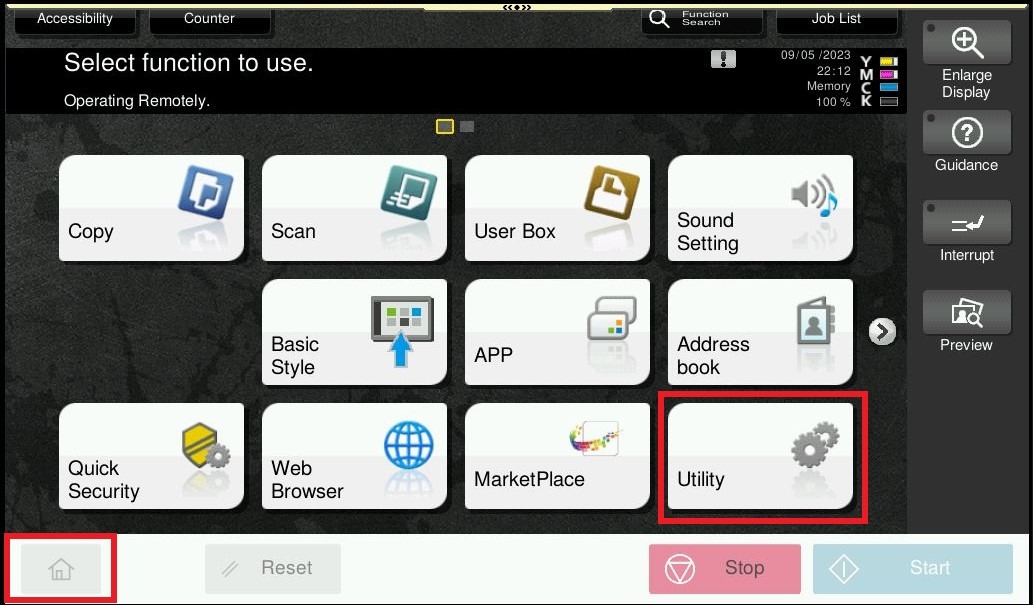
**You may access web connection page via machine IP Address. Click on this to check how to get the IP Address from machine, then key in Konica Minolta Machine IP Address at web browser and log in as admin the Web Connection.
STEP 2 – Select [Administrator].
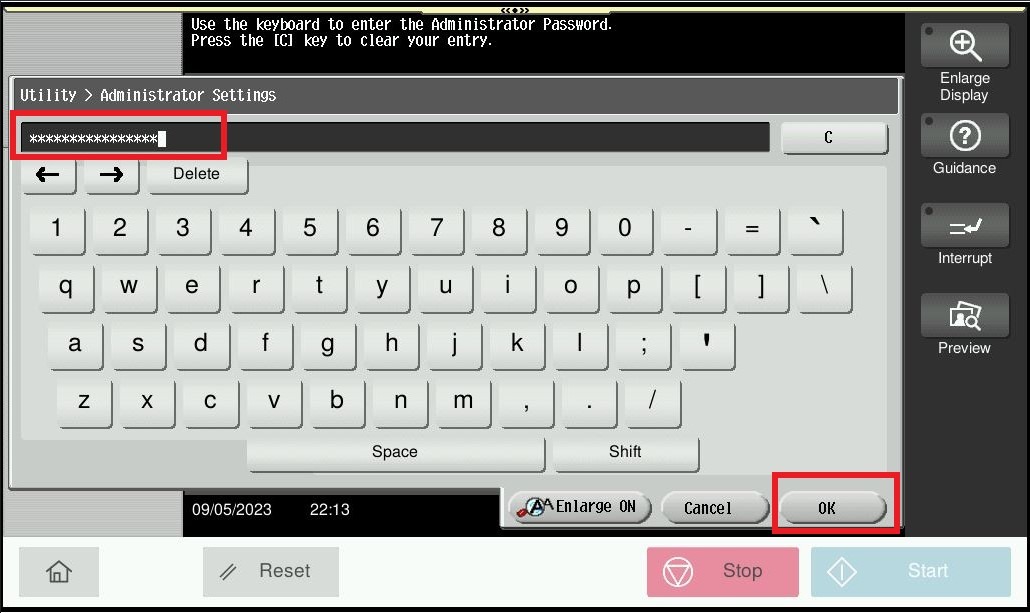
STEP 3 – Key in the default administrator password and click [OK] button.
Default administrator password: [7801261178012611] or [1234567812345678] or [12345678] or [12341234].
**If the default administrator password not able to login, kindly refer to the IT for the password.
**On Web Connection page login as admin mode by key in administrator password accordingly. The next step will be same option on below to change default scan file name.
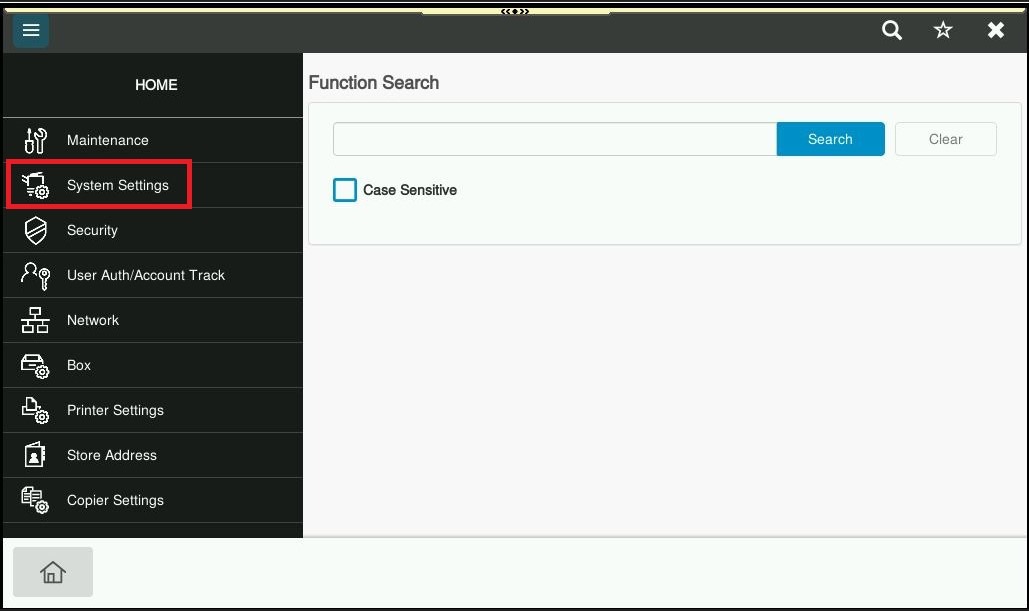
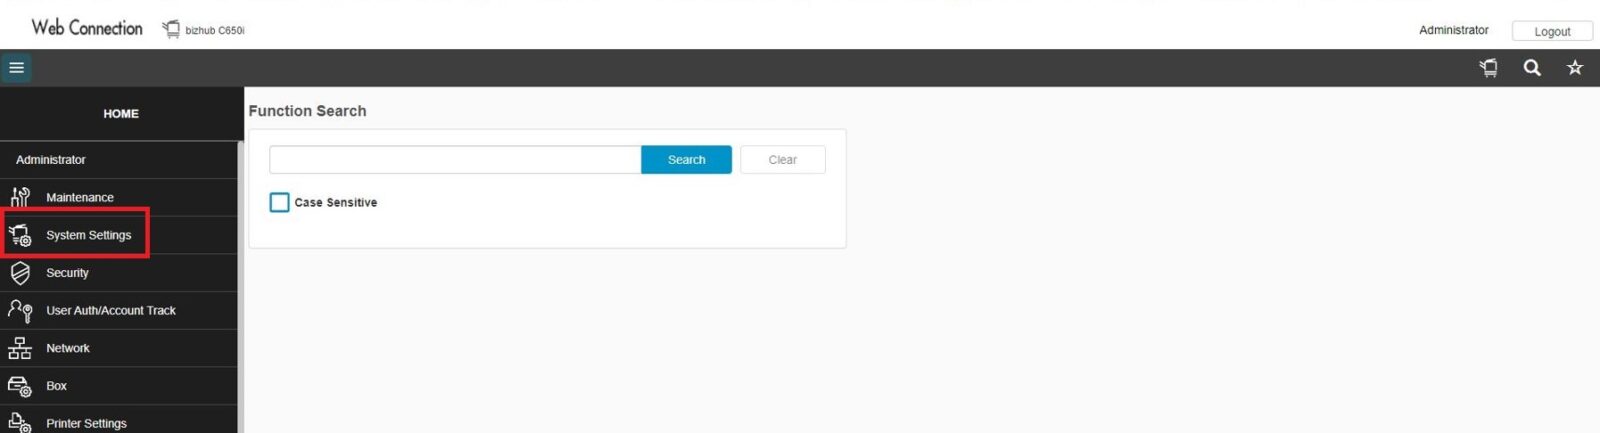
STEP 4 – Select [System Settings].
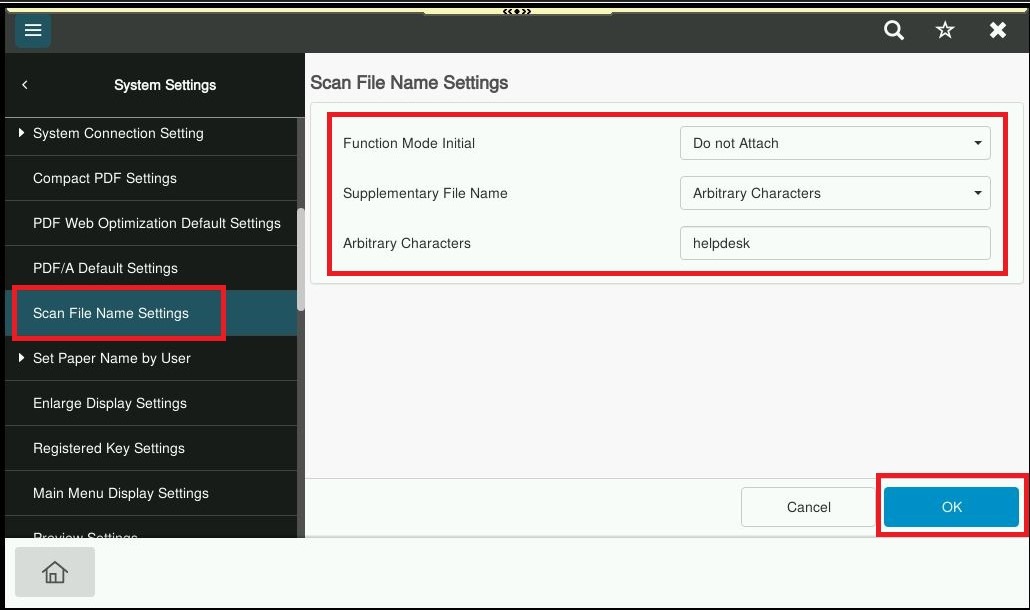
STEP 5 – Choose [Scan File Name Settings], edit the several options below. Then click [OK] to save the setting. Kindly refer to Table A & Table B for explanation and example.
- [Function Mode Name]: Select [Do not attach] if don’t want to specific initial name to be display.
- [Supplementary File Name]: Select [Arbitrary Characters] if use any desired text for the file name using up to 10 characters.
- [Arbitrary Characters]: Key in the desired text for the file name using up to 10 characters.

| Display Settings | Description |
| Function Mode Initial | Select whether want to use an initial of the relevant function as prefix. S: Scan/Fax or User box [Attach] is specific by default. If don’t want to specific initial name to be display, kindly select [Not Attach]. |
| Supplementary File Name | Select whether to add a device name or desired text to the file name. The name of this machine can be found by login to administrator mode then [System Settings] – [Machine Setting] – [Device Name]. – [Device Name]: Use the machine name for the file name. – [Arbitrary Characters]: Use any desired text for the file name up to 10 characters. |
Table A: Explanation of the Function Mode Initial and Supplementary File Name function.
| Function Mode Initial | Description | Example Output |
| [Attach] | [Device Name] | SKM_C368XXXXXXXXXX |
| [Attach] | [Arbitrary Characters] (Using own desired characters Helpdesk as example) | SHelpdeskXXXXXXXXXXX |
| [Not Attach] | [Device Name] | KM_C368XXXXXXXXXXX |
| [Not Attach] | [Arbitrary Characters] (Using own desired characters Helpdesk as example) | HelpdeskXXXXXXXXXXX |
Table B: Example combination of the Function Mode Initial and Supplementary File Name function.