

Guide on how to Key-in the User Authentication or Account Track details on the Printer Driver for MAC OS.
User Authentication Password On Printer Driver for MAC OS
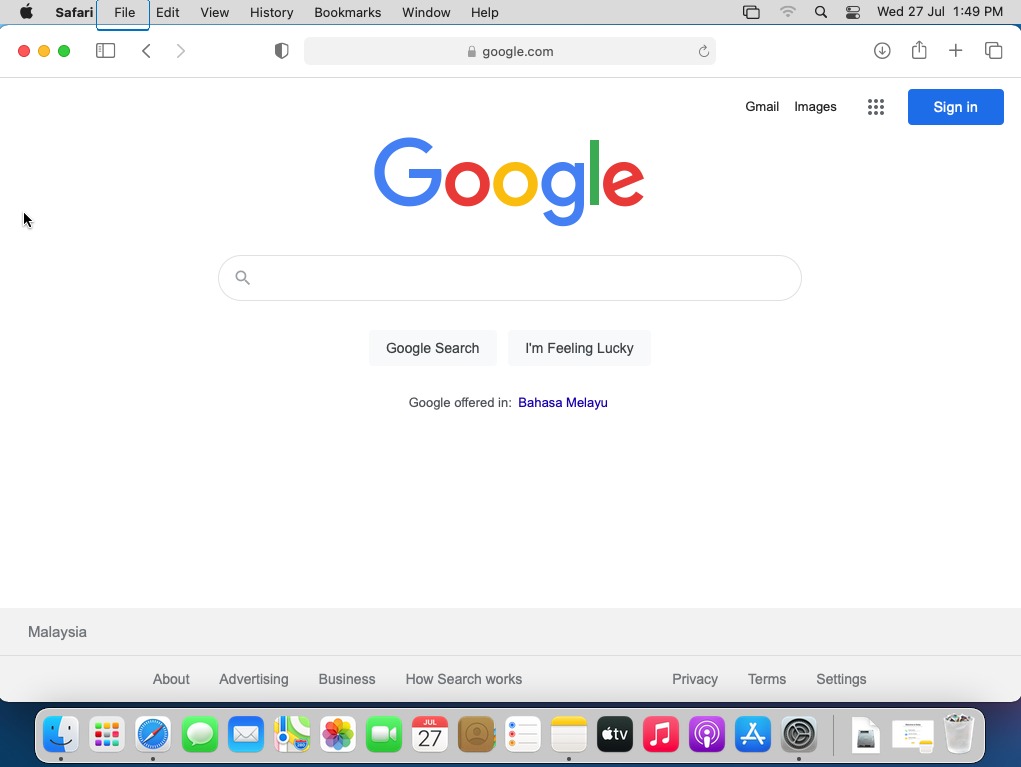
STEP 1 – Open Chrome or any 3rd party software document (Word, Excel, Adobe Reader, etc), and go to File menu.
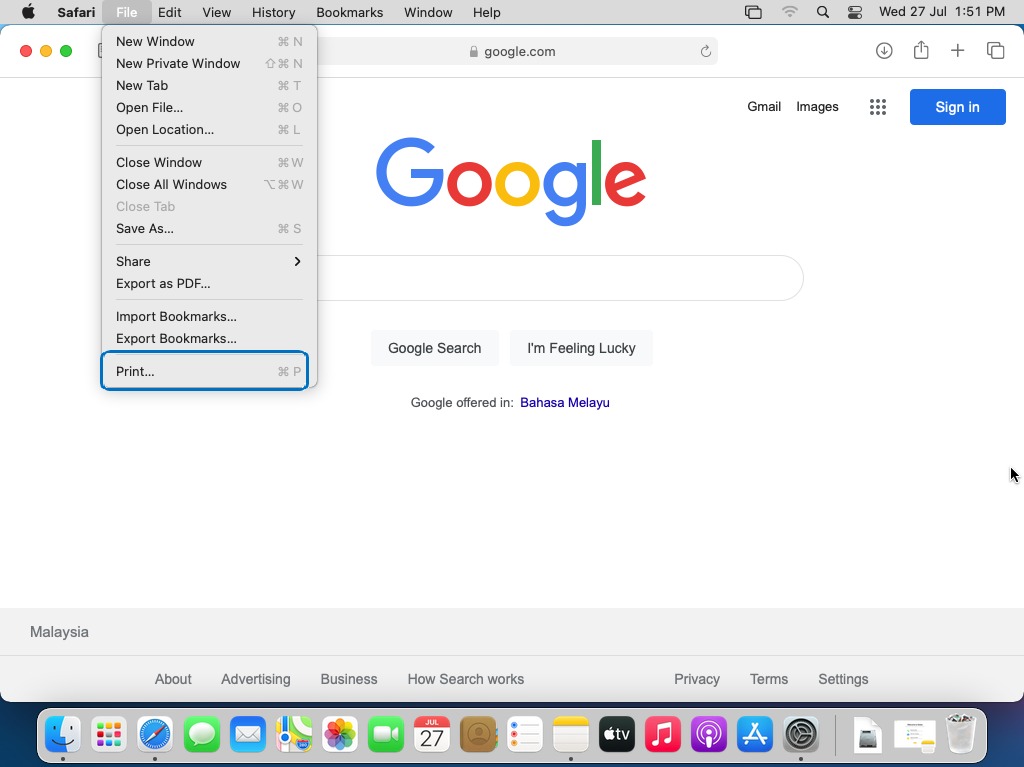
STEP 2– Select Print.
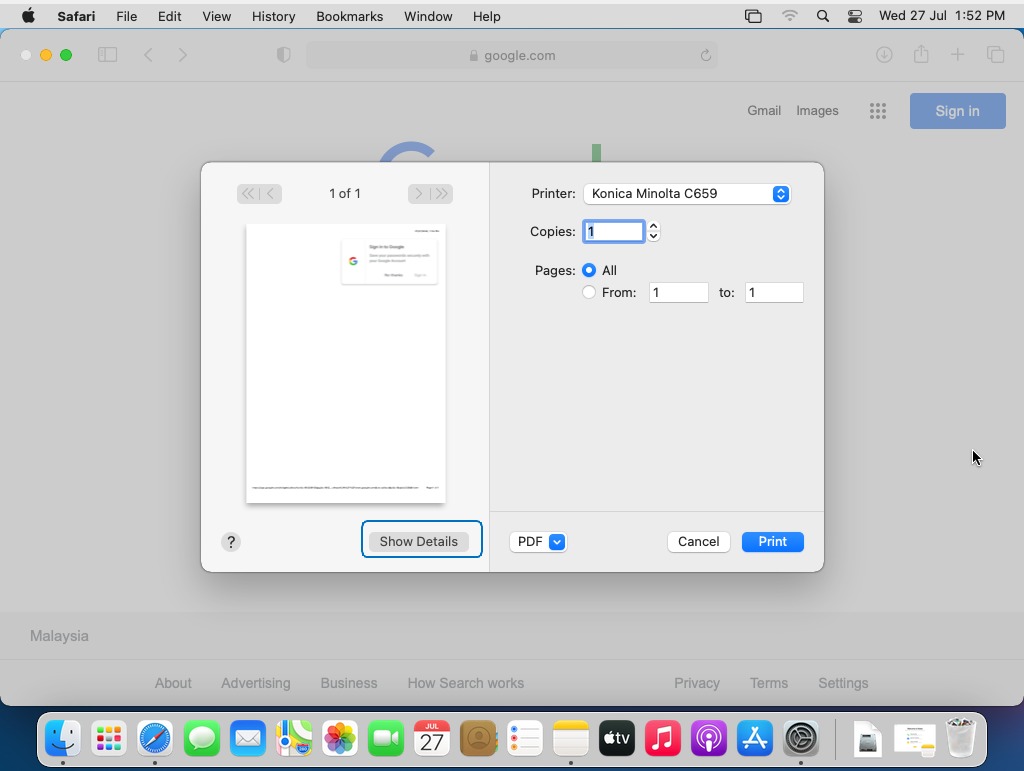
STEP 3 – Click on “Show Details”. to show the complete printer details. If printer details is already showed, proceed to Step 4.
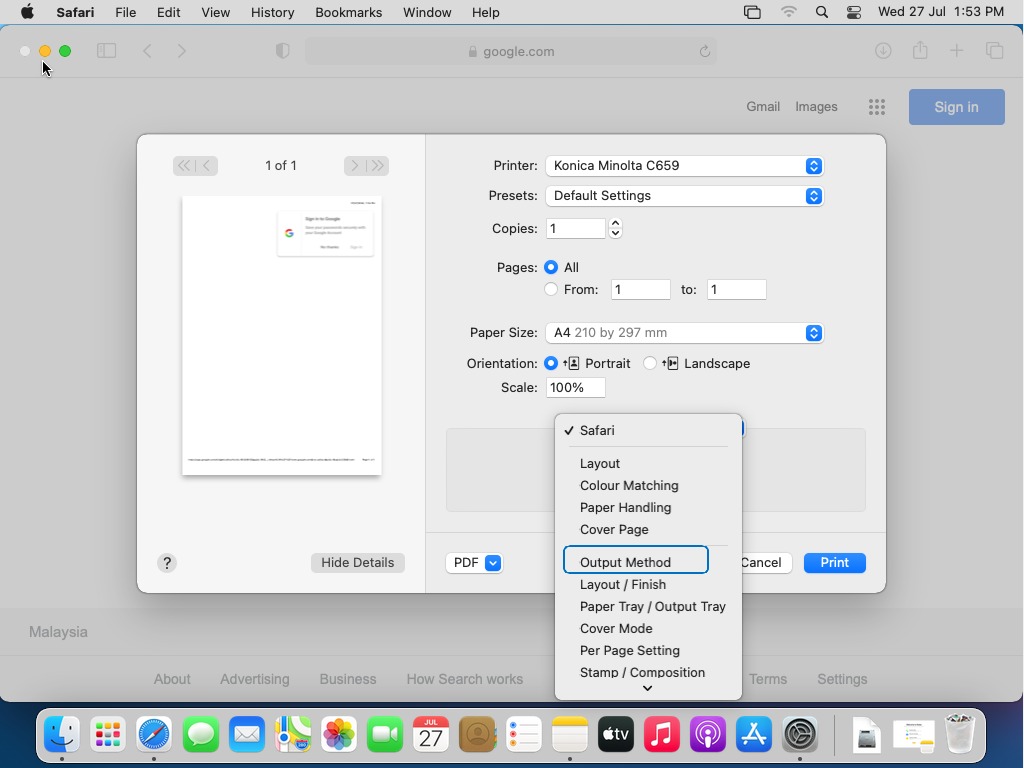
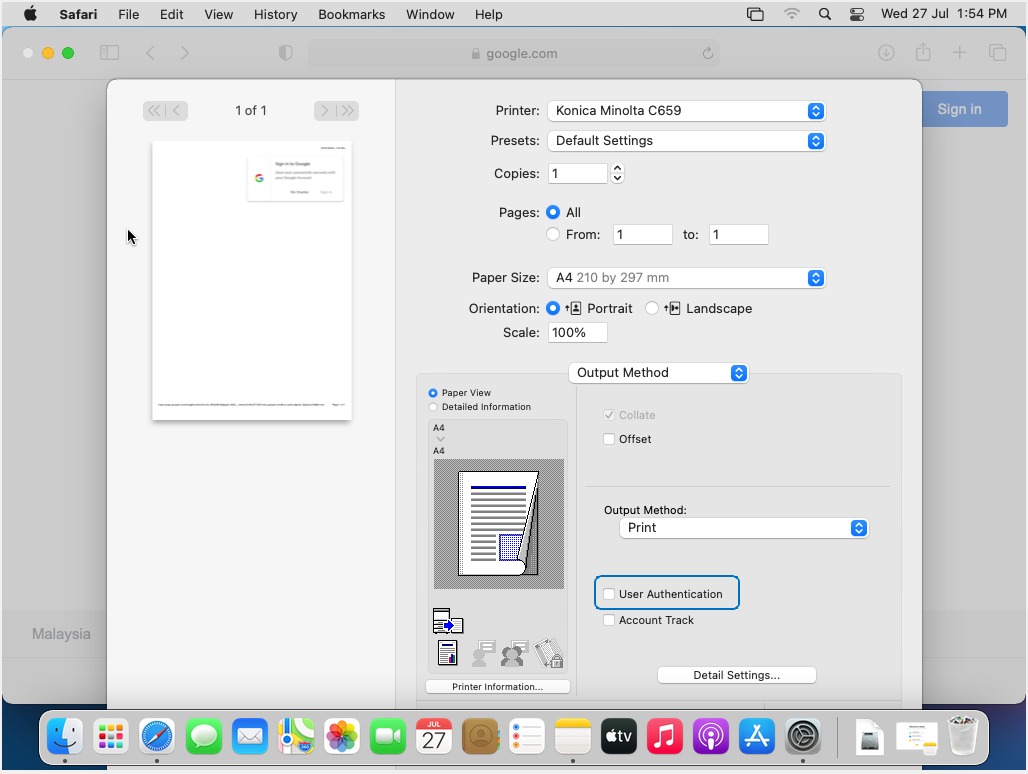
STEP 4 – Select Output Method.
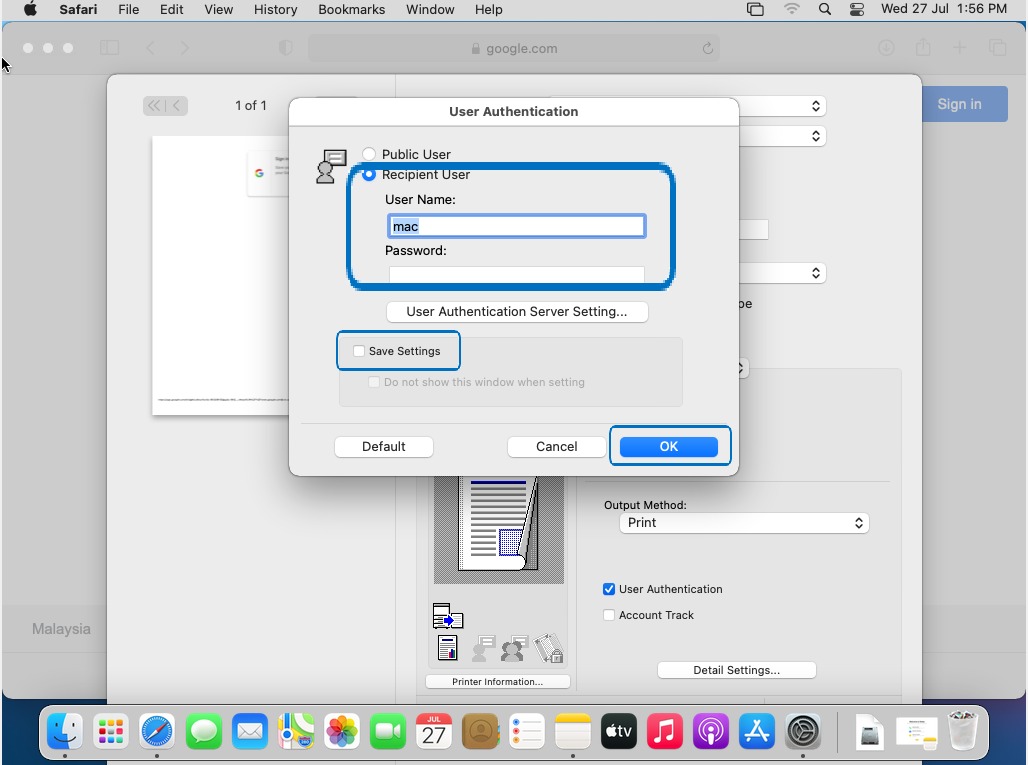
STEP 5 – Tick the User Authentication and select either Public User or Recipient User then enter the username / password for the printer, tick save setting to save the setting for User authentication.

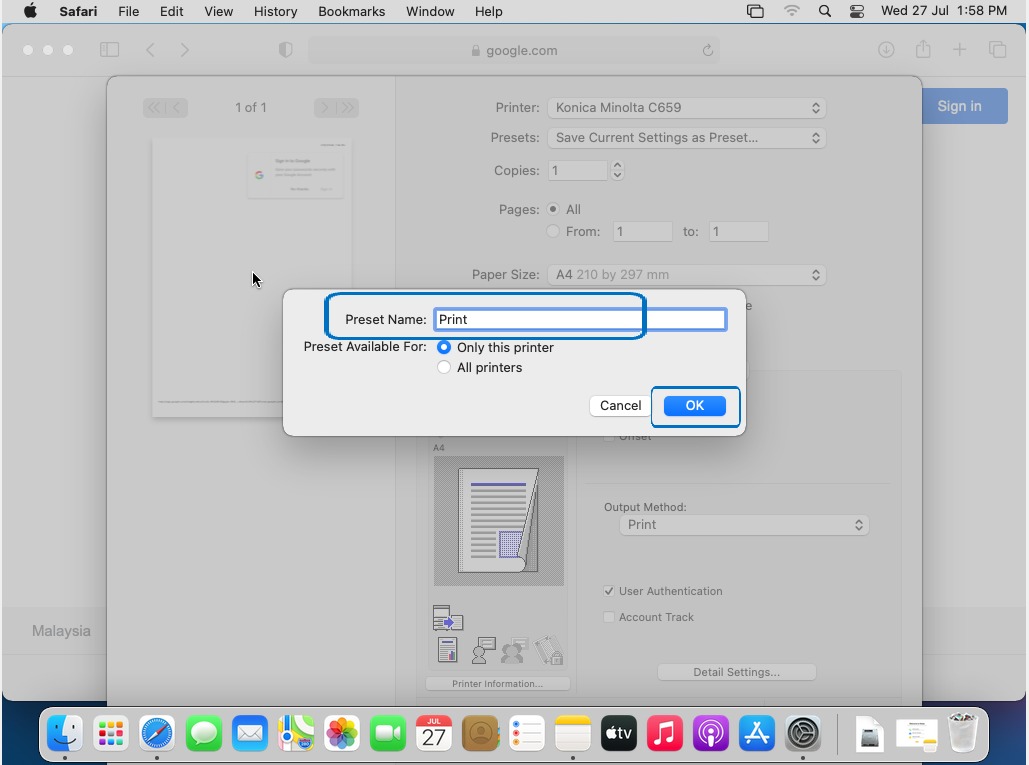
STEP 6 – Once click ok, proceed to the Preset Option to save the settings, select Save Current Settings as Preset. Then put a name on it and click OK to print it out.
Account Track Password On Printer Driver for MAC OS
STEP 1 – Open Chrome or any 3rd party software document (Word, Excel, Adobe Reader, etc), and go to File menu.
STEP 2 – Select Print.
STEP 3 – Click on “Show Details”. to show the complete printer details. If printer details is already showed, proceed to Step 4.
STEP 4 – Select Output Method.
STEP 5 – Tick Account Track and key in Account Track password, tick save setting and ok to save the setting for Account Track.
STEP 6 – Once click ok, proceed to the Preset Option to save the settings, select Save Current Settings as Preset. Then put a name on it and click OK to print it out.