

Guide on how to displaying the List of Usernames on machine
When user authentication is activated, in order to allows the user to enter a user name for user authentication with a single touch, user can enabled the [User Name List] on the machine so the [User Name List] will displayed on the authentication screen. Kindly follow below guideline for how to on the [User Name List] on Machine.
For the Older Machine series / Non I-Series Machine
STEP 1 – On the machine Control Panel, click [Menu] – [Utility] – [Administrator Settings] – [User Authentication/Account Track] – [User Authentication Setting] – [Administrative Settings].
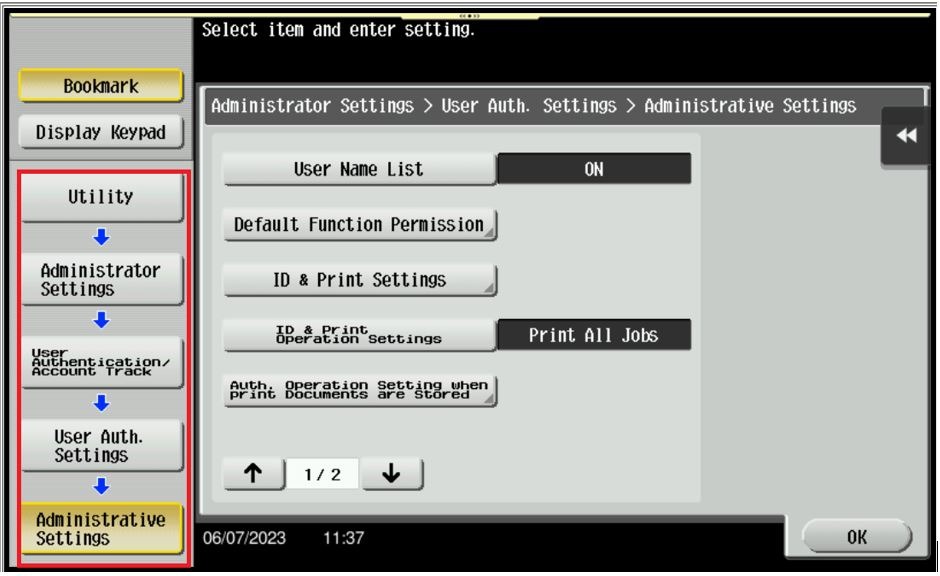
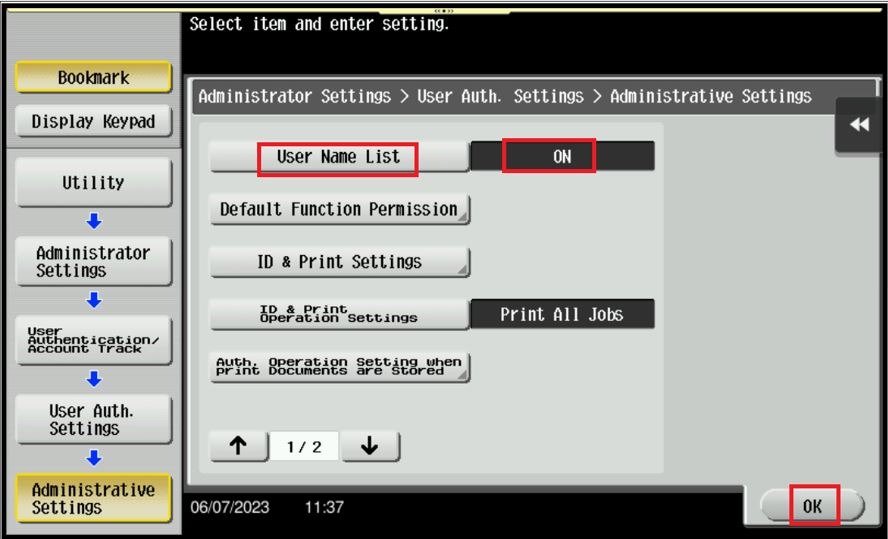
STEP 2 – Click on [User Name List], selecting [ON] enables you to select the login user from the list of user names registered on this machine and press [OK].
[OFF] is specified by default.
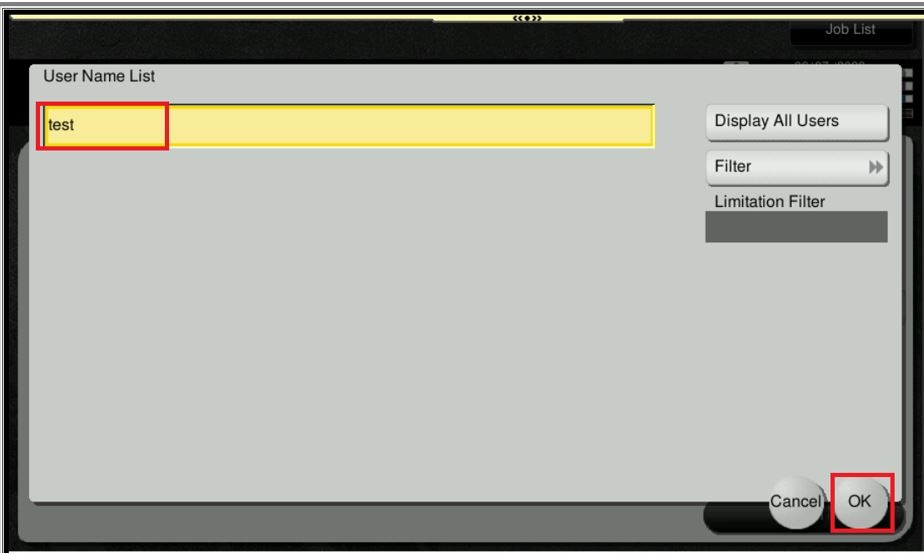
STEP 3 – Select the Icon highlighted in Red.
STEP 4 – Select User Name from the list and press OK.
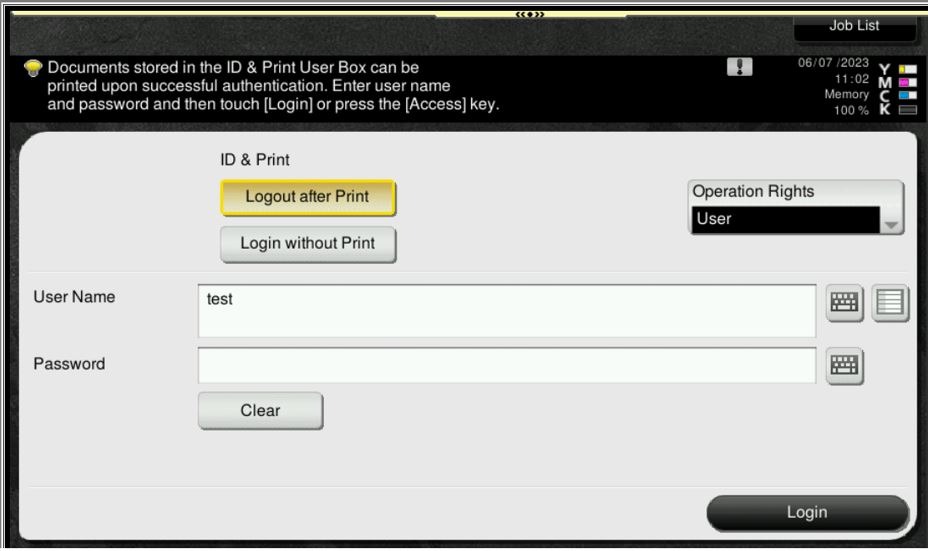
STEP 5 – The User Name will display username that been chosen, lastly Key in the password and select Login.
For the Newer Machine series / I-Series Machine
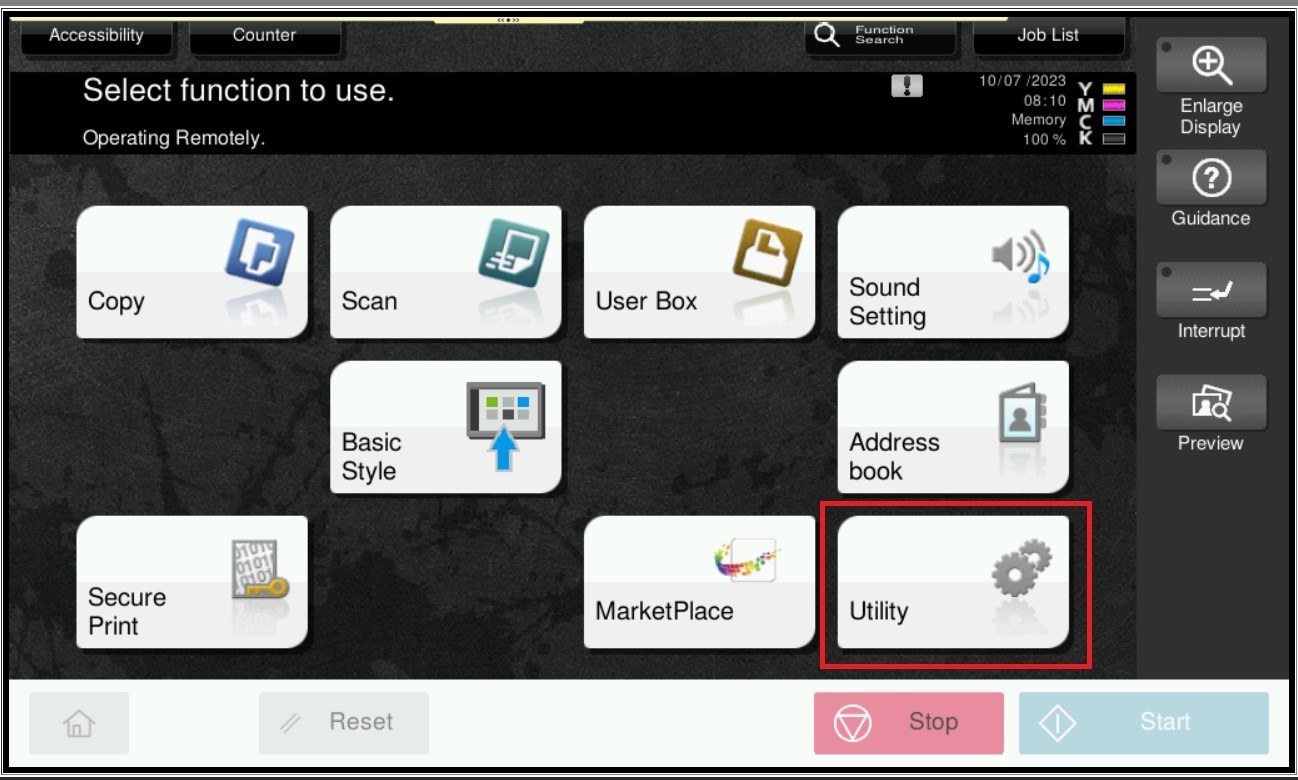
STEP 1 – On the Konica Minolta machine, click on [Home] icon, Select [Utility] from Control Panel.
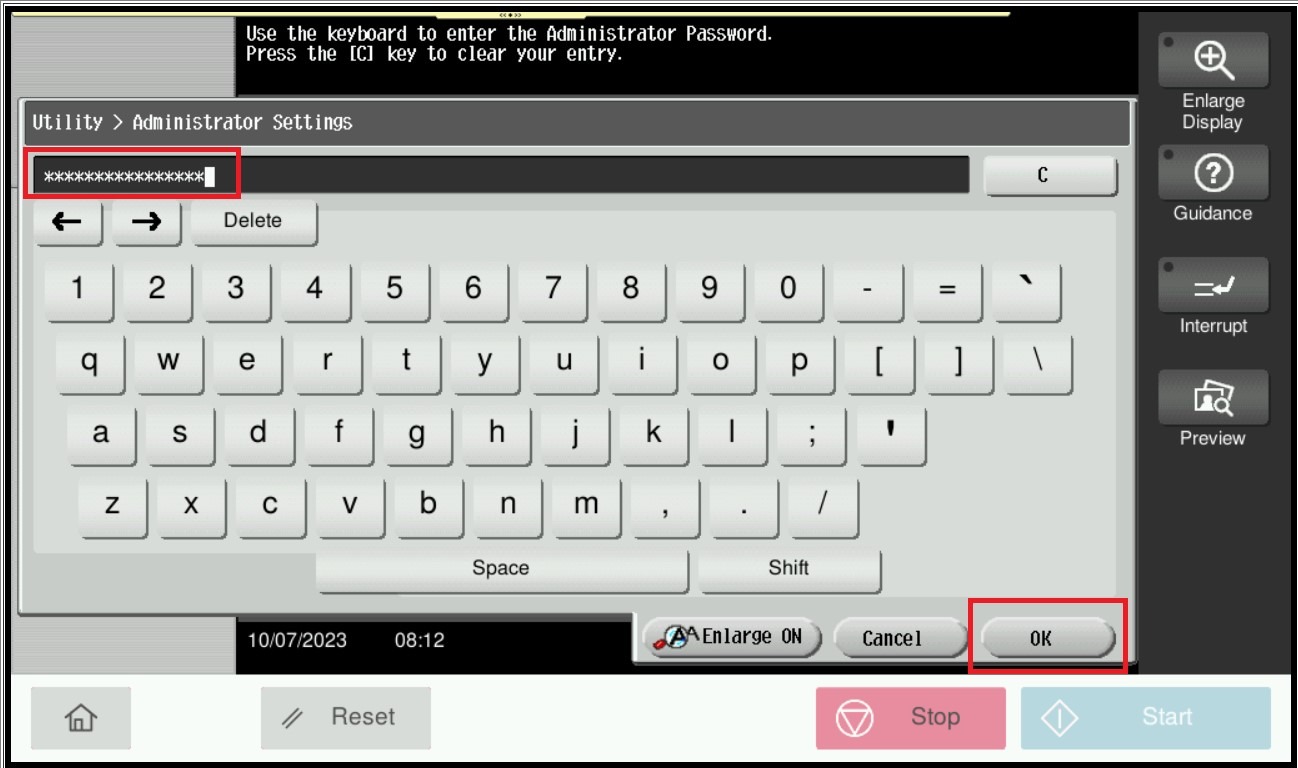
STEP 2 – Select [Administrator Settings], and key in the Administrator password accordingly.
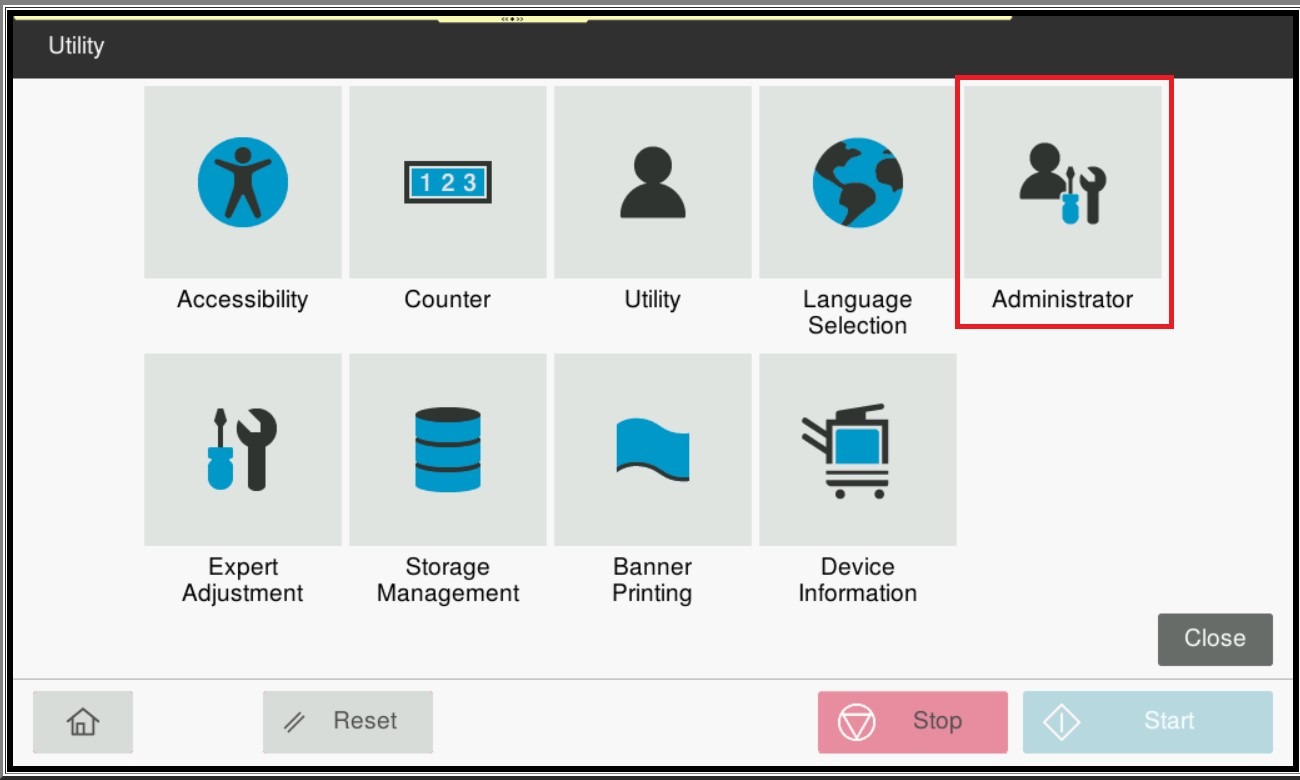
STEP 3 – Select [User Auth/Account Track].

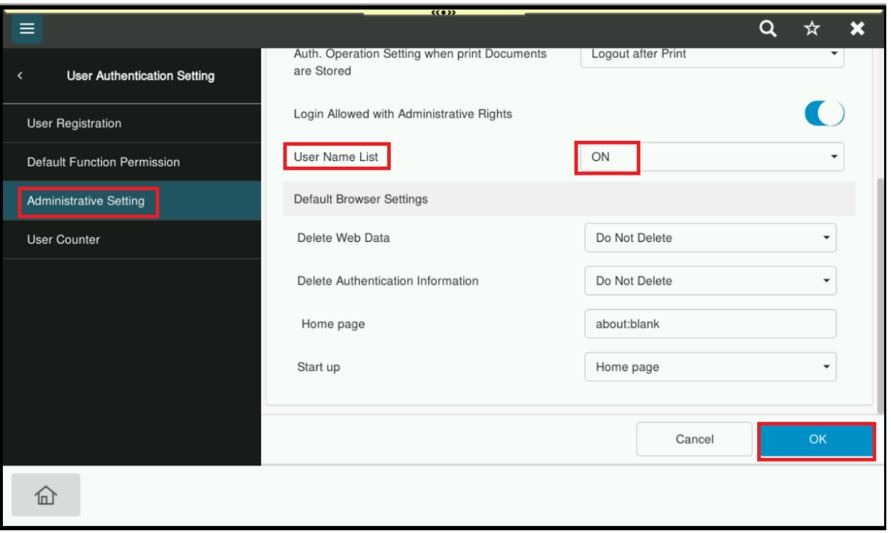
STEP 4 – Select [User Authentication Settings] – [User Name List], Choose [ON] will enables you to select the login user from the list of user names registered on this machine and press [OK].
[OFF] is specified by default.
STEP 5 – Select the icon highlighted in red in the login screen.
STEP 6 – Select the icon highlighted in red in the login screen.
STEP 7 – The User Name will display username that been chosen, lastly Key in the password and select Login.