Guide On How To Enable TeamViewer Permission For Mac
For The Newest MacOS
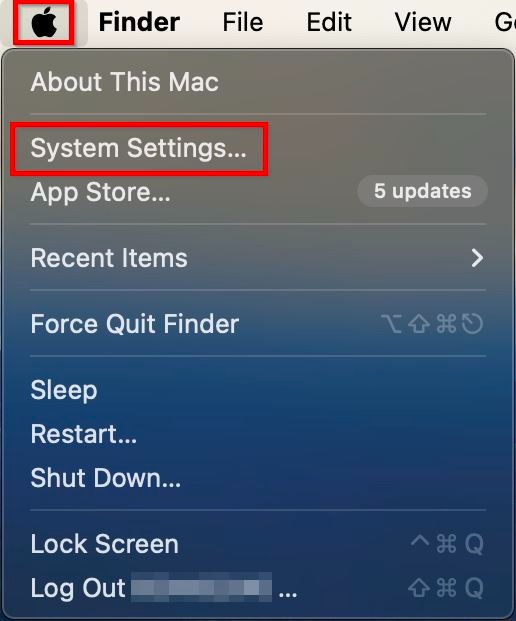
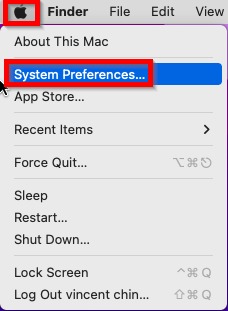
STEP 1 – On the top right corner click on the [Apple] icon and select the [System Settings].
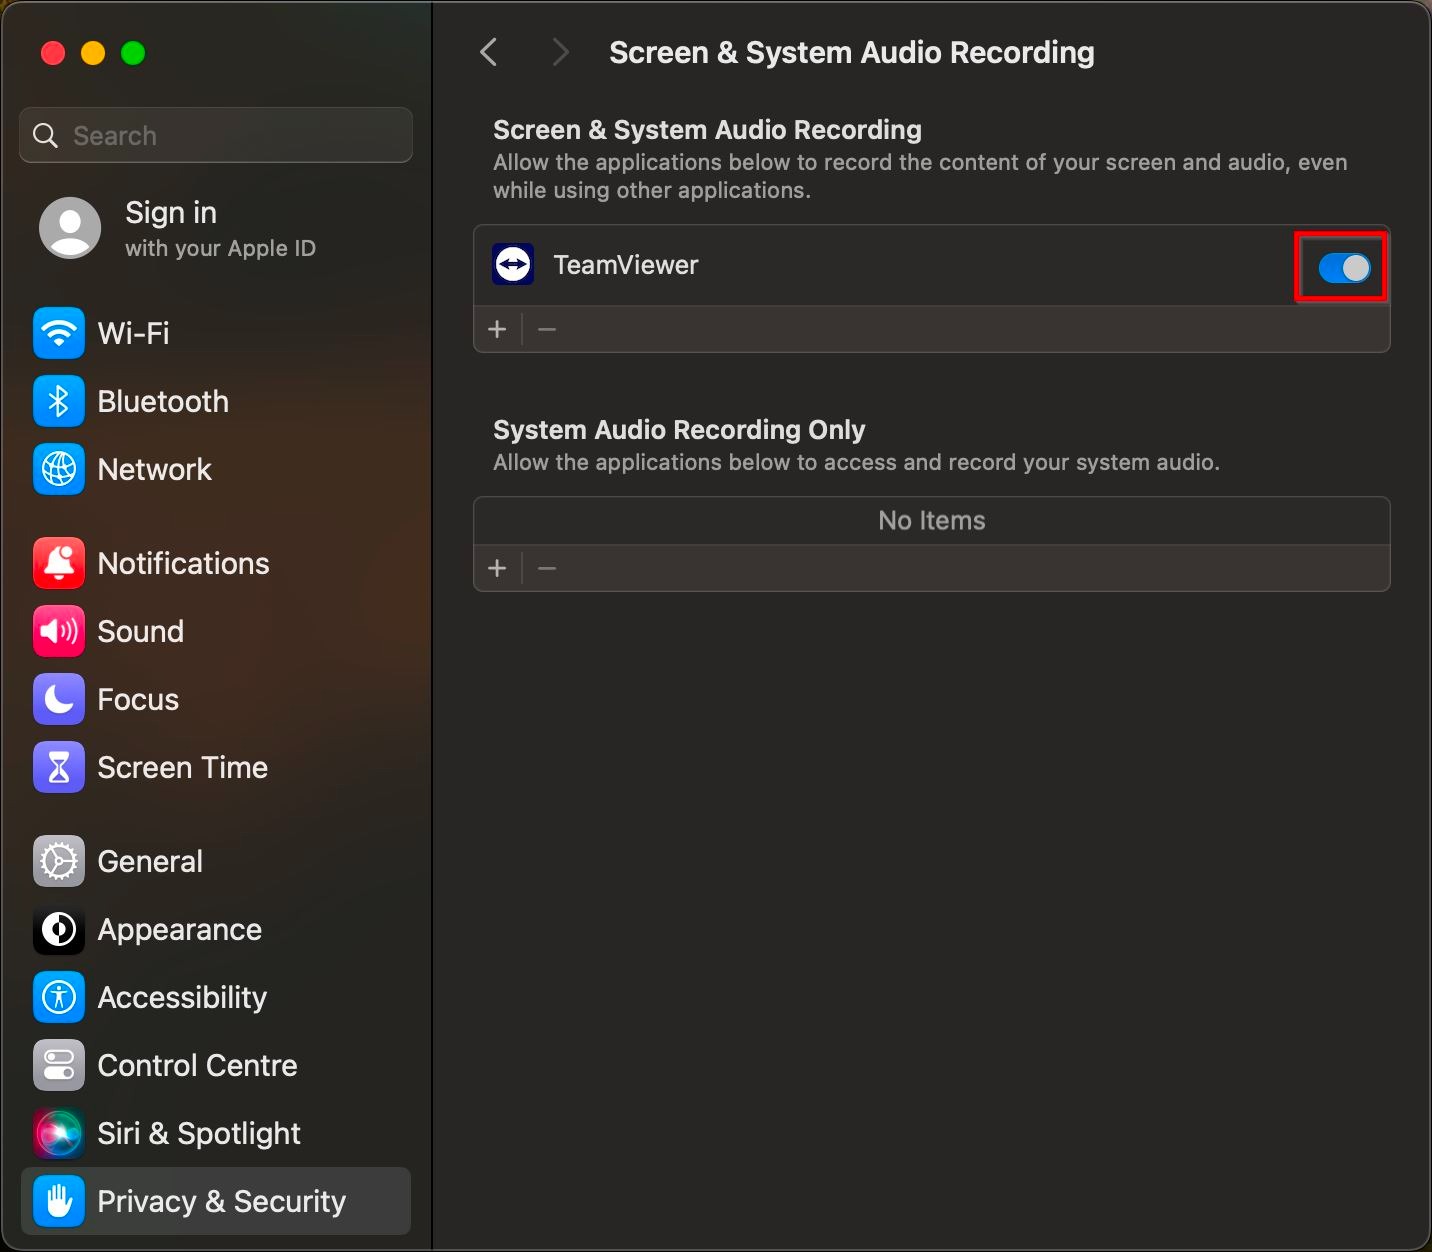
STEP 2 – Click on [Privacy & Security] and check is the TeamViewer is enable in the [Full Disk Access], [Accessibility] and [Screen & System Audio Recording].

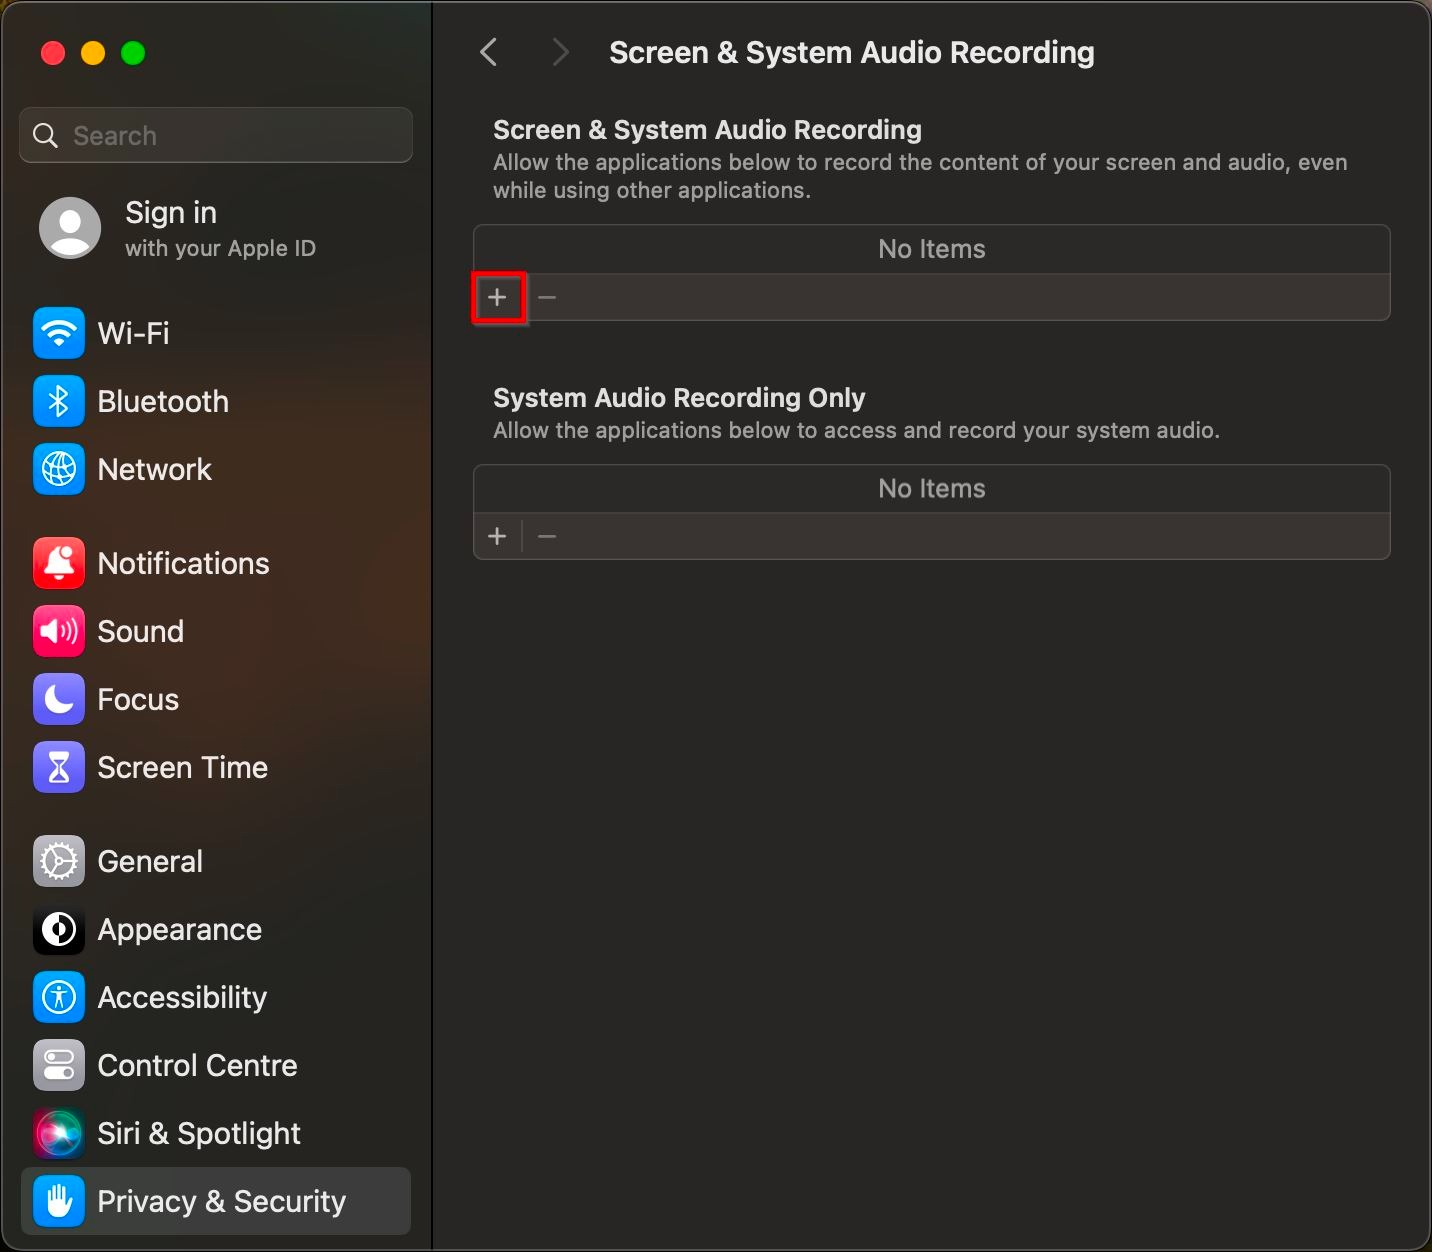
STEP 3 – Check if the TeamViewer application is enabled in the list, if not then move the slider to the [Right] or use the [+ Icon] to add the TeamViewer (if not in the list).
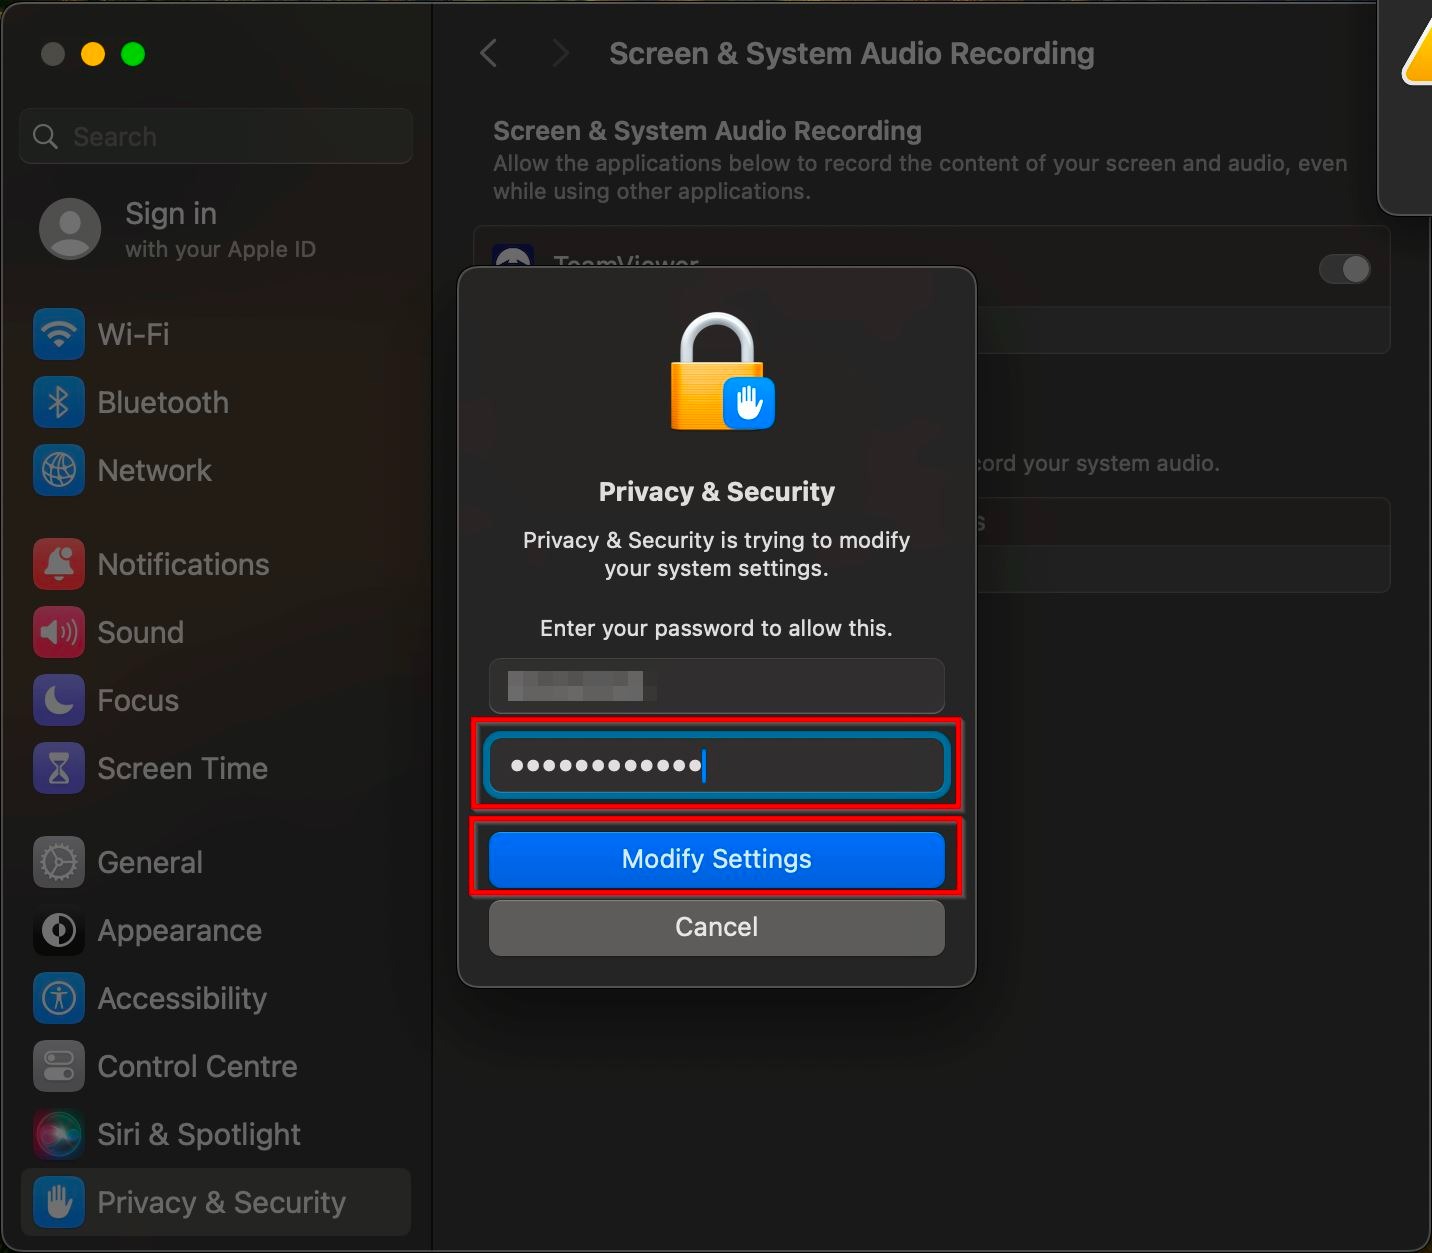
STEP 4 – Key in the [PC Password] and click on the [Modify Settings].
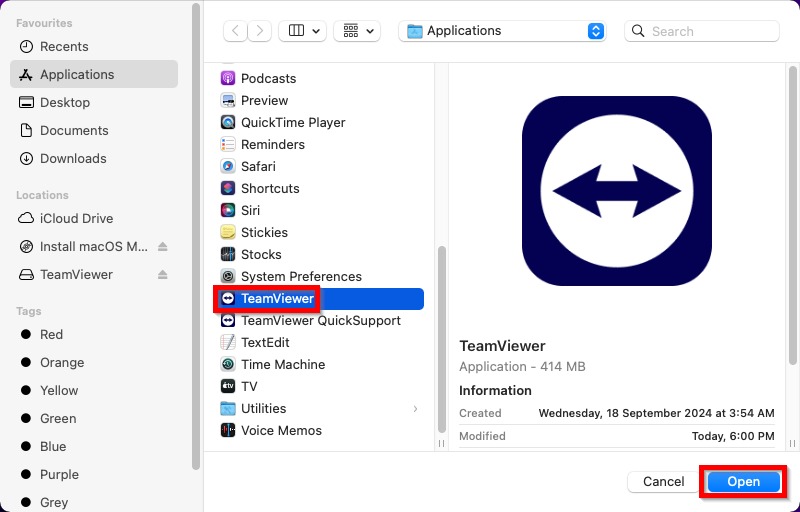
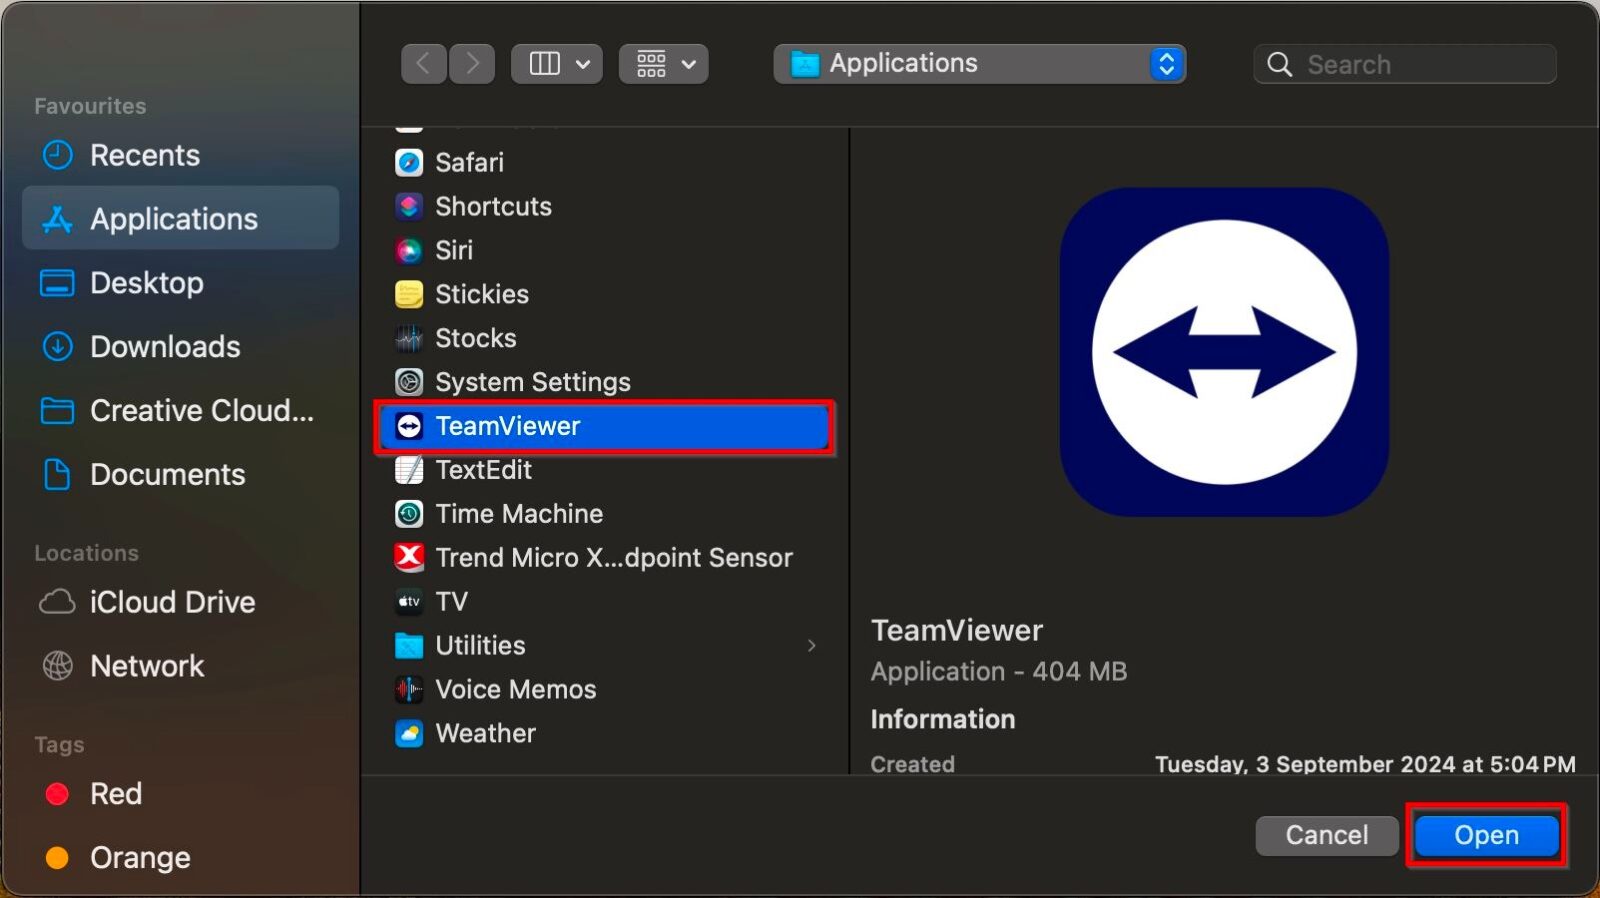
STEP 5 – Scroll down and click on the [TeamViewer] and click [Open].
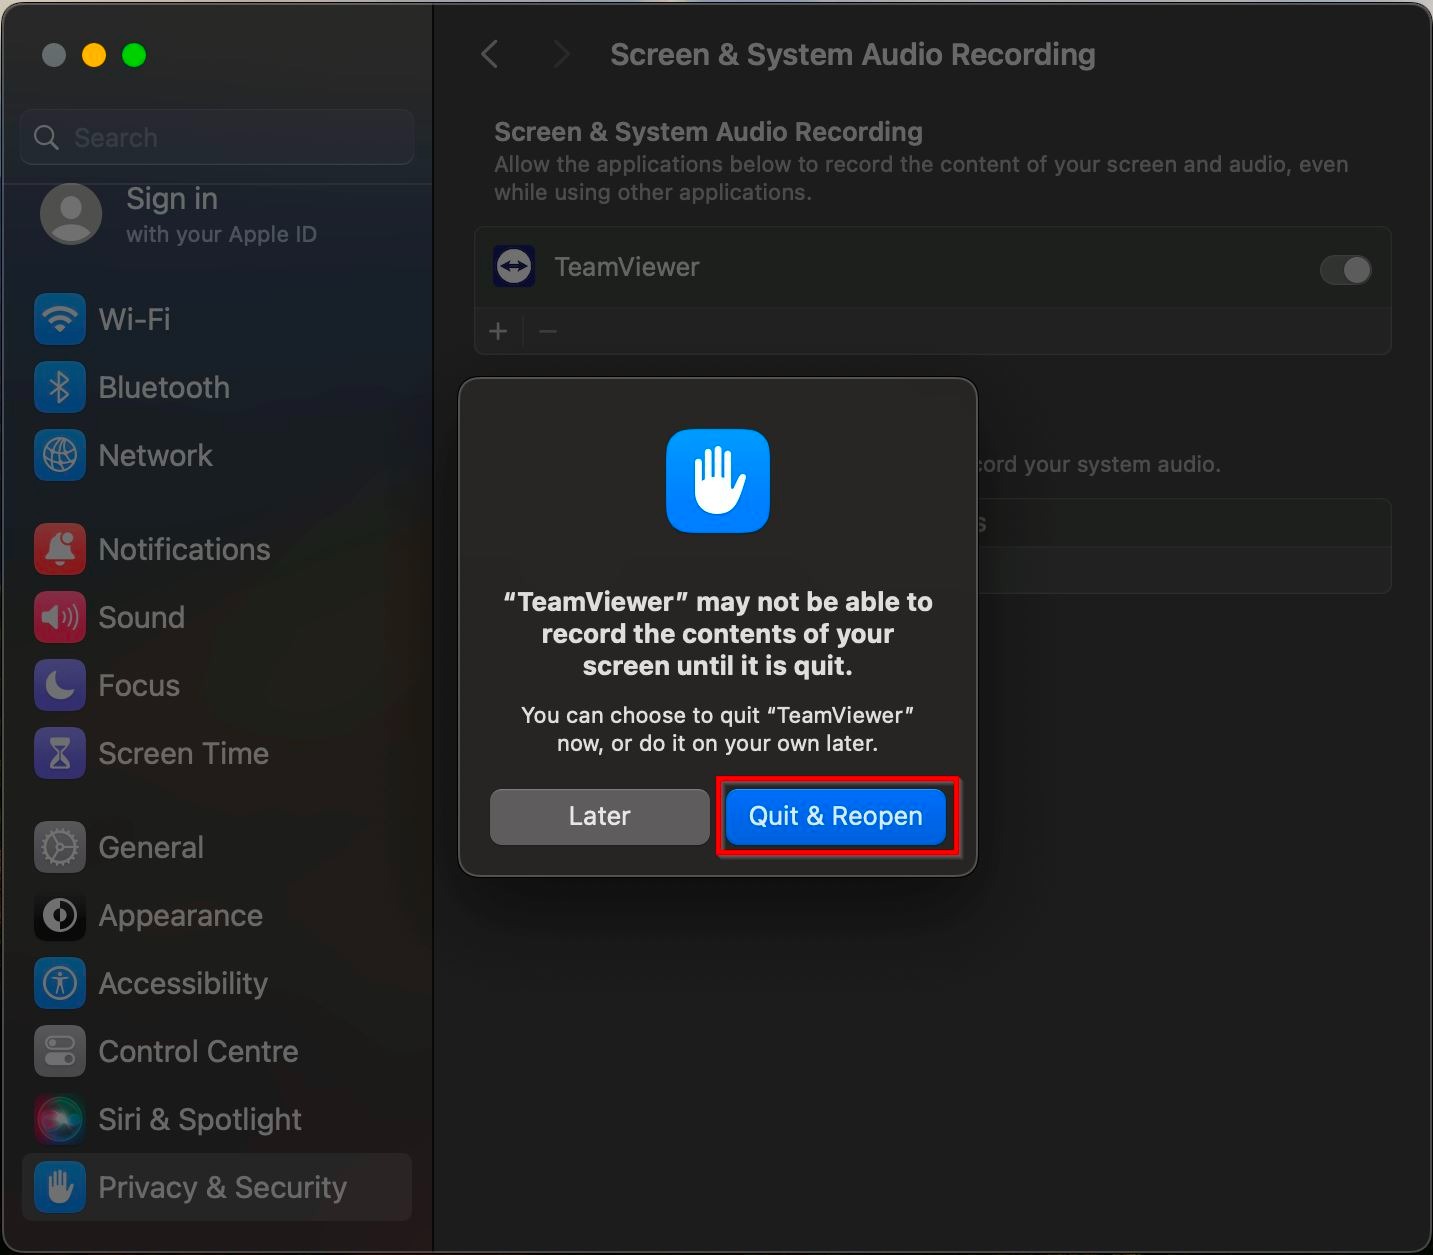
STEP 6 – Click on [Quit & Reopen] and now the Mac will be able to access by using TeamViewer.
**(Repeat steps 3 – 5 if the TeamViewer is not enable in Full Disk Access and Accessibility)
For The Oldest MacOS
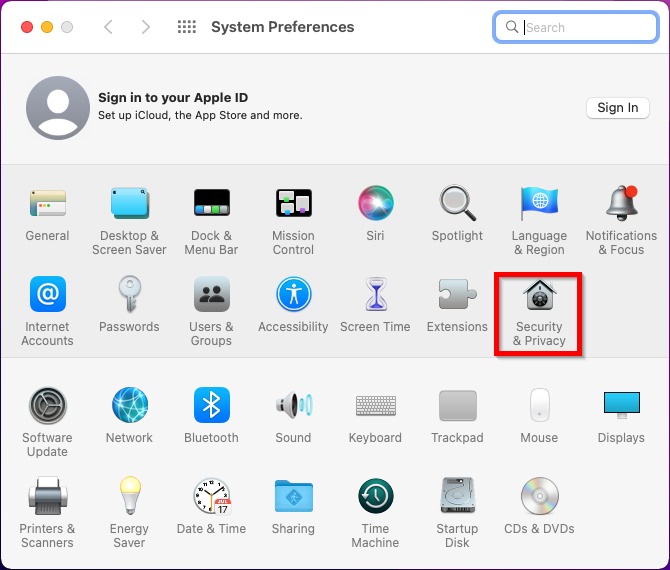
Step 1 – On the top right corner click on the [Apple] icon and select [System Preferences].
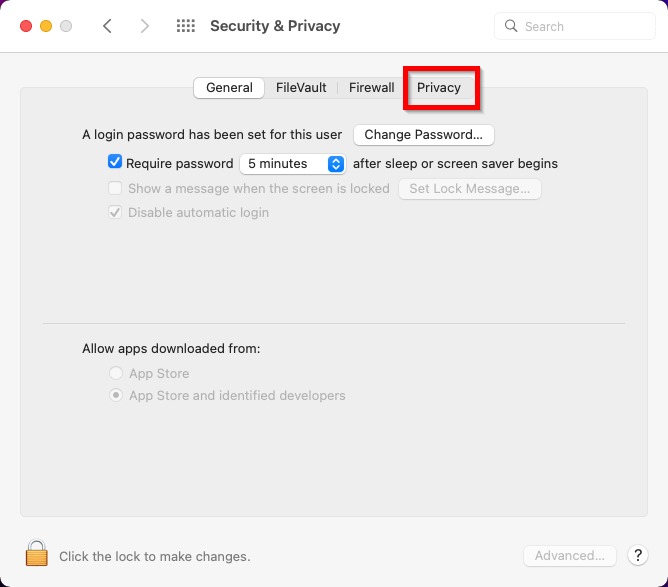
Step 2 – Click on the [Security & Privacy] – [Privacy].
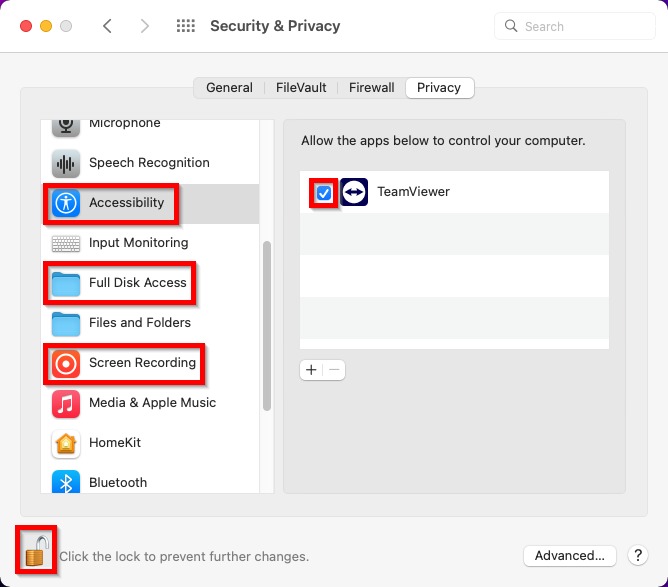
Step 3 – Check if the Teamviewer is enable in the [Accessibility], [Full Disk Access] and [Screen Recording], if not then [Tick] on the Teamviewer to enable. (If the tick button is gray out, click on the [Lock] icon to unlock)
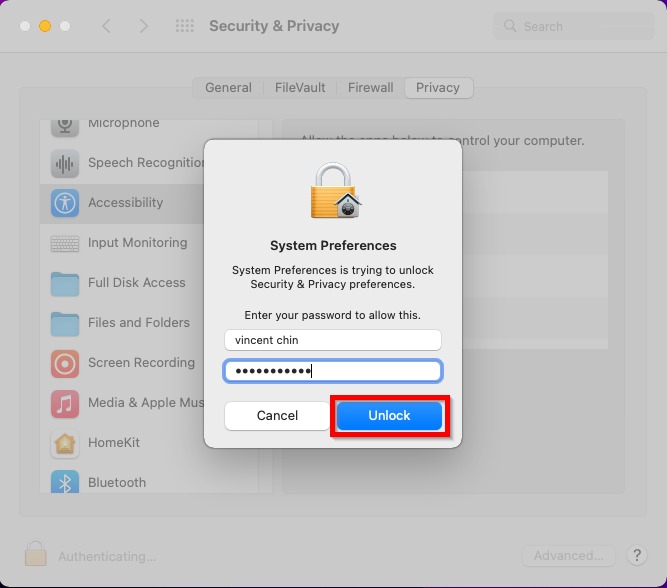
Step 4 – Click on the [Lock] icon – key in the PC password and click on the [Unlock]. (If not in the list)
Step 5 – Use the + icon to add the TeamViewer (If not in the list).
Step 6 – Scroll down and click on the [Teamviewer] and click on [Open].